In this article, we will try to explain how to setup our Mailchimp Pro addon within Contact Form 7.
What’s needed #
- Ensure that both Contact Form 7 and Ultimate Addons for Contact Form 7 are installed on your WordPress site.
- Download & Install Ultimate Addons for Contact Form 7 Pro from our Client Portal.
- Activate your license key.
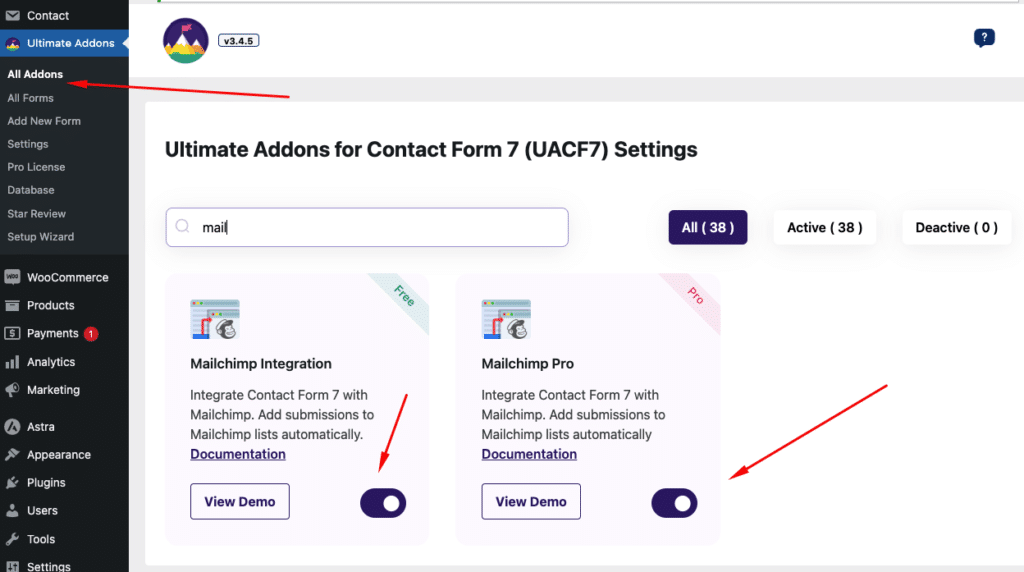
- Go to Ultimate Addons menu in your WordPress Dashboard and enable both Mailchimp & Mailchimp Pro Checkboxes.

Follow Mailchimp Addon’s Free version setup guide #
Before diving into the pro features, make sure you’ve set up the free version of our Mailchimp addon by following the setup guide.
Add the Mailchimp Acceptance Checkbox #
Now, for the pro version’s feature: To comply with privacy regulations, you’ll need to add an acceptance checkbox so users can opt-in to your Mailchimp list.
Here’s how:
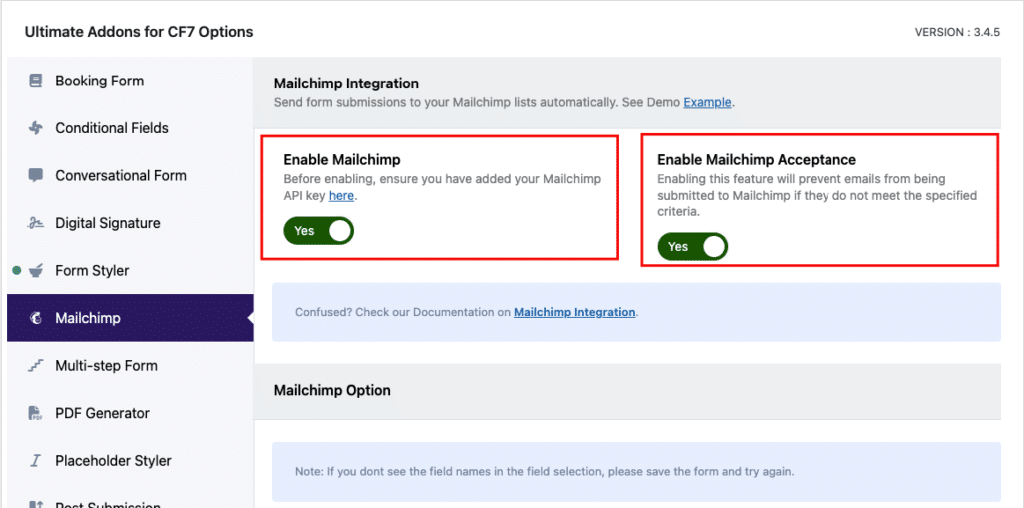
- Scroll down to the Ultimate Addons for CF7 Options section.
- Click on the Mailchimp tab.
- Toggle Enable Mailchimp Acceptance.

That’s it! Our pro addon will handle the rest, ensuring compliance and seamless integration with Mailchimp. Once enabled, your form submissions will automatically sync with Mailchimp when users check the acceptance checkbox, streamlining your lead collection process.
Still Not Clear? Please contact us. Open a ticket from here.
