In this article, we will try to explain how to set up Contact Form 7 Range Slider with the help of our Free Addon “Contact Form 7 Range Field”.
Watch Complete Video #
If you are still confused, we suggest you watch this video. In this video, we tried to describe the whole step of How to create a form with Range Slider Field with Contact Form 7:
What’s needed #
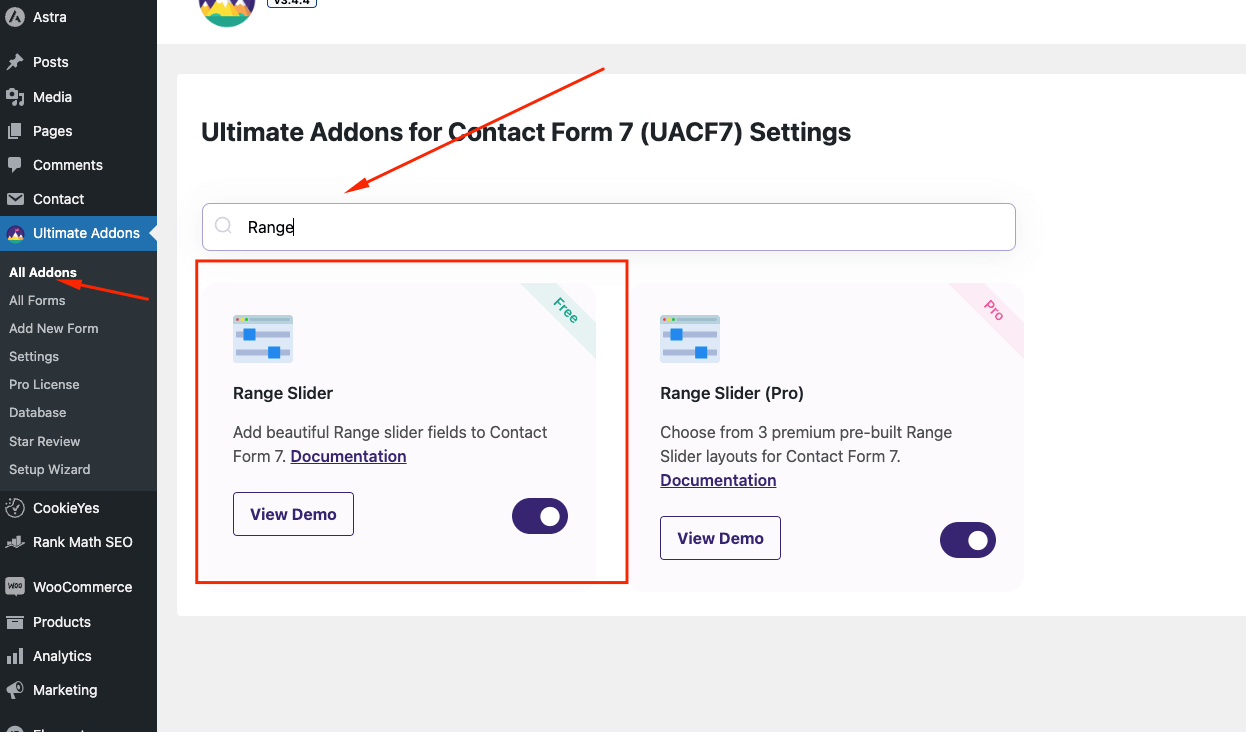
- Ensure that both Contact Form 7 and Ultra Addons for Contact Form 7 are installed on your WordPress site.
- Go to Ultra Addons in your WordPress Dashboard, and enable the Range Slider checkbox/toggle.
What is Range Slider for Contact Form 7? #
The Range Slider for Contact Form 7 is an addon that allows you to add an interactive slider field to your contact forms. This field lets users select a numeric value or a range of values by sliding a handle across a bar. It’s ideal for fields like “budget,” “age range,” or any input that requires a value within a specified range. You can customize various aspects of the slider, including minimum and maximum values, default values, and visual styles like color, handle size, and shape.
Range Slider for Contact Form 7 – Live Example #
In this tutorial, we’ll guide you through creating a range slider for Contact Form 7, similar to the example below.
Check out our main demo to see all the supported fields for the Contact form 7 range field.
Creating a Contact Form 7 Range Slider #
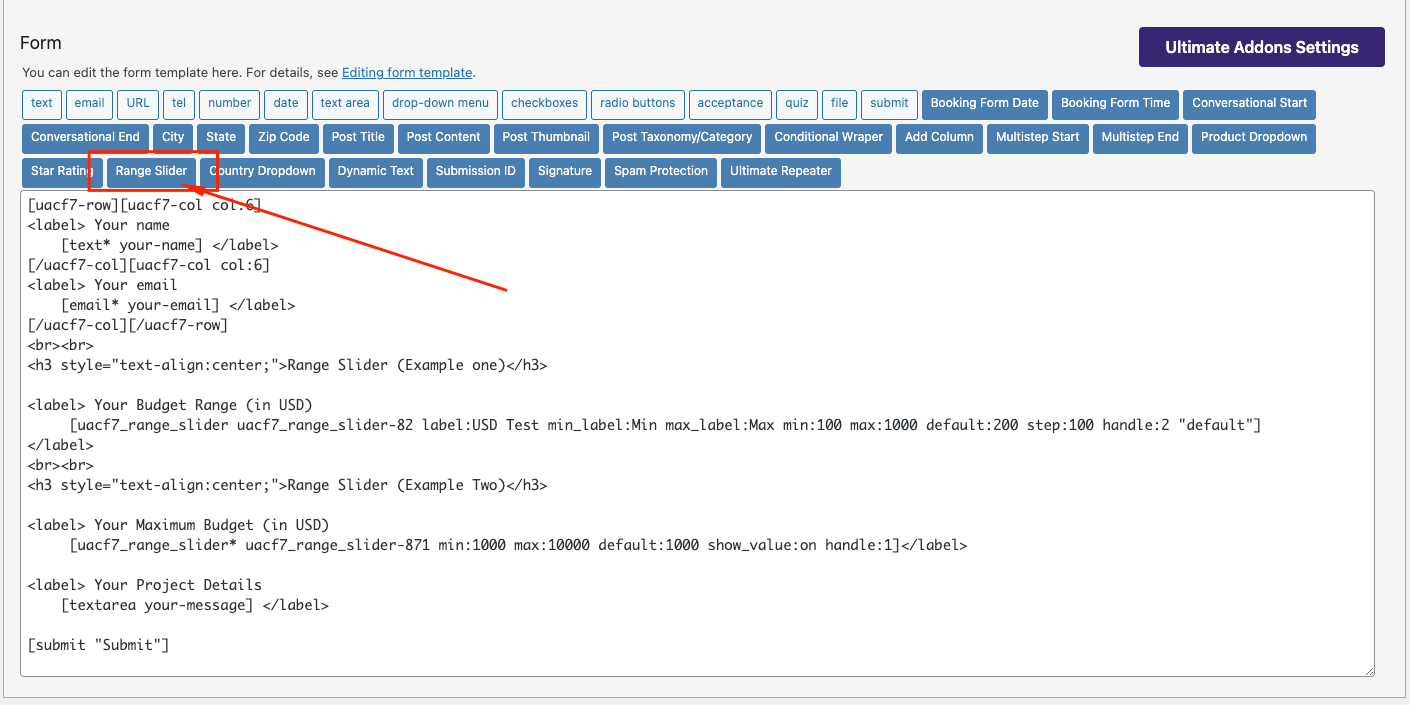
From the Admin Screen, go to Contact -> Add New to open a new Contact Form on your Admin screen. Add a title to your new Contact Form (e.g., “Range Slider”).
Adding Range Slider Tag #
Inside the Form Tag Generator option, look for the Range Slider tag.
Open Range Slider from the tags. You will find a list of settings that allows you to customize your Range Slider before you place it on your Contact Form.
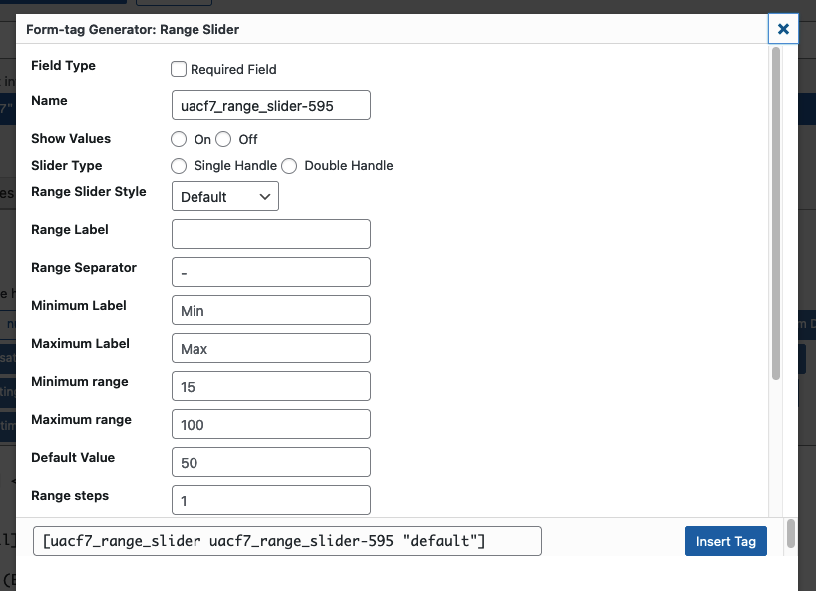
- Field Type: Decide if the Range Slider field should be required.
- Name: Use the auto-generated name or enter a custom name for the tag.
- Show Values: Displays the slider’s specific values.
- Minimum Range: Set a minimum range value.
- Maximum Range: Set a maximum range value.
- Default Value: Set an initial value for the slider when users visit your site.
- Slider Type:
- Single Handle: One button to show a single value.
- Double Handle: Two buttons to display a range of values.

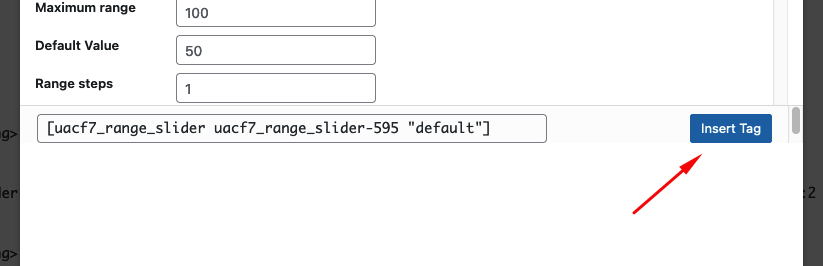
After you have finished customizing your range slider in the Contact Form. Copy the Tag or Click Insert Tag. It will place the Tag inside the Admin Panel of your Contact Form.
Add other fields #
Add any additional fields to the form, either above or below the range slider tag as needed.
If your form is ready, click save button.
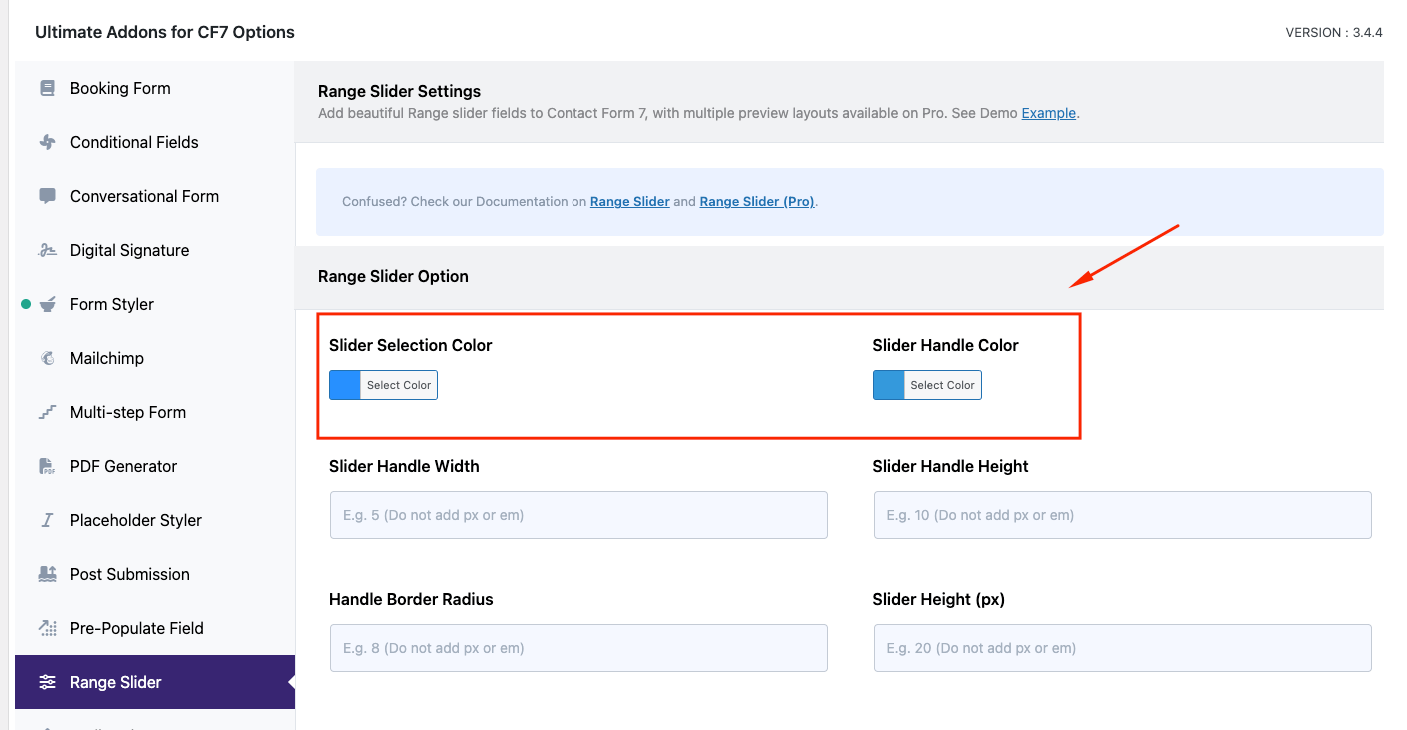
Range Slider Design Settings #
After creating the form, scroll down to the Ultra Addons for CF7 Options section and click the Range Slider tab. You will find a list of design-related settings here (e.g., slider selection color, handle color, handle width, handle height, handle border radius, and slider height). Configure these settings as needed.
Copy the Shortcode #
Once your setup is done, click save and copy the Contact form shortcode.
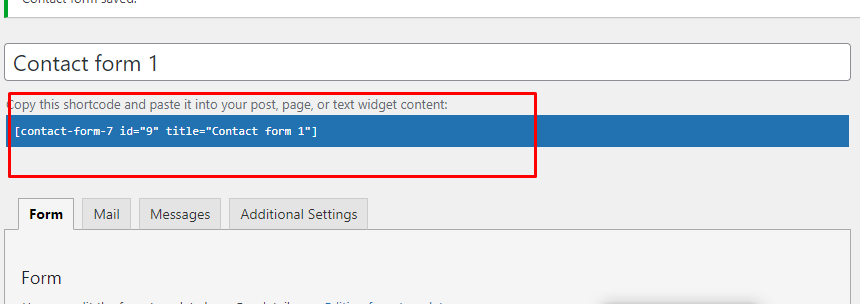
Time to Publish #
Paste the shortcode wherever you want to display the form (Pages, Posts, Custom Post Types, or Sidebars). The result should look like the example form above.
Looking for more Advanced Options? #
With the Range Slider Pro version, you can select from 3 premium pre-built range slider layouts. Here is a live demo example of the form.
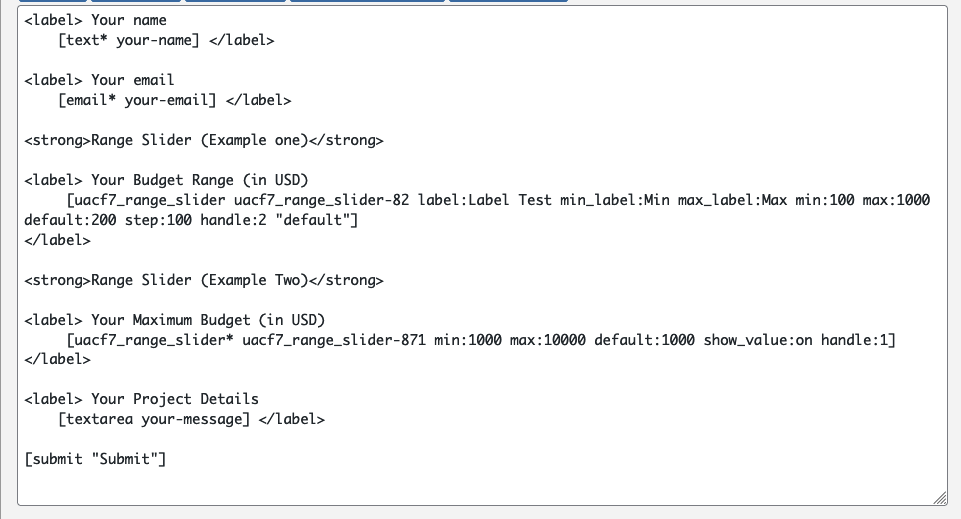
Full-Form Code #
Here is a sample code of our above form:
<label> <strong>Your Email</strong>
[email* your-email autocomplete:email] </label>

<label><strong>Your Budget</strong>
[uacf7_range_slider uacf7_range_slider-234 min:100 max:20000 default:100 step:1 show_value:off handle:1 "default"]</label>

<label><strong>Your Age Range</strong>
[uacf7_range_slider uacf7_range_slider-199 min:18 max:60 default:26 show_value:off handle:2 "default"]</label>

<label> <strong>Your Project Details</strong>
[textarea your-message] </label>

[submit "Submit"]
Still Not Clear? Please contact us. If you are a free User, you can open a ticket from here. If you are a pro user, you can open a ticket from here.