In this article, we will try to explain how to Custom Columns for Contact Form 7 with the help of our Pro Addon “Contact Form 7 Custom Columns”.
Watch Complete Video #
If you need further guidance, watch our video tutorial that walks through the entire process of creating flexible columns for Contact Form 7:
What are Custom Columns? #
The primary function of Custom Columns is to allow users to create more complex and tailored forms by introducing user-defined fields. With Custom Columns, users can define the width of each form field, creating a multi-column layout that optimizes space and improves the visual appeal of the form.
For example, a form layout could be set with widths of 36%, 49%, and 15% for different fields, allowing for more efficient use of space and a cleaner, more organized appearance.
In this tutorial, we will show how to create such Flexible columns for Contact Form 7.
What’s needed #
- Ensure that both Contact Form 7 and Ultimate Addons for Contact Form 7 are installed on your WordPress site.
- Download & Install Ultimate Addons for Contact Form 7 Pro from our Client Portal.
- Activate your license key.
- Go to Ultimate Addons menu in your WordPress Dashboard and enable both Column Or Grid & Column – Custom Width Checkboxes.

Contact Form 7 Custom Columns Form – Live Example #
In this tutorial, we’ll guide you through creating a custom columns form for Contact Form 7, similar to the example below.

Visit our main demo to see all the supported fields for CF7 columns.
Steps to Create Custom Columns for Contact Form 7 #
Go to Contact -> Add New in your WordPress Dashboard. This opens a contact form editor with an Add Column button.
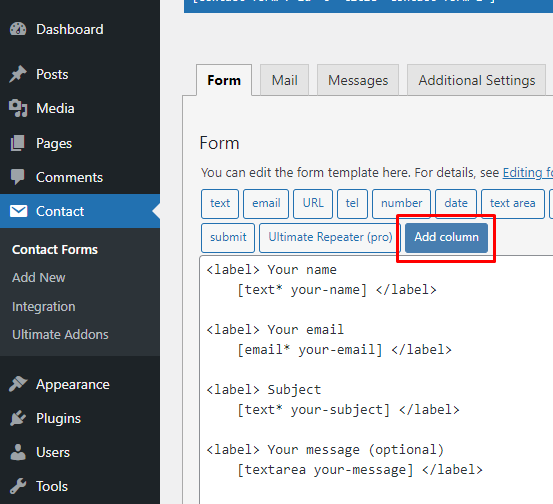
Choose your Column Type #
Click on the Add Column button. You’ll have options to add 2, 3, or 4 columns to your Contact Form. Scroll down to find the Custom Column Width section.
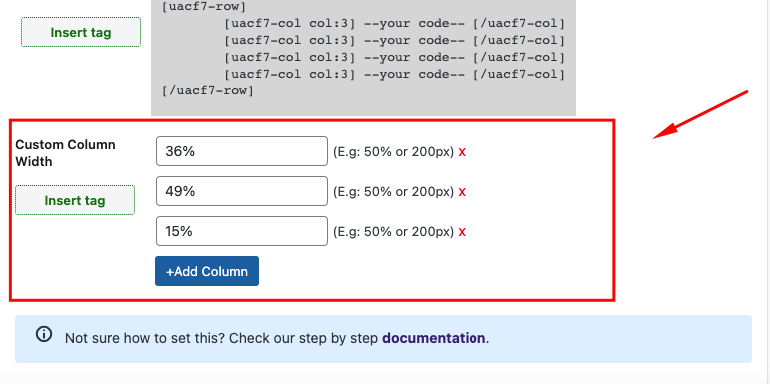
In this section:
- You can add more columns by clicking the +Add Column button.
- For each column, set a width either in percentage (%) or pixels (px). The percentage refers to the total width of the form’s body, not the viewport width. Ensure that the total values equal the form’s width for proper alignment.
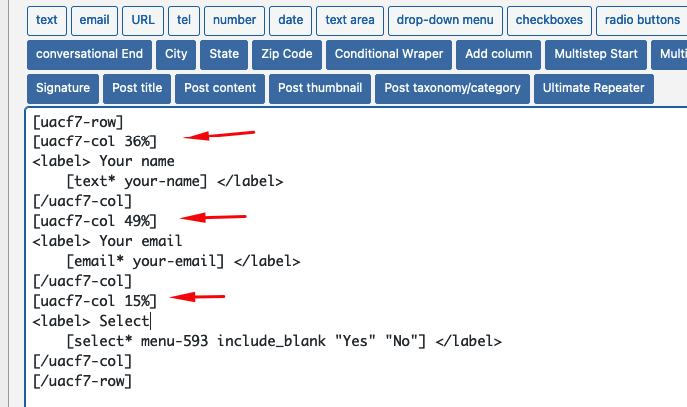
Insert Tag #
Once you’ve configured your columns, click the green Insert Tag button to add the column tags to the Contact Form 7 editor. Each column will have opening and closing tags, similar to HTML syntax.
Rearrange Your Codes #
To create columns, rearrange your fields within the column tags. For example, to create three columns with widths of 36%, 49%, and 15%, place the respective fields (e.g., Name, Email, Select field) inside each column’s code block..

Copy and paste your text fields (e.g., Name, Email, URL, Number, Date) into the respective columns within –Your Code– area.
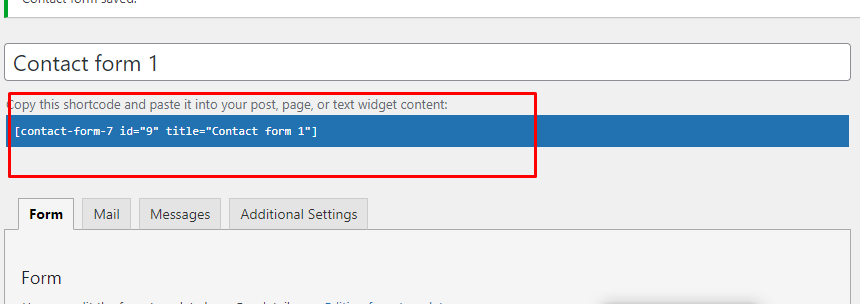
Copy the Shortcode #
Once your form is ready, click Save and copy the Contact Form shortcode.
Time to Publish #
Paste the shortcode wherever you want to display the form (Pages, Posts, Custom Post Types, or Sidebars). The form will appear similar to the example shown.
Full Form Code #
Here is a sample code of our above form:
[uacf7-row][uacf7-col 36%]
<label> Your name
[text* your-name] </label>
[/uacf7-col][uacf7-col 49%]
<label> Your email
[email* your-email] </label>
[/uacf7-col][uacf7-col 15%]
<label> Select
[select* menu-593 include_blank "Yes" "No"] </label>
[/uacf7-col][/uacf7-row]

<label> Your message (optional)
[textarea your-message] </label>

[submit "Submit"]
Still Not Clear? Please contact us. Open a ticket from here.