In this article, we will try to explain how to Display Contact Form 7 Fields on 2 or More Columns with the help of our Free Addon “Contact Form 7 Columns”.
Watch Complete Video #
If you are still confused, we suggest you watch this video. In this video, we tried to describe the whole step of How to create a Multi-Column Responsive form with Contact Form 7:
What’s needed #
- Ensure that both Contact Form 7 and Ultra Addons for Contact Form 7 are installed on your WordPress site.
- Navigate to Ultra Addons section in your WordPress Dashboard and enable the “Column or Grid” checkbox/toggle.

What is Contact Form 7 Columns Addon? #
The Contact Form 7 Columns Addon is a feature for Contact Form 7 that allows you to organize your form fields into multiple columns, creating a more structured and visually appealing layout. Instead of displaying all fields in a single column, you can split them into two, three, or even four columns, making your forms more compact and easier to navigate. This addon enhances the user experience by reducing the length of the form and providing a cleaner design.
Live Example of CF7 Columns Form #
In this tutorial, we’ll create a Contact Form 7 with multiple columns, similar to the examples shown below. You can customize your own form by following these steps.
Visit our main demo to see all the supported fields for CF7 columns.
Creating a Contact Form 7 Columns Form #
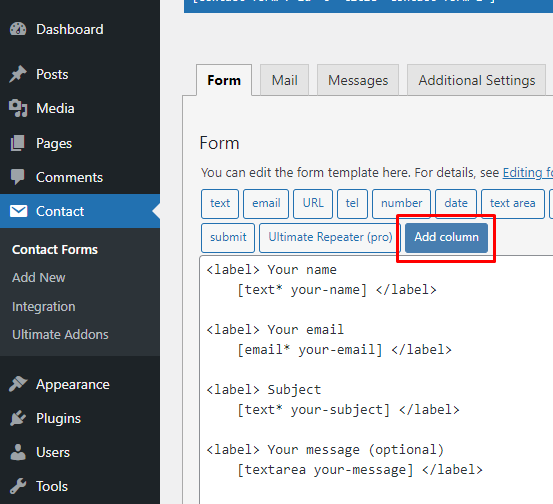
Go to Contact -> Add New in your WordPress Dashboard to create a new form. You will see a contact form editor with an “Add Column” button.
Choose your Column Type #
Click on “Add Column” to select options for integrating 2, 3, or 4 columns into your form. These options are available in the free version. Pro users have the additional option of creating custom-sized columns, which will be covered in another guide.
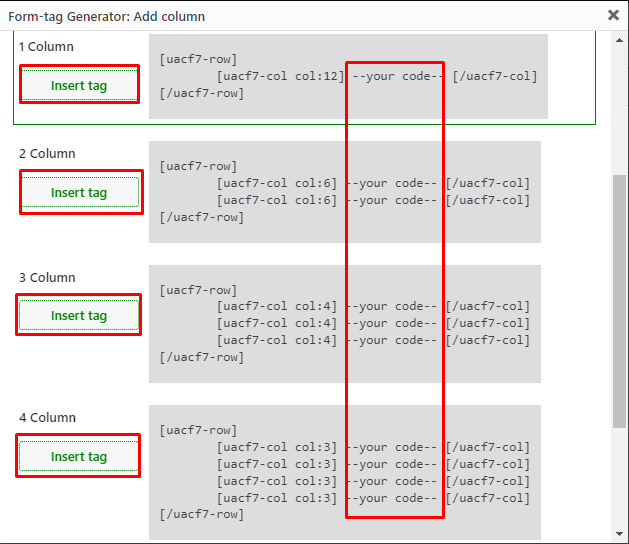
Insert Tag #
Click the “Insert Tag” button next to your preferred column. This action will insert the tag into your editing panel.

Rearrange Your Codes #
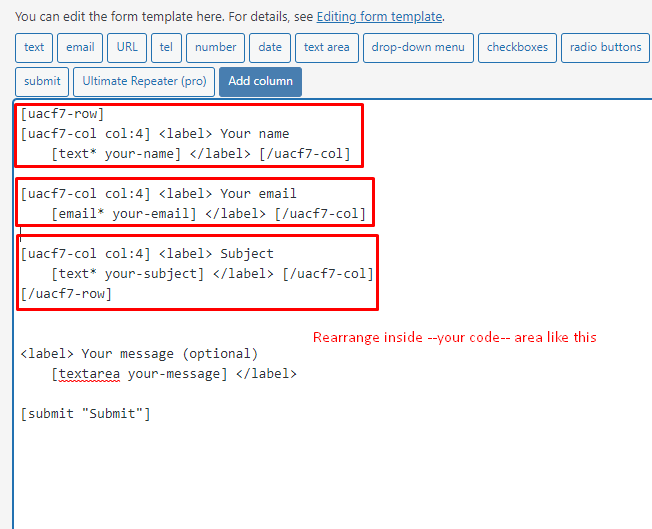
If you’re creating a three-column layout, for example, you can place your “Name,” “Email,” and “Subject” fields within the three columns in one row.
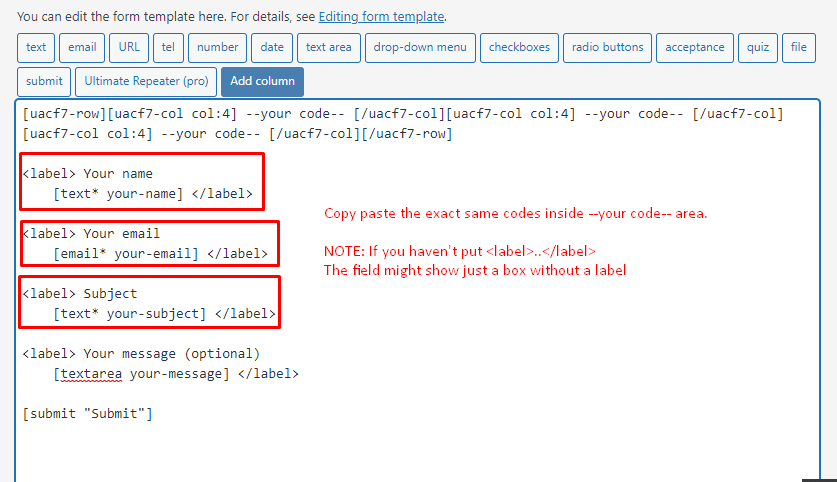
Rearrange your code inside the column tags as needed. Copy and paste the fields (e.g., Name, Email, URL, Number, Date, etc.) into the designated –Your Code– area.
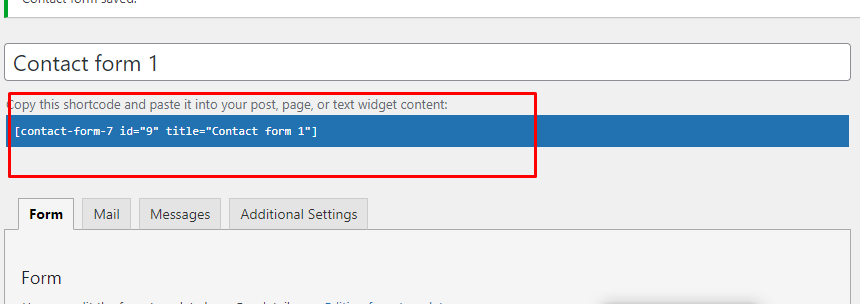
Copy the Shortcode #
Once your form is ready, click “Save” and copy the Contact Form shortcode.
Time to Publish #
Paste the shortcode wherever you’d like to display your form, whether on Pages, Posts, Custom Post Types, or Sidebars. The result should resemble the example form shown above.
Looking for Flexible / Custom Columns? #
With the Contact Form 7 Columns Pro version, you can set the form’s columns to a desired width. For example, create a three-column form where one column is 12% wide, another is 27%, and the third is 61%. You can set as many columns as needed. Check out our live demo to see a form with custom column widths.
Full Form Code #
Here is a sample code of our above form:
<label><strong>One Column Example</strong></label>
[uacf7-row][uacf7-col col:12]
[email your-email placeholder "Your email"]
[/uacf7-col][/uacf7-row]

<label><strong>Two Columns Example</strong></label>
[uacf7-row][uacf7-col col:6]
[text* text-337 placeholder "First Name"]
[/uacf7-col][uacf7-col col:6]
[text* text-338 placeholder "Last Name"]
[/uacf7-col][/uacf7-row]

<label><strong>Three Columns Example</strong></label>
[uacf7-row][uacf7-col col:4]
[url url-817 placeholder "Facebook URL"]
[/uacf7-col]
[uacf7-col col:4]
[url url-817 placeholder "Twitter URL"]
[/uacf7-col]
[uacf7-col col:4]
[url url-817 placeholder "Instagram URL"]
[/uacf7-col][/uacf7-row]

<label><strong>Four Columns Example</strong></label>
[uacf7-row][uacf7-col col:3]
[text* text-331 placeholder "Address"]
[/uacf7-col]
[uacf7-col col:3]
[text* text-332 placeholder "City"]
[/uacf7-col]
[uacf7-col col:3]
[text* text-333 placeholder "Country"]
[/uacf7-col]
[uacf7-col col:3]
[text* text-334 placeholder "Zip"]
[/uacf7-col][/uacf7-row]

[uacf7-row][uacf7-col col:12]
[submit "Submit"]
[/uacf7-col][/uacf7-row]
Still Not Clear? Please contact us. If you are a free User, you can open a ticket from here. If you are a pro user, you can open a ticket from here.