In this article, we will try to explain how to to add a Star Rating Field on Contact Form 7 with the help of our Free Addon “Contact Form 7 Star Rating Field”.
Watch Complete Video #
If you are still confused, we suggest you watch this video. In this video, we tried to describe the whole step of How to create a star rating form with Contact Form 7:
What’s needed #
- Ensure that both Contact Form 7 and Ultra Addons for Contact Form 7 are installed on your WordPress site.
- Go to Ultra Addons in your WordPress Dashboard, and enable the Star Rating checkbox/toggle.

What is Contact Form 7 Star Rating Field? #
The Star Rating field in Contact Form 7 is an addon that allows users to rate items or services by selecting a specific number of stars, typically from 1 to 5, within a contact form. This feature is commonly used for gathering feedback, reviews, or ratings from users. It can be customized with different icons, styles, and values, and you can make it a required field in the form. The Star Rating field is especially useful for product reviews, customer satisfaction surveys, or any other scenario where a rating is needed.
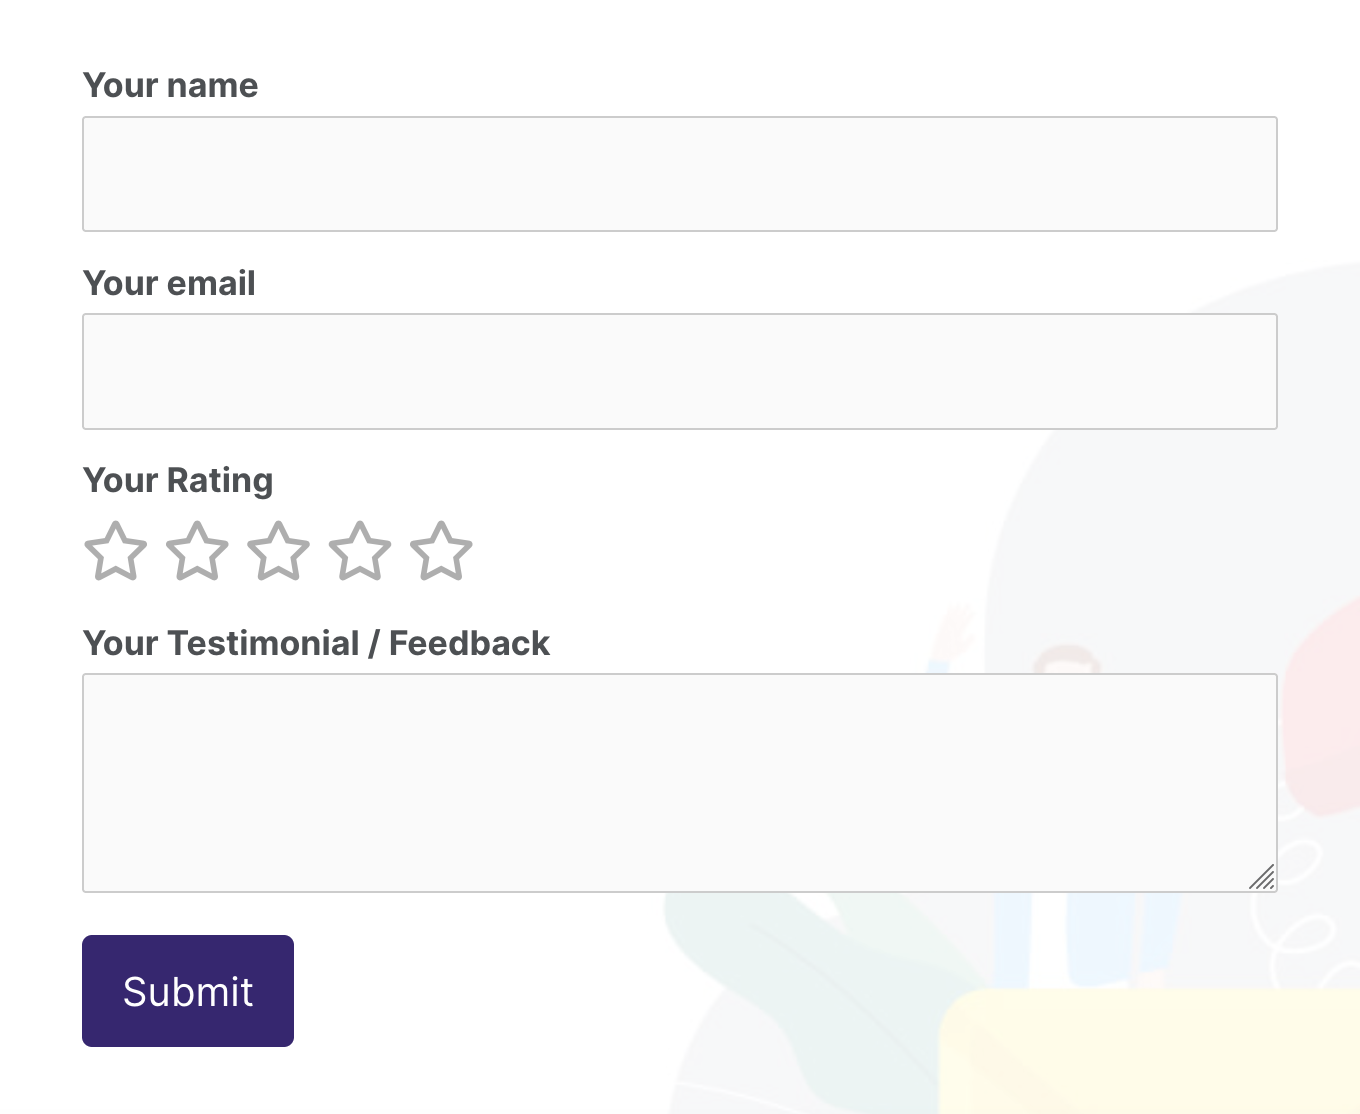
Live Example: Contact Form 7 Review Form #
In this tutorial, we’ll create a Contact Form 7 product review form using the Star Rating Addon, as demonstrated in the example below. You can follow the same steps to create your own form.
Visit our main demo to see all the supported fields for Contact Form 7 Star Rating Field.
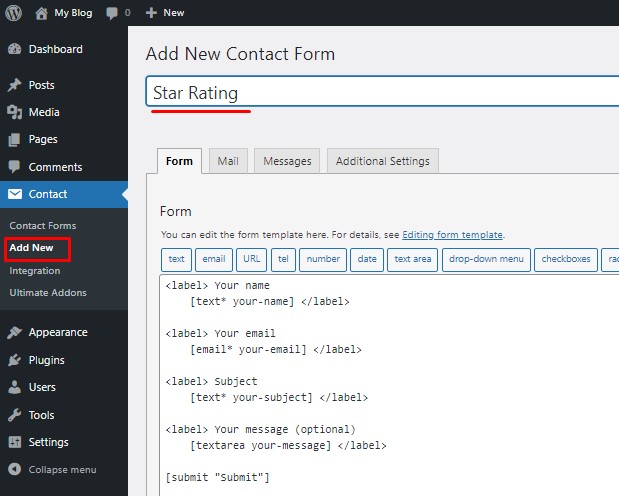
Contact Form 7 Star Rating Field Form Creation #
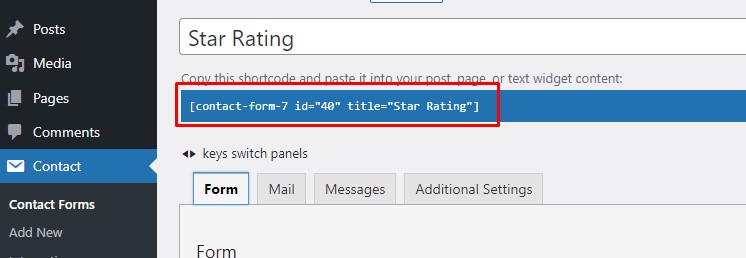
Go to Contact -> Add New and add a title for your form (e.g., “Star Rating”).
Setting Up Star Rating #
Inside the admin panel, you’ll find a Star Rating tag.
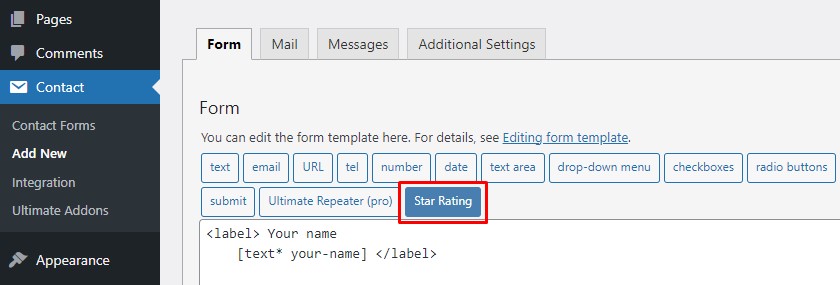
Click Star Rating and a menu will appear with the following options:
- If you want to make the Star Rating a required option for your Contact Form, tick the button for the Required Field.
- Enter a name for the Star Rating Tag (e.g., Rating).
- Choose a Rating Icon.
- Set a value for the Default Selected Star between 1 and 5.
- If you want to change the numeric values to character values for each star, enter them sequentially in the Star 1, Star 2, Star 3, Star 4, and Star 5 boxes.
- Click Insert Tag to add the tag to your Contact Form Admin Panel.
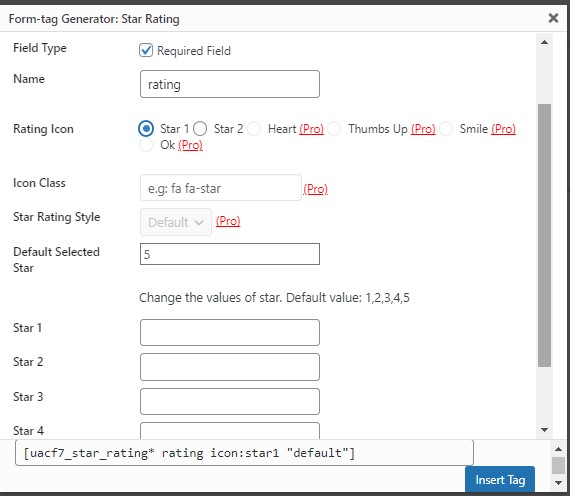

After you’ve inserted the Tag, you will see an HTML tag similar to the one shown in the image below:
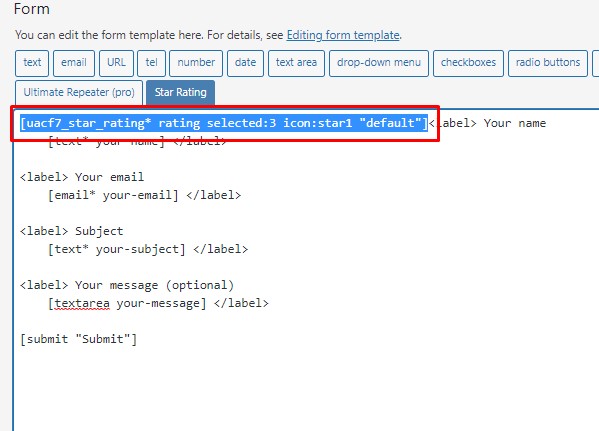
After inserting the tag, rearrange the field as needed in the admin panel. For example, if you want to place it below the “Your Email” field, cut and paste the tag in the desired position.
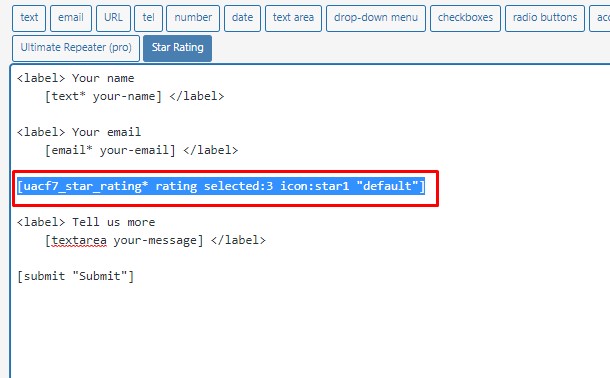
Note: To add a label for the Star Rating, wrap the tag in <label>…</label>.
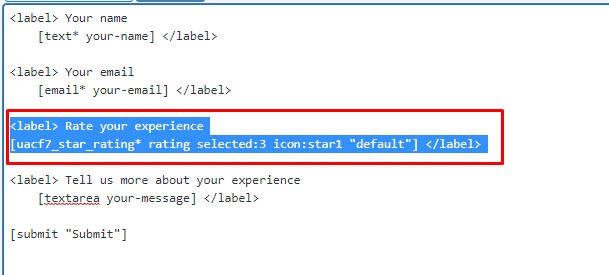
Once the Star Rating tag is inserted and the codes are arranged, click Save Changes.
Mail Setup #
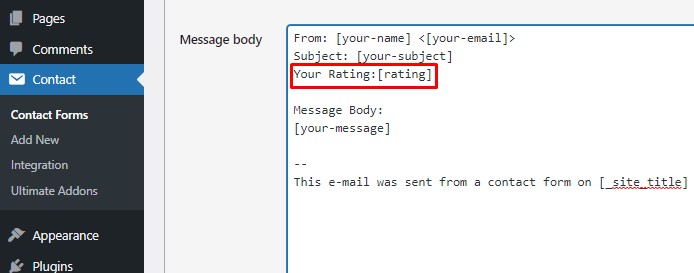
To receive Star Rating feedback via email, open the Mail tab in the form’s settings.
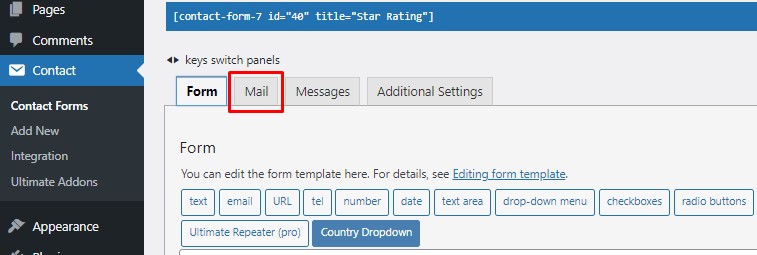
To include the Star Rating in the email, copy [rating] from the suggested mail tags and paste it into the message body.
Copy Shortcode #
Once your form is ready, copy the Contact Form shortcode from the admin panel.
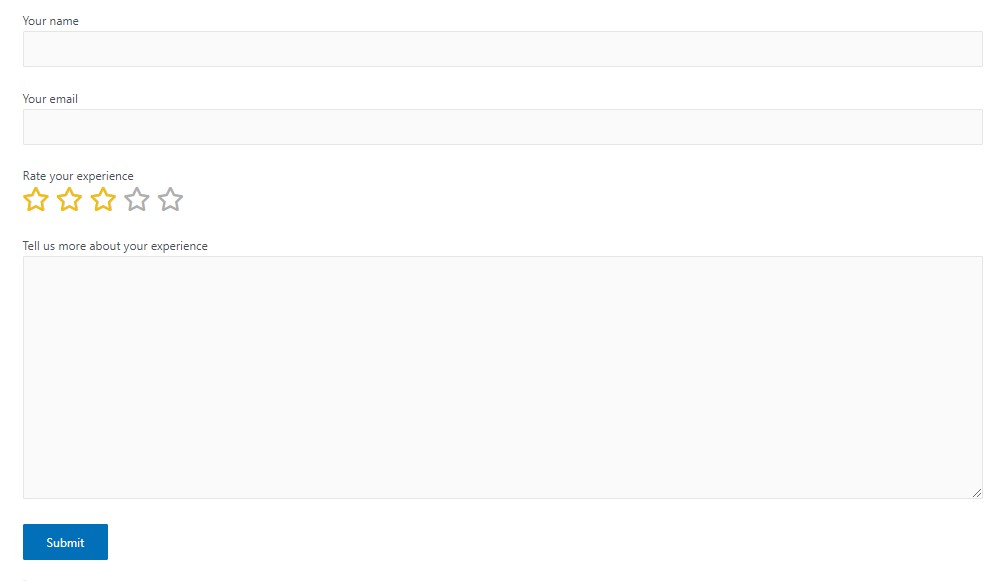
Time to Publish #
Paste the shortcode wherever you want to display the form (Pages/Posts/Custom Post Types/Sidebars). The result should look similar to the demo form.
Your Contact Form is ready. Once users fill in all the information and submit the form, you will receive an email with the star ratings from your audience like the example below (Obviously you need to design the mail template, we are showing a basic one):

Full Form Code #
Here is a sample code of our above form:
<label> Your name
[text* your-name] </label>

<label> Your email
[email* your-email] </label>

<label> Your Rating
[uacf7_star_rating rating] </label>

<label> Your Testimonial / Feedback
[textarea your-message] </label>

[submit "Submit"]
Still Not Clear? Please contact us. If you are a free User, you can open a ticket from here. If you are a pro user, you can open a ticket from here.
Is this documentation up to date??
Hi
The please check the video. That’s upto date.