Tourfic’s multi-vendor addon allows you to create hotel, apartment, or travel booking websites with ease.
Installation and Setup #
- Since the multi-vendor addon requires Tourfic’s pro version, you’ll first have to download Tourfic Pro from Themefic’s download portal.
- Afterward, you’ll have to install the add-on named Tourfic Pro – Multi-Vendor Add-on from the download portal.
- With the addons downloaded, head to the Add New section on your WordPress dashboard’s plugins section and upload the files (in .zip format). Install and activate the plugins, and we’re good to go.
Frontend dashboard Page #
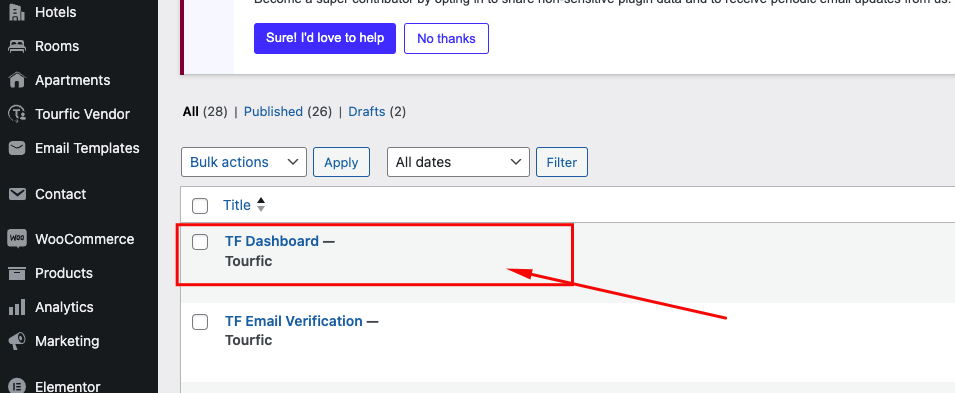
Once you install the Tourfic Pro – Multi-Vendor Add-on, a page called TF Dashboard will automatically appear on your website.
Accessing the Frontend Dashboard #
- TF Dashboard Page:
- The TF Dashboard page serves as the main gateway to the frontend dashboard.
- This dashboard allows you to manage vendor-related activities in a user-friendly interface, streamlining the multi-vendor functionality.
Tourfic Settings — User Options #
Once you’ve installed the multi-vendor addon, you shall find a section named User Options under the Tourfic Settings tab. This allows admins to determine how much control vendors and managers have over a website.
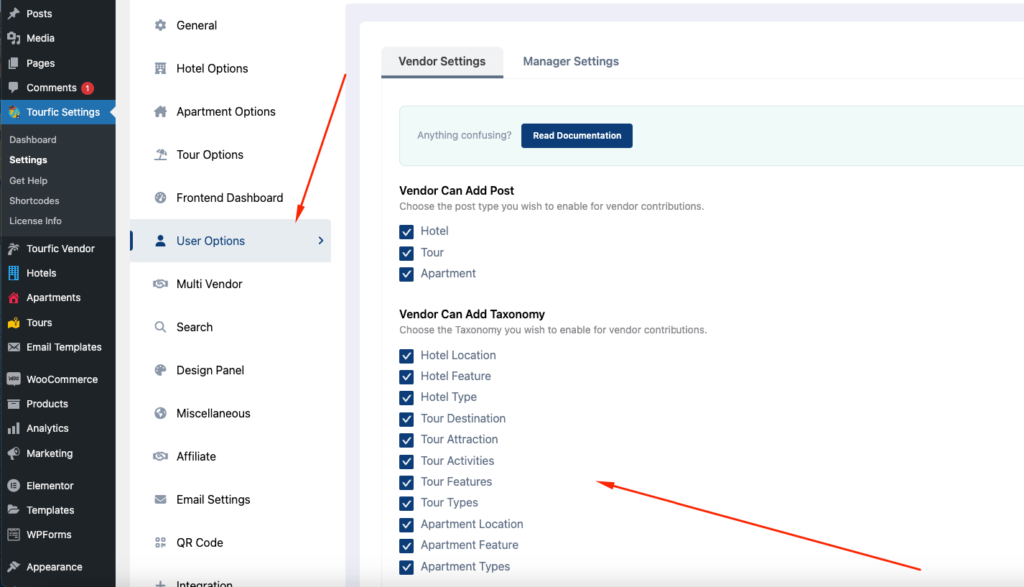
There are two tabs for the two different roles — vendor settings and manager settings. Admins can determine three capabilities for them — adding posts, taxonomies, and managing options.
While the managing options section differs for vendors and managers, the rest are similar. You can specify each capability to vendors and managers separately from one another.
Adding Posts #
Vendors and managers can add listings and posts, i.e., hotels, tours, and apartments.
Adding Taxonomy #
Taxonomies are essentially categories for different properties and listings. When a vendor or manager is provided control, they’ll be able to add categories and sub-categories such as locations, features, types, or activities. Once again, you can enable or disable these abilities separately for hotels, tours, and apartments.
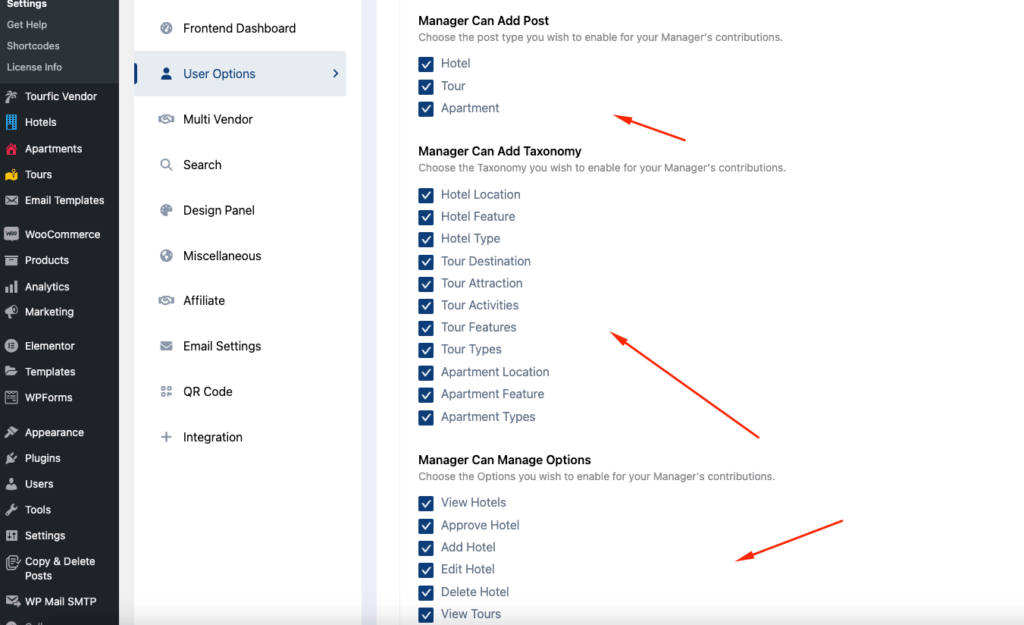
Can Manage Options #
Managing options offers different levels of control for vendors and managers.
Vendors: Vendors can view enquiries, bookings, commissions, and payout, as well as add hotel or tour bookings from the manage section.
Managers: The manager role provides a user with more control over the website, which is appointed by the admin. Hence, while the manager can control vendors, listings, commissions, payouts, and bookings, the admin remains in control of the manager.
You, as the super admin, can allow the manager to add, edit, delete, and approve hotels, apartments, and tours. Additionally, they can directly add, edit, or even delete vendors through the Vendor Management section.
Managers can also add and edit payouts and commissions depending on how much access you provide.
Tourfic Settings — Multi Vendor #
In the same settings tab, you’ll find another section named Multi Vendor. This section allows you to make global changes to the vendor’s dashboard, withdrawal settings, and more.
General Options #
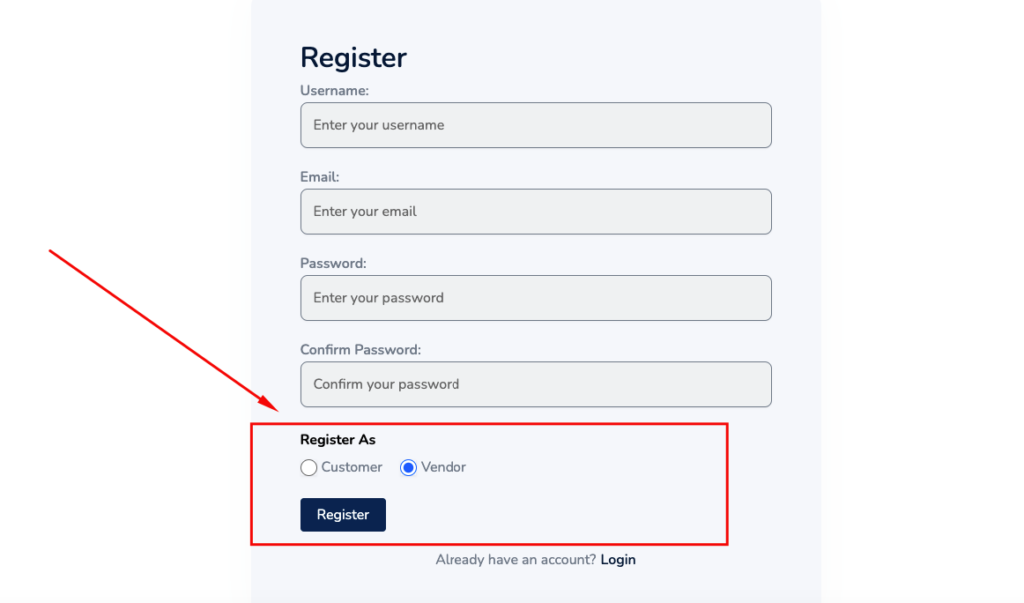
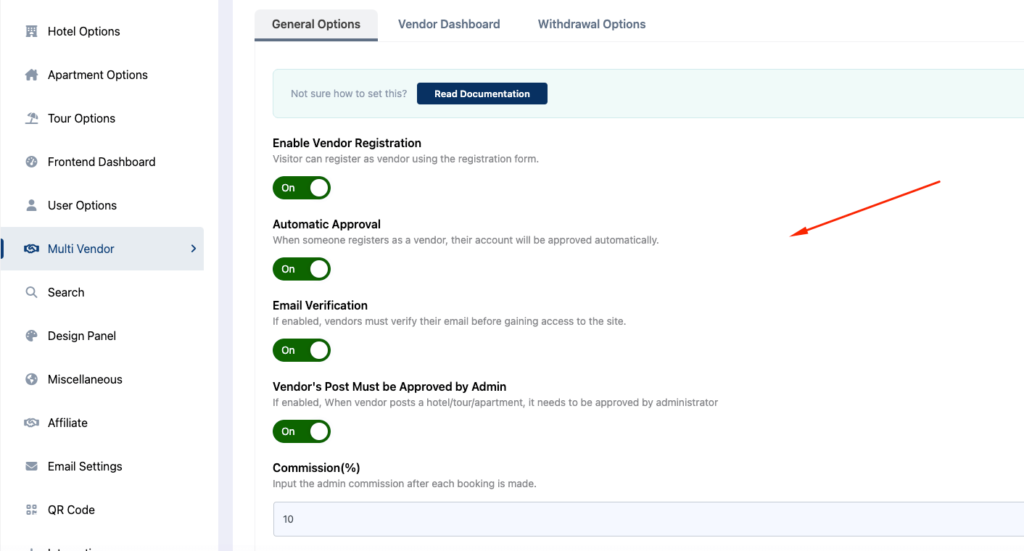
Enabling vendor registration: It will allow visitors to register themselves as vendors on your multi-vendor website. This way, you won’t have to add vendors manually. When turned off, the register section will only allow visitors to sign up as users.
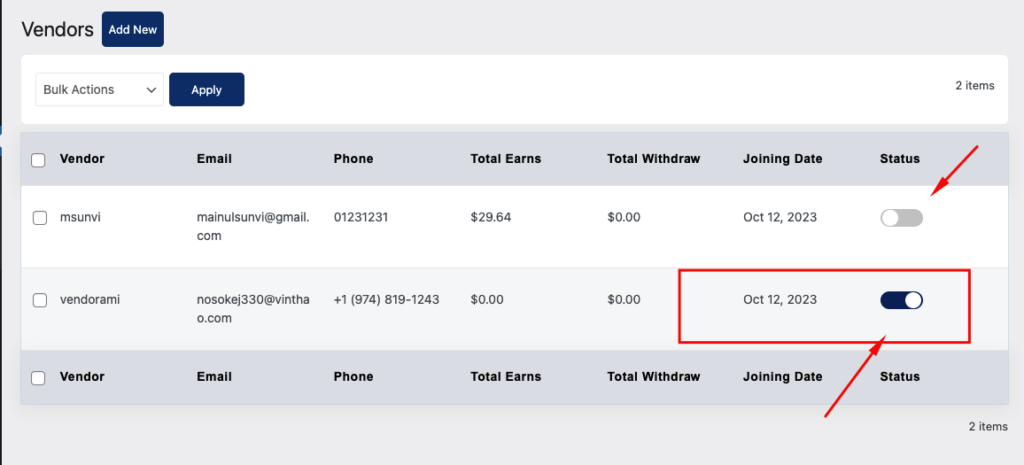
Automatic approval: If you turn on automatic approval, new vendor accounts will be automatically approved without any manual process. When turned off, you’ll have to toggle the vendor status from Tourfic’s settings to allow that vendor to operate.
Email verification: This will require vendors to verify their accounts with an email address when they’re signing up for the website.
Vendor’s Post Must be Approved by Admin: If you, as the admin, want to approve partner/vendor posts before they go live, turn on the Partner’s post must be approved by the admin toggle. This includes new listings such as hotels or apartments.
Commission(%): The Commission amount in the general settings will determine the global commission throughout the multi-vendor website. You can add this as a percentage value.
Note: It’s also possible to add specific commission rates for individual vendors in the vendor-specific settings.
Show/Hide Info #
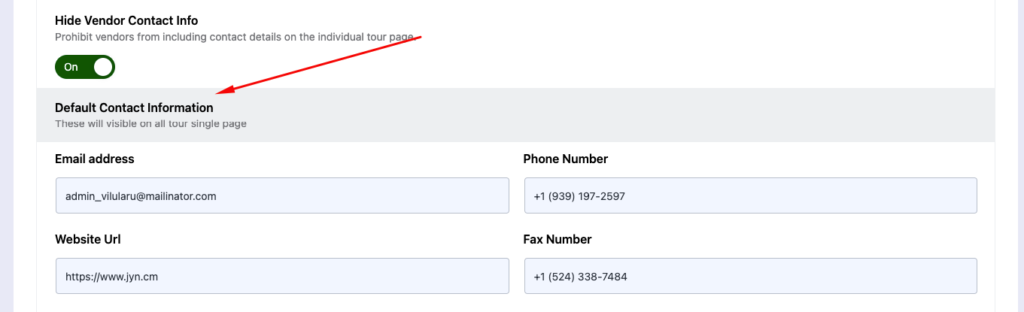
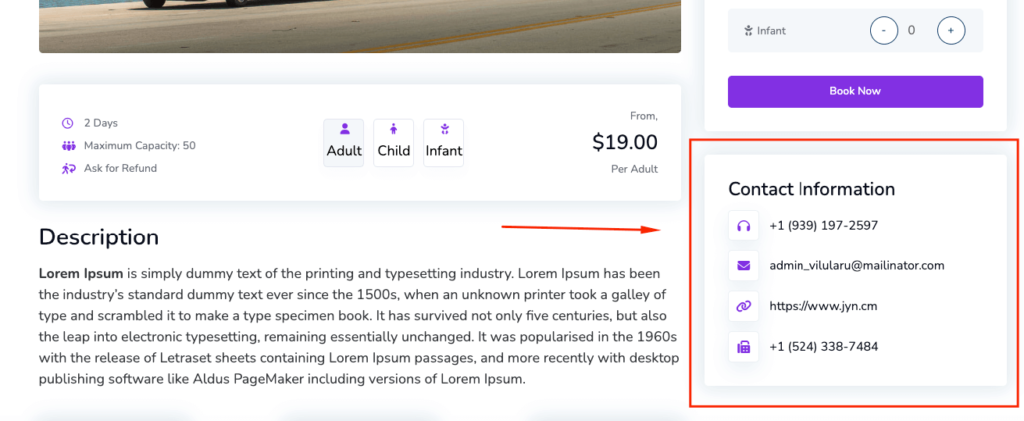
Hide Vendor Contact Info: If you turn this toggle on, you can determine which contact information a tour page will show. As shown above, you can determine what’s visible on the tour page. When turned off, it’ll show the vendors’ contact information by default, which the vendors can modify.
Template View #
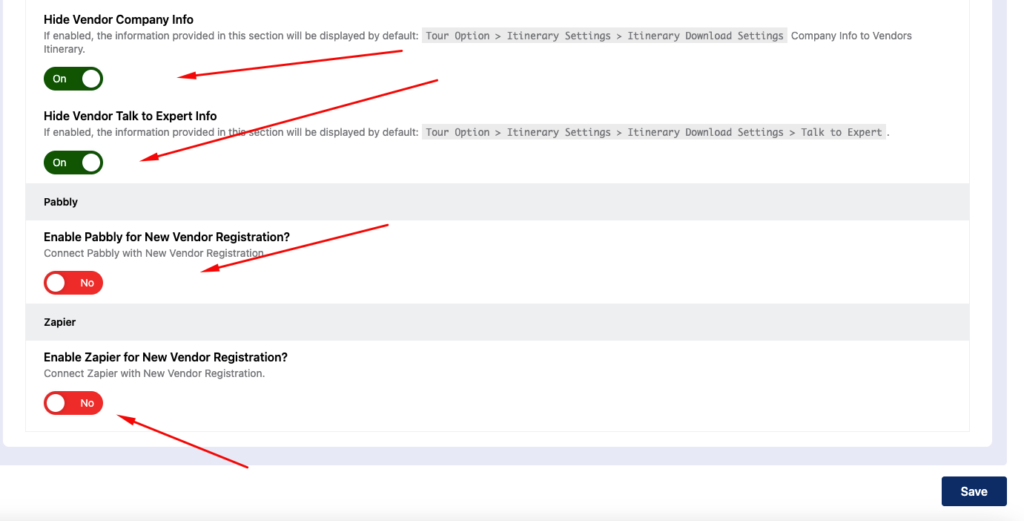
Hide Vendor Company Info: When this is turned off, a visitor or customer will see the vendor’s company information when they download the itinerary from the tour page. When enabled, it’ll show the details from the itinerary Download Settings page that the admin determines. This overwrites any details a vendor may add.
Hide Vendor Talk to Expert Info: When disabled, it’ll show the vendor’s preferred details for the talk to an expert section in the itinerary. You can turn this toggle on to specify information of your own choice as the admin.
Pabbly or Zapier: You can also enable integration with Pabbly or Zapier for vendor registrations with the vendor registration webhooks.
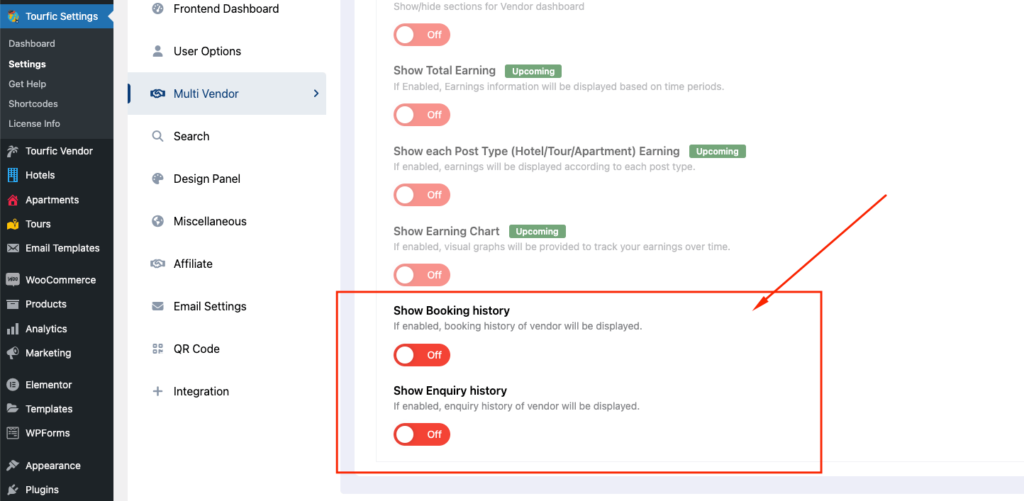
Vendor Dashboard #
This section is specific to what the vendor sees on their end.
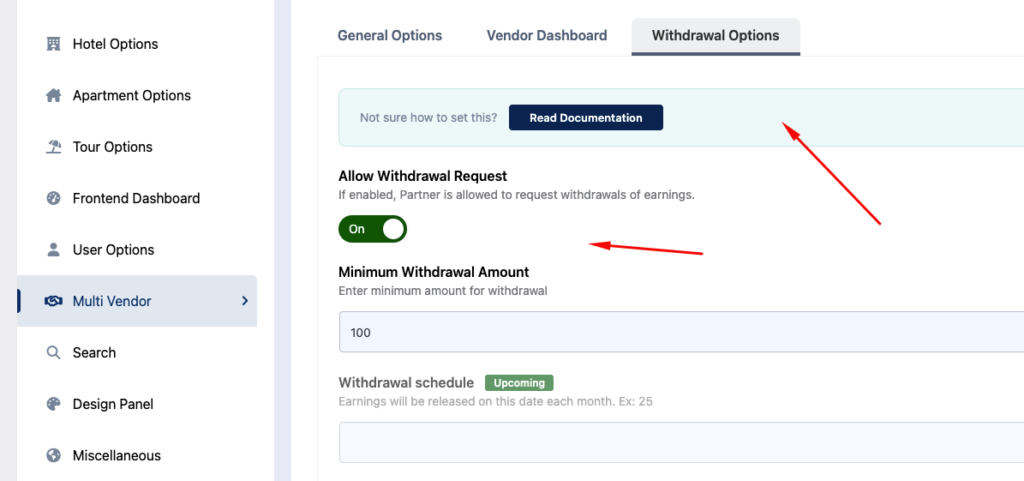
Withdrawal Options #
This section determines how much leeway and control partners get in terms of withdrawal.
- You can allow vendors to request for withdrawal themselves (as opposed to it only coming from the admin).
- The minimum withdrawal amount allows you to set a base limit to the amount they can withdraw.
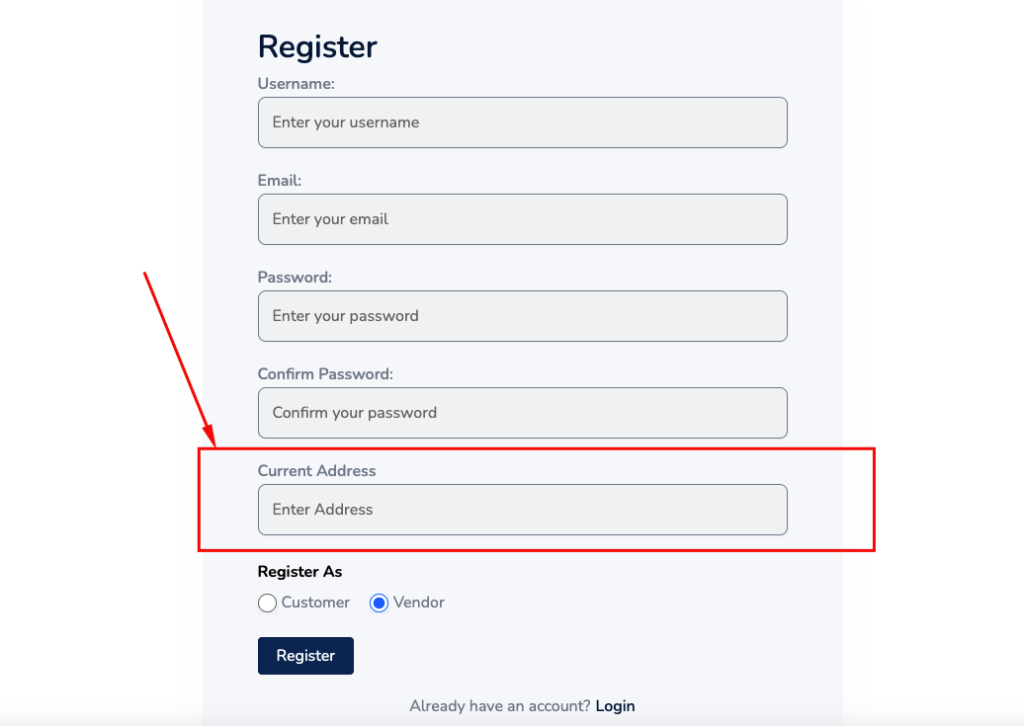
Adding Custom Fields for Vendor Registration #
If necessary, you can also add custom fields to the vendor registration section.
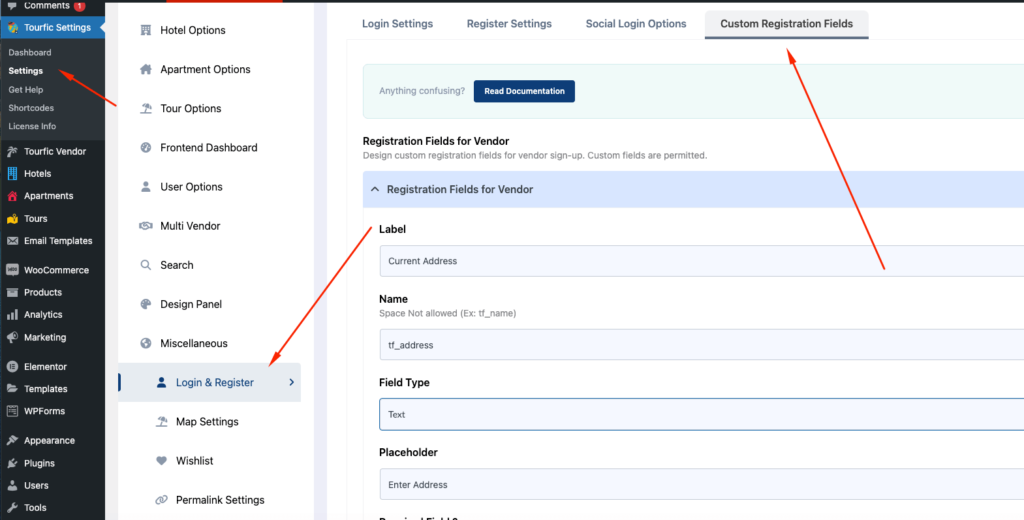
Once you add this field, it’ll show up on the registration form when a vendor tries to sign up. This field is entirely customizable (including email, text, checkbox, radio, and so forth), and you can change its status to required if necessary.
Template Preview #
Tourfic Settings — Using Email Templates #
In the Tourfic settings section, you can also determine if vendors receive an email once users confirm or cancel an order for their listings.
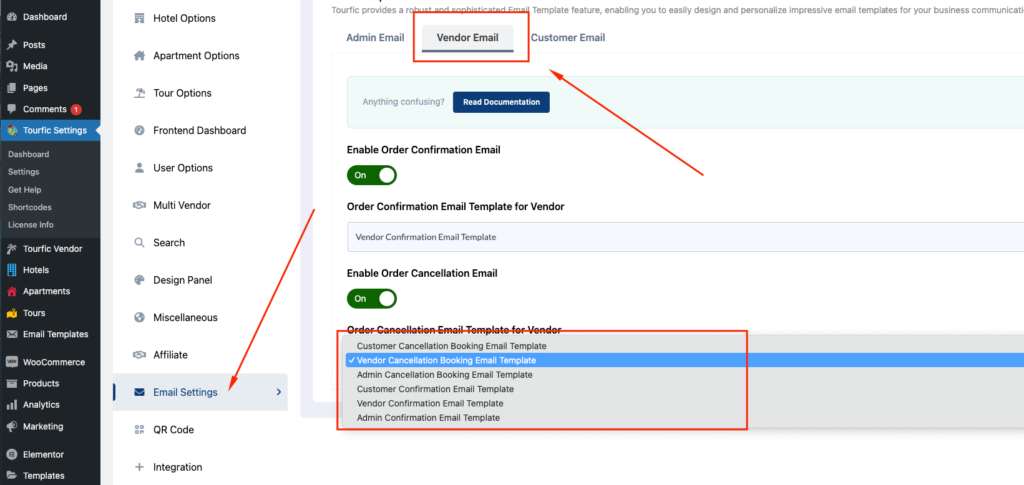
If you enable it, you can also determine which email template vendors receive once an order is confirmed or canceled. Simply select a template for each scenario and hit save.
Watch Initial Release Video: #
Still Not Clear? Please contact us. If you are a free User, you can open a ticket from here. If you are a pro user, you can open a ticket from here.