Collecting user signatures with a form can be necessary in many cases, where the support for digital signatures is vital. In this article, we will try to explain how to add a Contact Form 7 Signature Field with the help of our Free Addon “Contact Form 7 Signature addon”.
Watch Complete Video #
If you’re still unsure, we recommend watching our video tutorial, which walks you through the process of adding a digital signature to your Contact Form 7:
What’s Required #
- Ensure that both Contact Form 7 and Ultra Addons for Contact Form 7 are installed on your WordPress site.
- Go to the Ultra Addons menu in your WordPress Dashboard, enable the “Signature” checkbox/toggle.
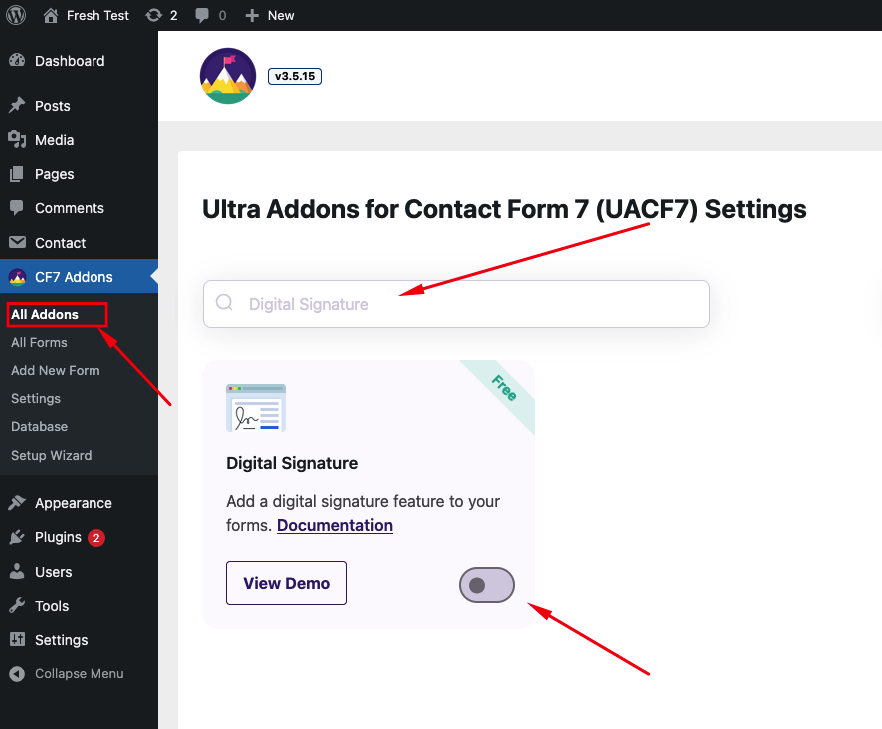
What is Contact Form 7 Signature Addon? #
The Contact Form 7 Signature Addon is a feature for Contact Form 7 that allows users to add a digital signature field to their contact forms. This feature enables users to sign forms directly on your website using a mouse, stylus, or touch screen, providing an easy way to collect signatures digitally. The addon also includes customization options, allowing you to adjust the signature pad’s size, background, and pen color. Additionally, signatures can be saved as images and included in emails or PDFs, making it a versatile tool for forms requiring authorization or consent.
Live Example: Contact Form 7 Signature Addon #
In this tutorial, we’ll create a Contact Form 7 digital signature form similar to the example below. You can follow the same steps to create your own form.
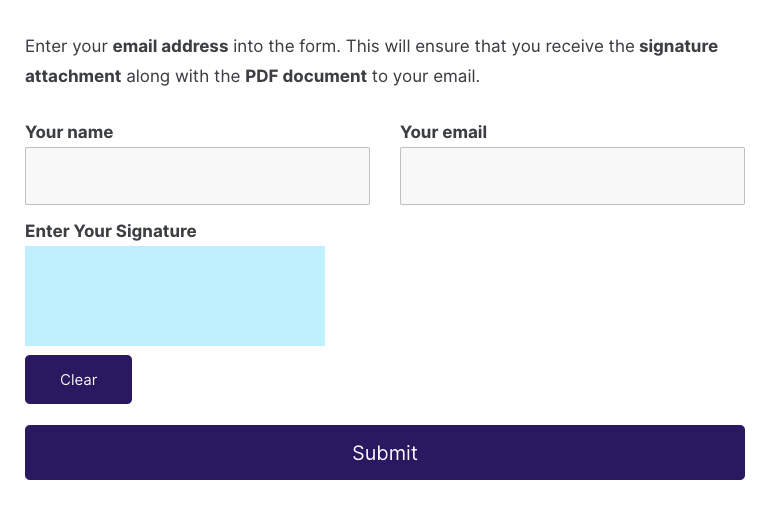
Visit our main demo to see all the supported fields for the Contact Form 7 Signature field.
Contact Form 7 Digital Signature Form Creation #
Go to Contact -> Add New in your WordPress Dashboard to start creating a new form.
Generating the Signature Form Tag #
In the form editor, you’ll see a new “Signature” button above the code editor. Click this button to access the form tag generator.
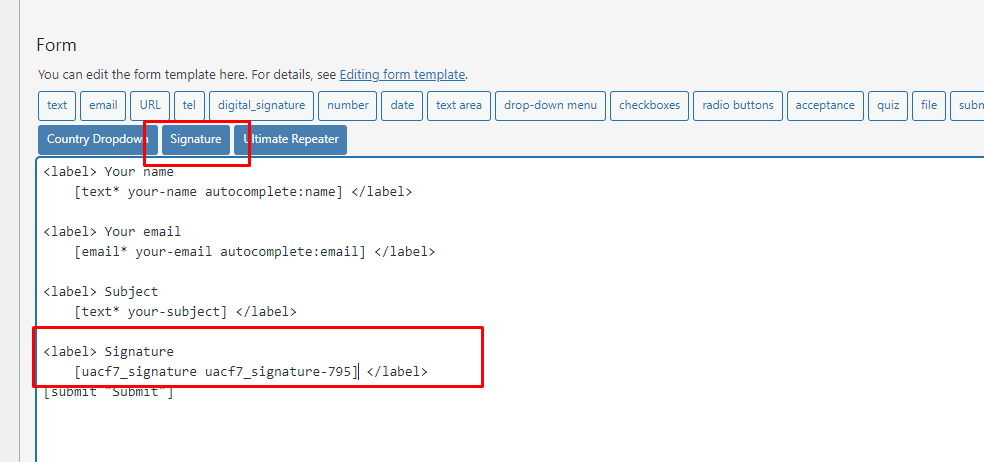
In the form generator, you can set the field as required, give it a unique name, and add a custom class name using the Class Attribute field for further customization.

Inserting the Signature Form Tag #
Once you’ve configured the signature field, click the “Insert Tag” button to place it in the desired position within the form editor.
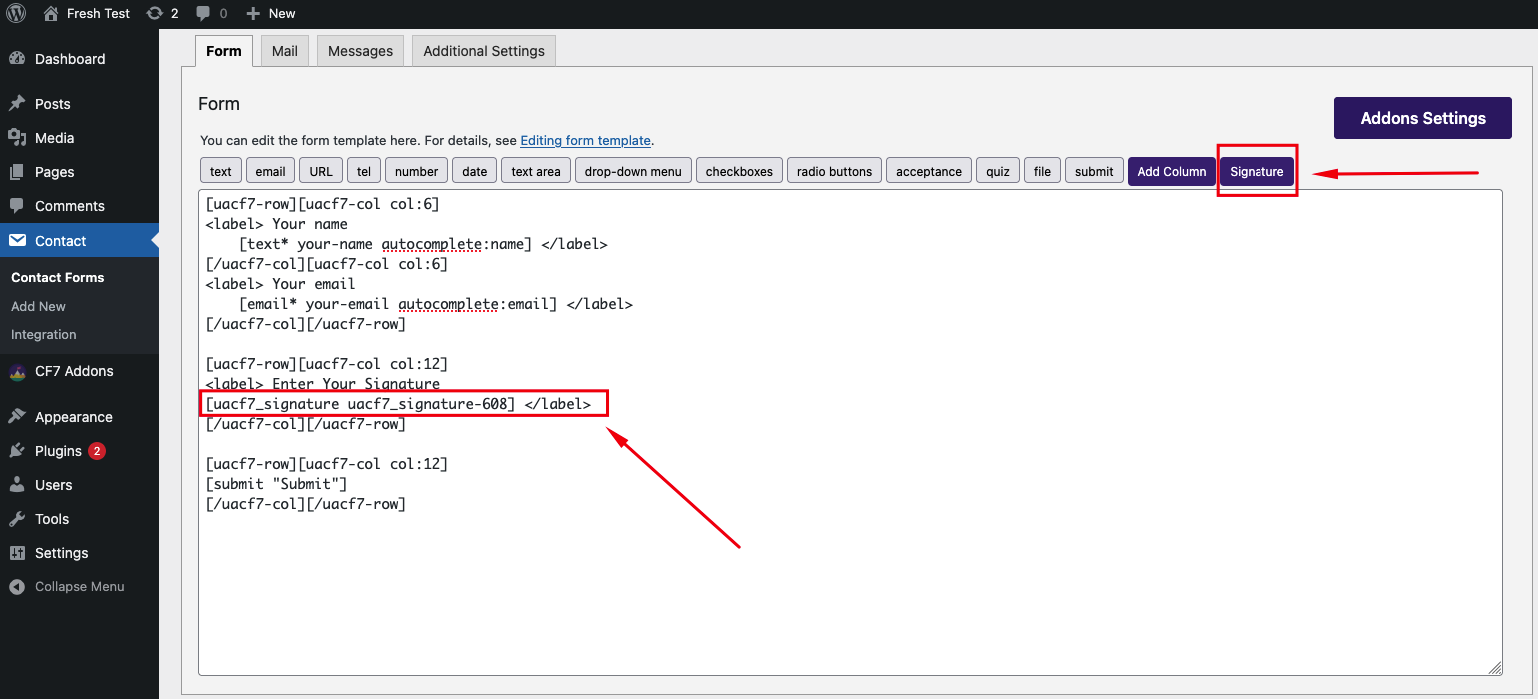
Enabling Signature #
Scroll down to the Ultra Addons for CF7 Options panel, click the “Digital Signature” tab, and toggle the “Enable Signature” option. This will activate the signature field in your form.
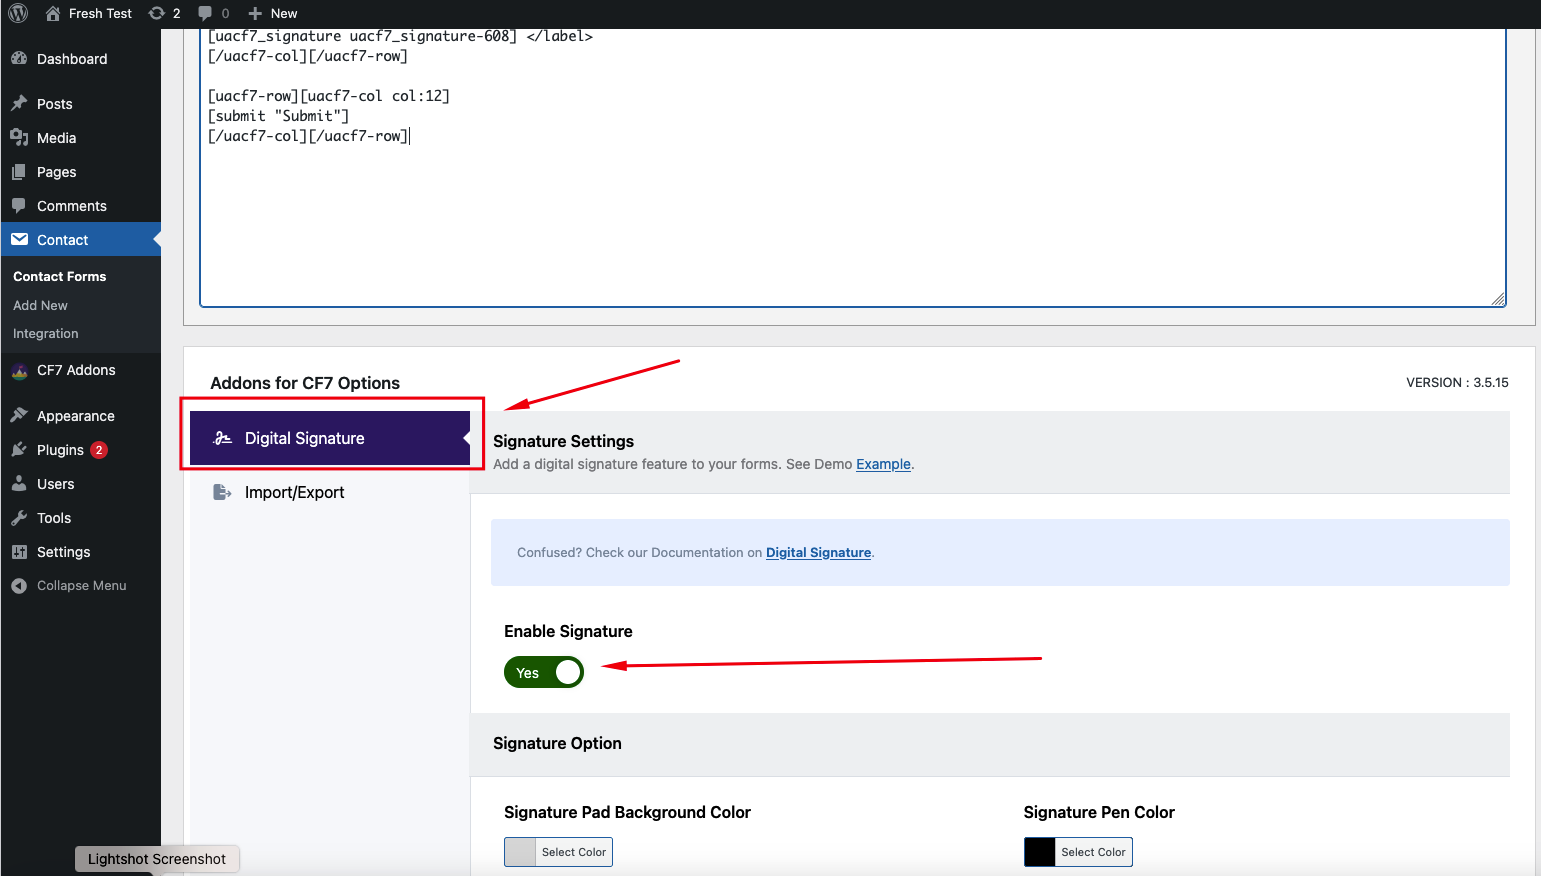
You can also adjust design properties like the background color of the pad, pen color, and the width and height of the signature pad to fit your site’s design.
Add Other Fields #
After setting up the signature field, you can add additional form fields such as name, email, and address based on your requirements.
Copy the Shortcode #
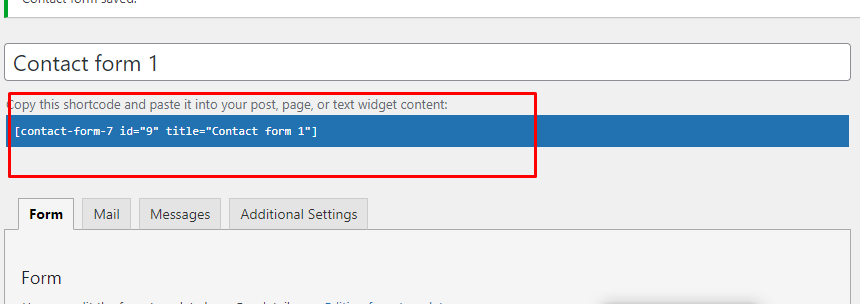
Once your form is ready, click “Save” and copy the Contact Form shortcode.
Time to Publish #
Paste the shortcode into your desired Pages, Posts, Custom Post Types, or Sidebars. The form will function like the example shown above.
Note: Users can create and clear their signature multiple times before submitting. Submission only occurs when the “Confirm Signature” button is clicked.
Integration with UACF7 PDF Generator #
If you want to get your submissions as PDFs with the PDF Generator, it’s also possible to attach a digital signature. To add the signature to your PDF:
- Make sure you have the PDF Generator addon installed and activated from Ultra Addons’ settings.
- Next, head to the PDF generator tab. You’ll find the list of available form tags that you can embed within your PDF. Assuming you have inserted a signature tag in your form, the form tag for the signature will show up here.
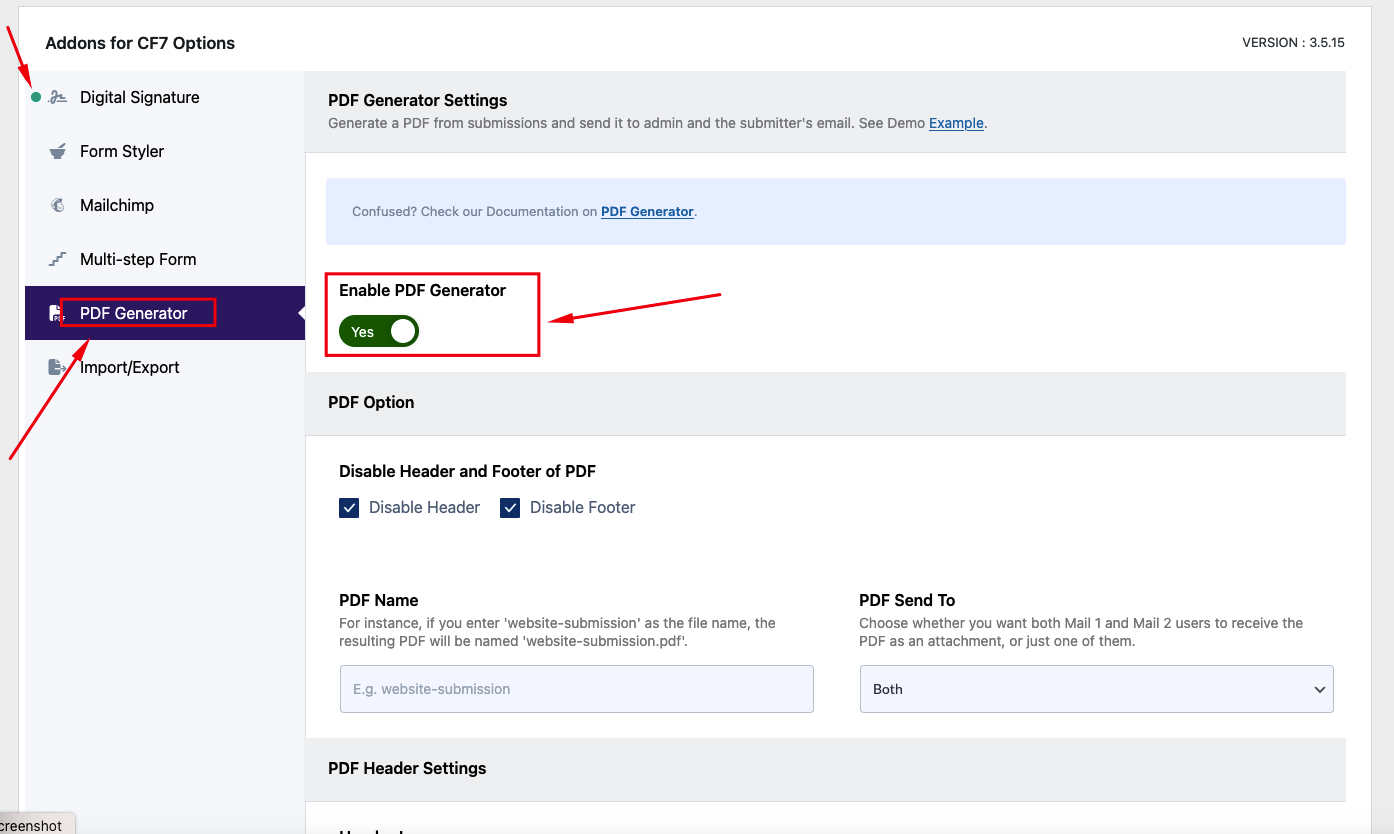
- On the “Body Content” section, insert the digital signature tag as an image (
<img>) (see below screenshot). The signature is stored as an image, so you’ll need to place it inside an image tag.

- Set the signature’s form tag as the
srcor source and save.
Attaching the Signature to the Mail #
To receive the signature via email:
- Go to the Mail tab on the form editing page.
- Find the signature form tag and place it in the “File Attachments” section. The digital signature will be sent as an image attachment in the email.
- Save the changes, and the signature will be added to every form submission sent to your email.

Full Form Code #
Here is a sample code of our above form:
[uacf7-row][uacf7-col col:6]
<label> Your name
    [text* your-name autocomplete:name] </label>
[/uacf7-col][uacf7-col col:6]
<label> Your email
    [email* your-email autocomplete:email] </label>
[/uacf7-col][/uacf7-row]

[uacf7-row][uacf7-col col:12]
<label> Enter Your Signature
[uacf7_signature uacf7_signature-608] </label>
[/uacf7-col][/uacf7-row]

[uacf7-row][uacf7-col col:12]
[submit "Submit"]
[/uacf7-col][/uacf7-row]
Still Not Clear? Please contact us. If you are a free User, you can open a ticket from here. If you are a pro user, you can open a ticket from here.
