Managing bookings manually can quickly become messy, especially when you’re handling multiple meetings or appointments. By connecting Apple Calendar with Hydra Booking, you can automatically sync all your bookings, avoid double scheduling, and keep everything organized in one place.
This guide will walk you through how to connect Apple Calendar with Hydra Booking step by step.
How to Connect Apple Calendar with Hydra Booking? #
Prerequisits #
- Since Apple Calendar integration is a pro feature, make sure you have a valid pro license for Hydra Booking. If you don’t have one yet, check pricing here.
- Ensure you have an active and functional Apple account.
- Ensure you’ve updated the Hydra Booking Plugin to version 1.1.40 or higher and the Hydra Booking Pro Plugin to version 1.1.6 or higher.
Step 1: Get API Key from Apple Calendar #
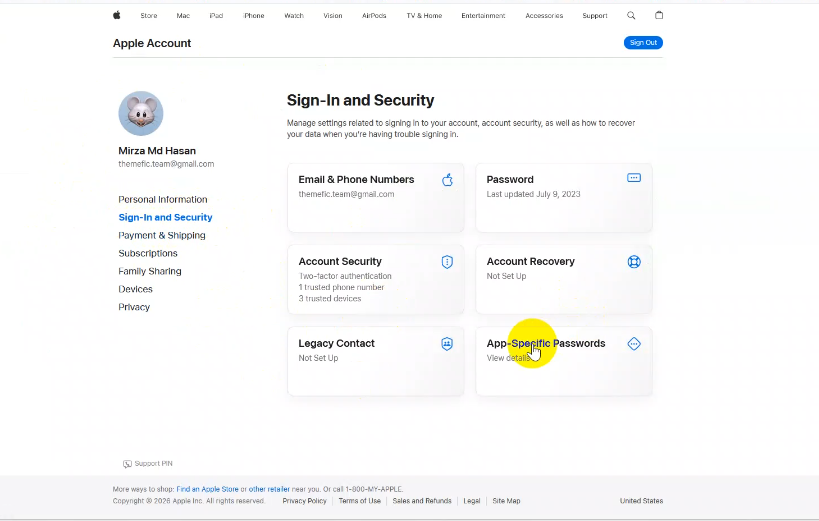
To connect Apple Calendar with Hydra booking, first of all, you will need an app-specific API key for it.
To generate an API Key, navigate to Sign-In and Security > and then click on the “App Specific Passwords” option.
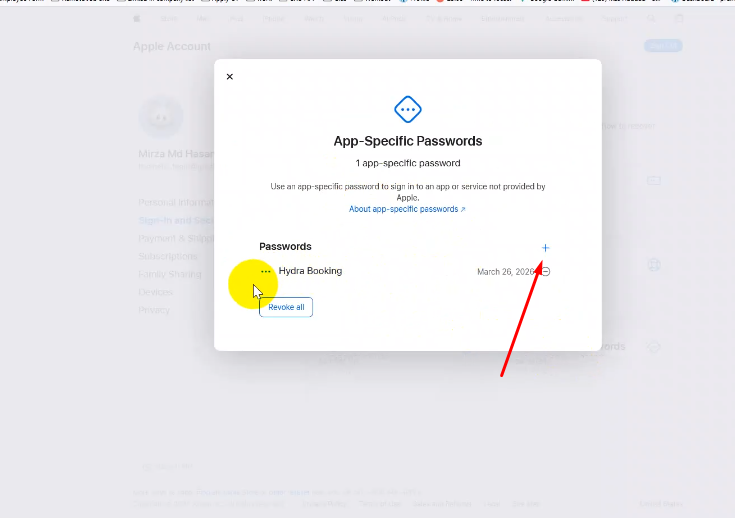
A popup will open, just click on the “+” sign.
Now fill in your desired name and click on “Create” the Button.
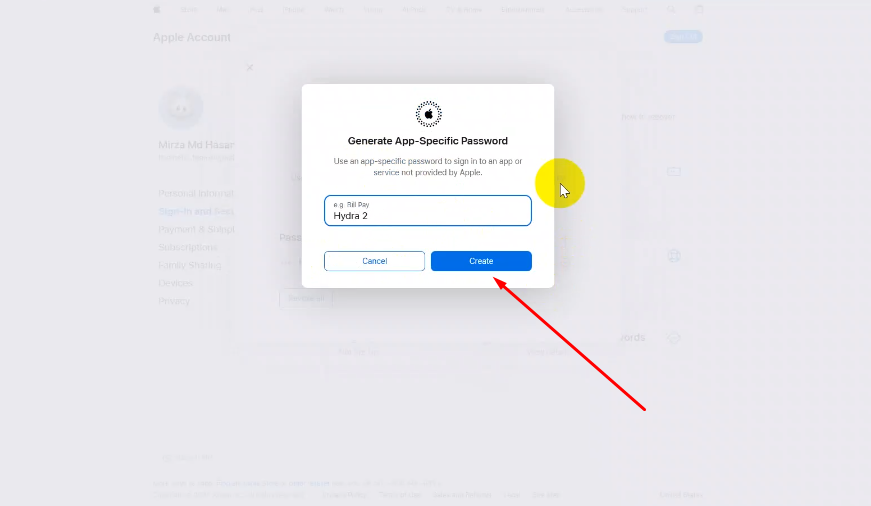
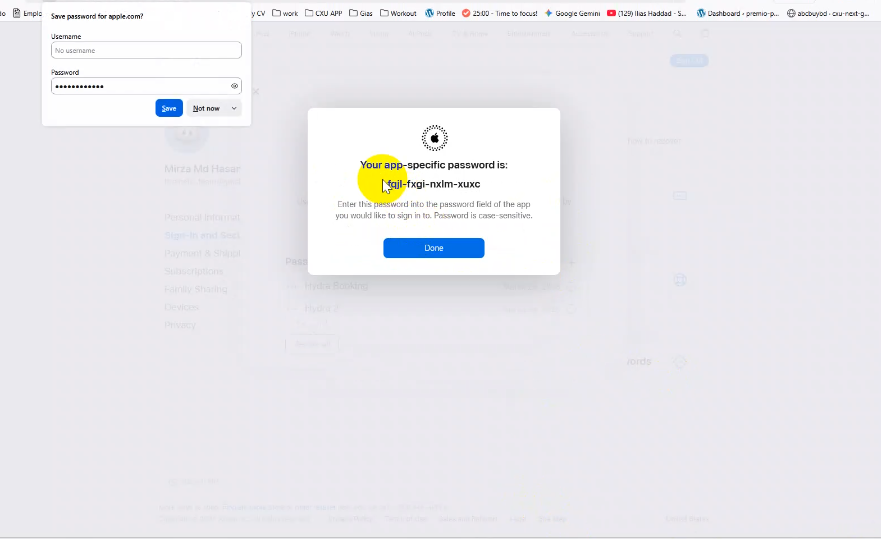
In the next page, an app-specific password will show. Copy it, we will require it for the next step.
Step 2: Configure Hydra Booking Settings #
To configure Hydra Booking settings.
Navigate to Hydra booking Settings > Integrations > Find the Apple Calendar box and click on the “Connect” button.
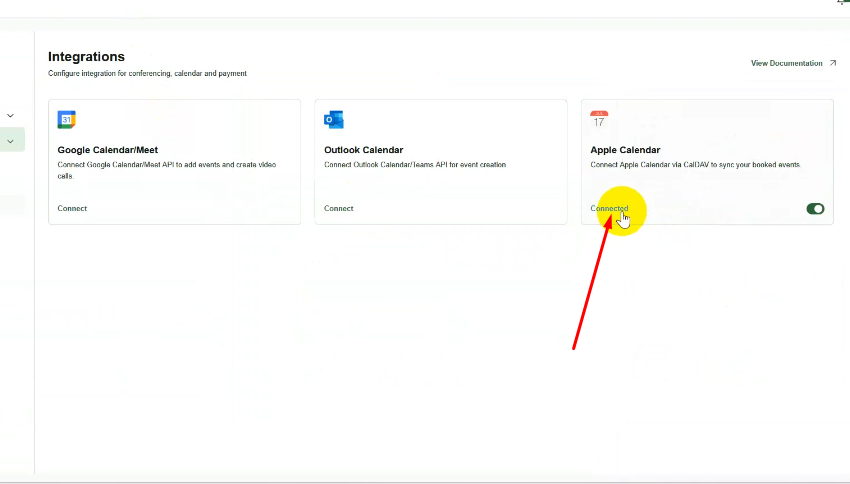
A popup will appear; just paste the “App-Specific Password” into the field and click on “Save and Validate.”

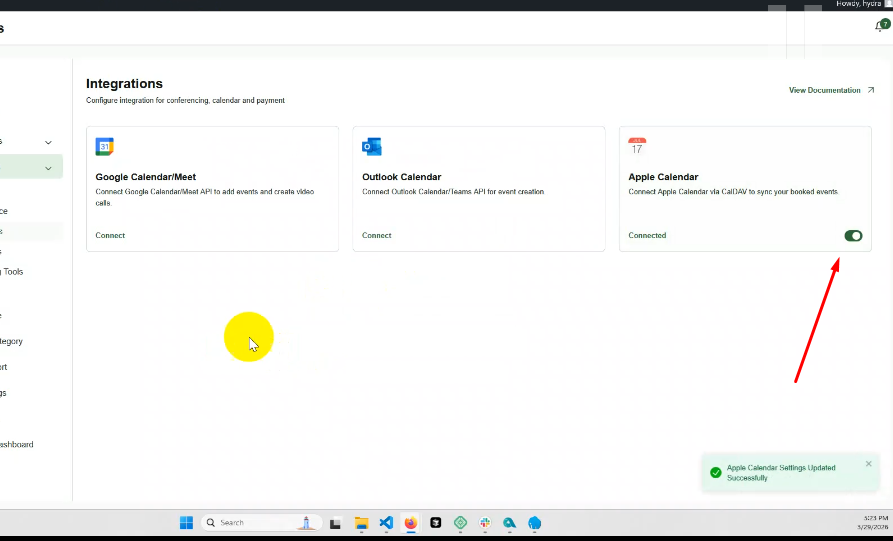
After “Clicking the “Save and Validate” button, now all you need to do is toggle the “Button” on to enable Apple Calendar.
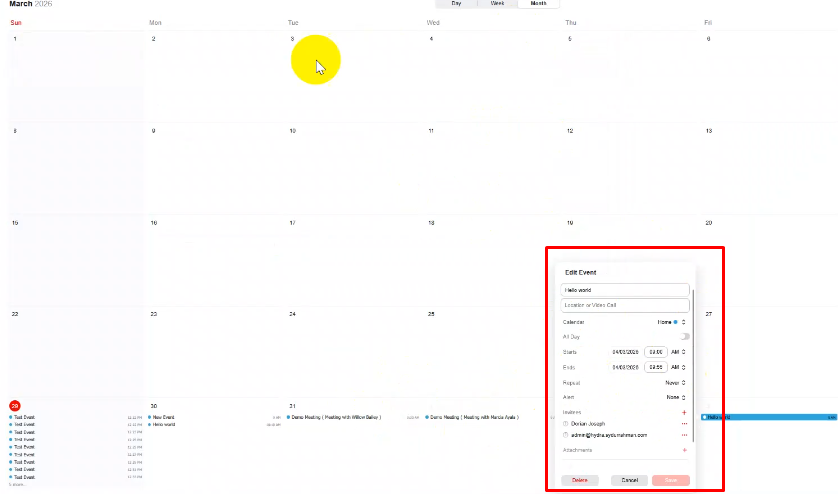
Testing the Apple Calendar Integration #
Now, whenever an attendee books a meeting from the front end, their data will automatically be added to the selected Apple Calendar Account. You can view this information by navigating to any date in your Apple Calendar account.