In this article, we will try to explain how to set up Contact Form 7 Country Dropdown with Flag Easily with the help of our Free Addon “Country Dropdown Field”.
Watch Complete Video #
If you need further guidance, watch our video tutorial. It walks you through the entire process of creating a Contact Form 7 country list form step-by-step:
What’s needed #
- Ensure that both Contact Form 7 and Ultra Addons for Contact Form 7 are installed on your WordPress site.
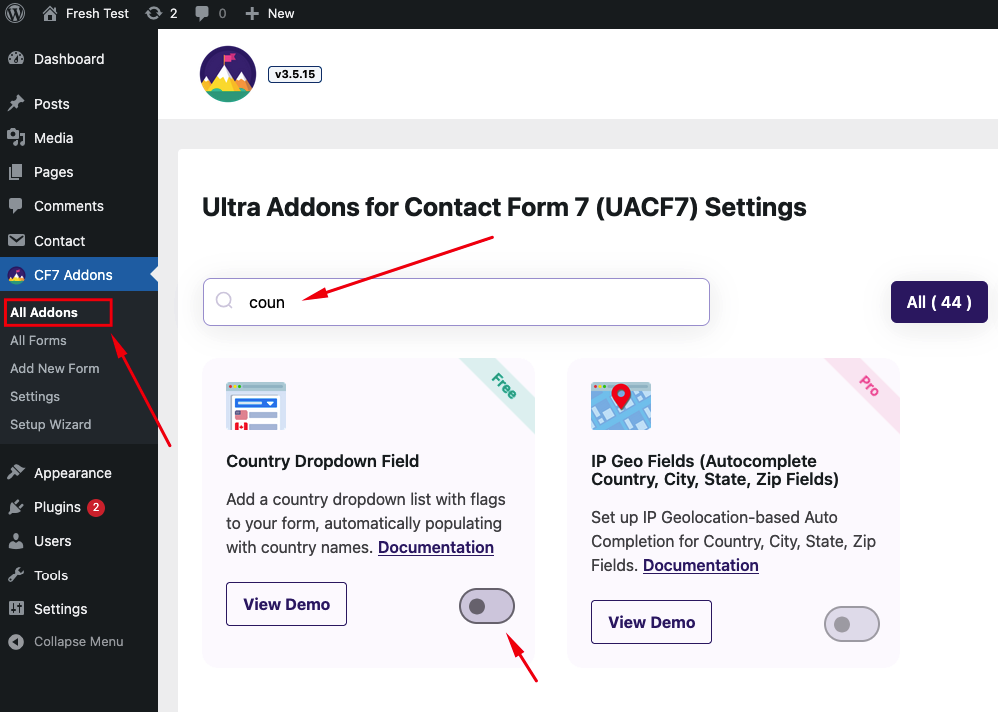
- Navigate to the Ultra Addons section in your WordPress Dashboard, and enable the “Country Dropdown Field” checkbox/toggle.
What is Contact Form 7 Country Dropdown field? #
The Contact Form 7 Country Dropdown Field is a feature that allows you to easily add a dropdown list of countries to your contact forms. This dropdown can be used to let users select their country from a predefined list, enhancing the user experience by providing a convenient way to enter location information.
Live Example of a Country List Form #
In this tutorial, we’ll create a Contact Form 7 with a country dropdown, similar to the example below. Follow these steps to create your own form.
Visit our main demo to see all the supported fields for the Contact Form 7 Country Dropdown field.
Creating a Contact Form 7 Country Dropdown with Flags #
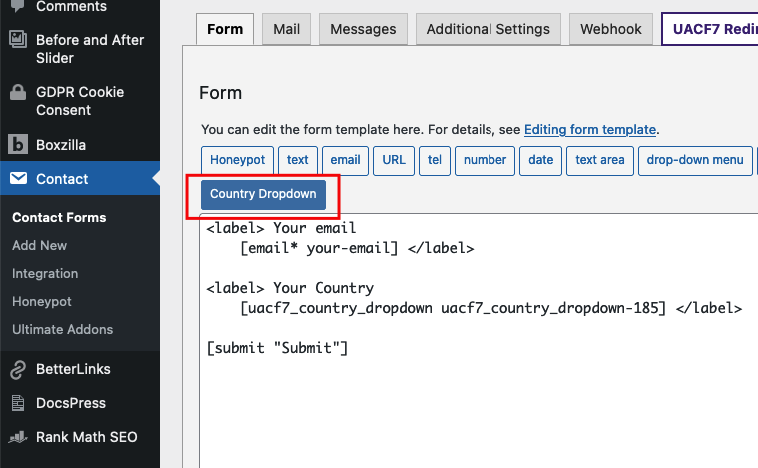
Go to Contact -> Add New in your WordPress Dashboard to create a new form. You will see a contact form editor with a “Country Dropdown” button.
Choose your Country List #
Click on the “Country Dropdown” button. This will give you options to add a list of countries to your contact form.
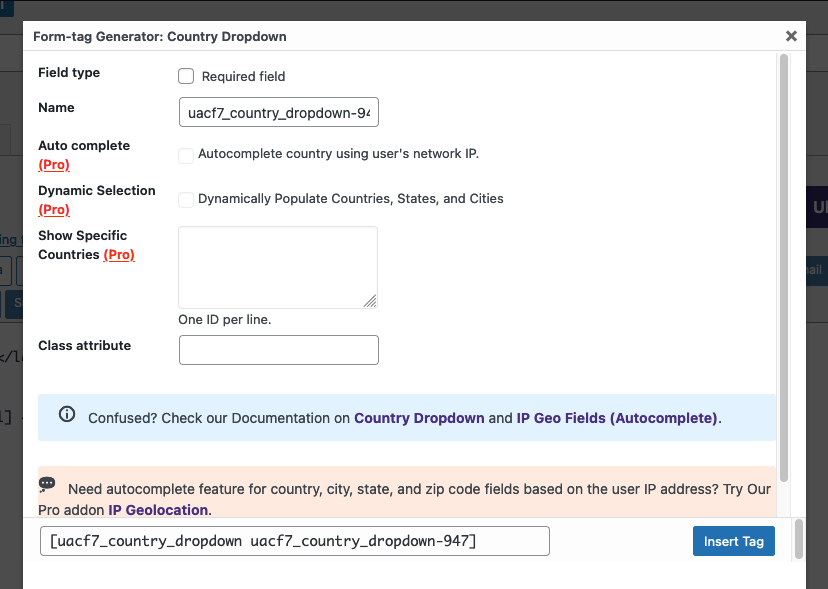
On the popup settings panel, you’ll find the following options:
- Field Type: Decide if this dropdown should be a required field. Check the box if you want to make it required.
- Name: This field is auto-generated, but you can rename it to suit your needs.
- Auto Complete, Only Countries, Default Country: These are Pro features. If you upgrade, the system can automatically detect the user’s location via IP and fill in the country name.
- Class Attribute: Add a custom class if needed.
Insert Tag #
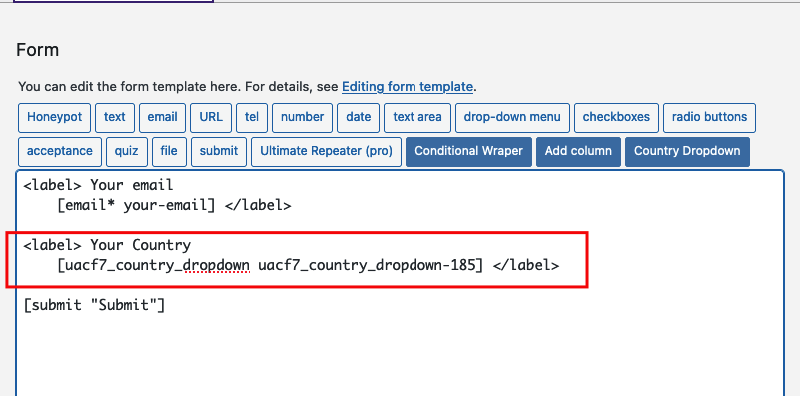
Click the “Insert Tag” button, and the tag will be added to your editing panel.
Add other fields (if needed) #
We are almost done. You can add additional fields like name, email, or URL as needed.
Mail Setup #
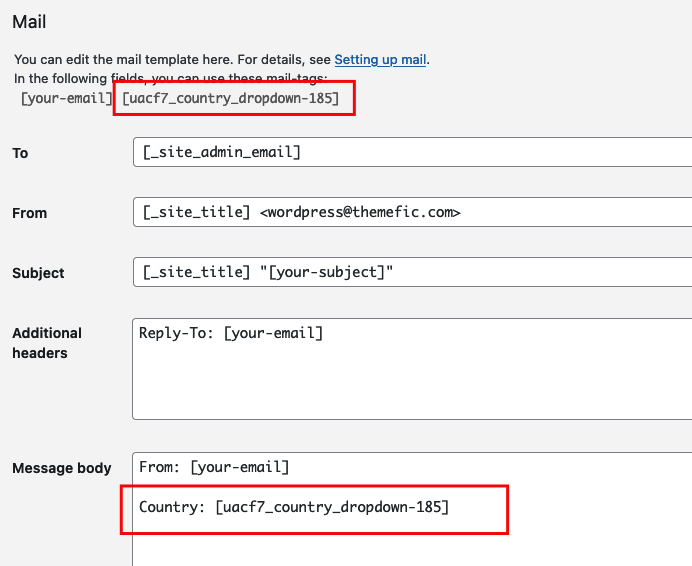
After adding all the necessary fields, ensure you properly set up the mail tags to receive the country information via email:
- Click the Mail tab in the form editor.
- Enter the email address where you want to receive submissions in the “To” box.
- Copy the Country Dropdown Tag from the suggested mail tags and place it inside the message body.
- Make sure to include tags for all other fields as well.
Copy the Shortcode #
Your form is now ready. Click “Save” and copy the Contact Form shortcode.

Time to Publish #
Paste the shortcode into your desired Pages, Posts, Custom Post Types, or Sidebars. The result should look like the example form above.
Looking for Autocomplete Country, City, State, Zip Fields? #
UACF7 Pro version’s Autocomplete Addon allows you to set IP Geolocation-based Country, City, State, and Zip fields on Contact Form 7. These fields will automatically complete based on the user’s IP address. You can also select specific countries and set a default country in the dropdown. Check out our live demo to see this feature in action.
Full Form Code #
Here is a sample code of our above form:
<label> Your email
[email* your-email] </label>

<label> Your Country
[uacf7_country_dropdown* uacf7_country_dropdown-70] </label>

<label> Your message (optional)
[textarea your-message] </label>

[submit "Submit"]
Still Not Clear? Please contact us. If you are a free User, you can open a ticket from here. If you are a pro user, you can open a ticket from here.
Hi, could you add the option to edit/translate the “Select a Country” text showing up frontend with the dropdown ?
Hello Jul, Thank you for bringing this to our attention. I have taken note of this and forwarded this to the dev team for resolution.
Hi, thank a lot. We tried translating the string with our polylang plugin but it’s not found. Any idea if you can fix this easily with next release ?
Hello Jul, this solution will be released on the next update.
Hi, We launch the website tomorrow, no update since your last message. Would you please push the update so as we can at least translate the “Select a Country” string in Poedit !