Tour Setting > Itinerary
Title of the Section #
This text will appear as the heading for the Tour Itinerary section on the frontend of your website.
Create your Travel Itinerary #
This section allows you to build your tour itinerary in a day-by-day format. Click the “Add New Itinerary” button to create a new section for each day or specific time slot within your tour.

Within each Itinerary Section: #
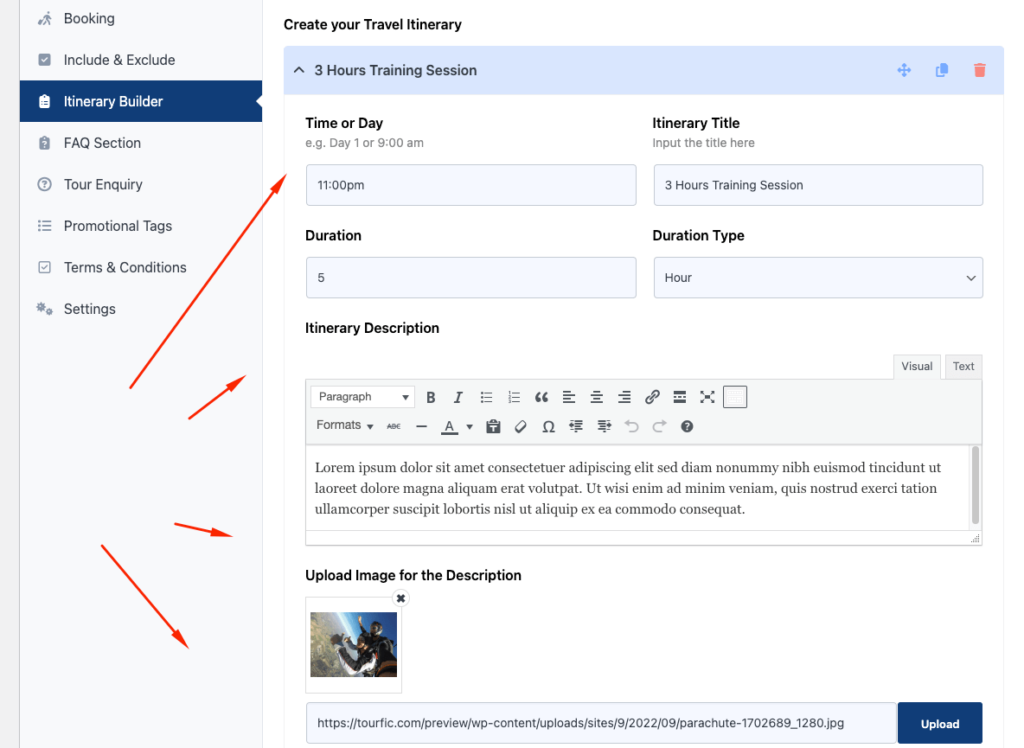
Time or Day: Specify the itinerary section as a specific time (e.g., 9:00 AM) or a general day (e.g., Day 1).
Itinerary Title: Provide a title for this Itinerary in the text field.
Duration (Pro Version): Define the estimated duration of the itinerary section using hours and minutes. This helps to gauge the time commitment involved in each activity or location.
Duration Type (Pro Version): Select the unit of time for the duration (e.g., Hour, Minute).Itinerary Description: Provide a detailed textual description of the planned activities, locations, or events for that part of the tour. Here, you can elaborate on timings, logistics, and any essentials.
This is where you can input the description in the backend. Additionally, there are tools provided for you to format the text as you like it.
Upload Image for the description: Users can upload an image that visually complements the itinerary section’s content. This can be a landmark photo, an activity image, or anything that visually represents the planned experience. This option is available in both Free and Pro versions).
You can click on the Upload button to open the Media Library and then choose any existing image or upload the one you want.
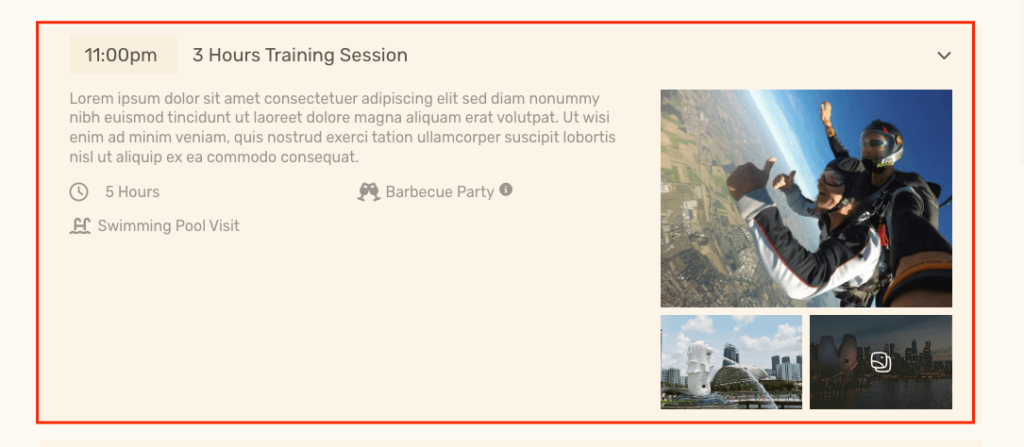
Itinerary Gallery Image (Pro Version): Showcase multiple images to visually describe your itinerary. Include a collection of images to provide a more comprehensive picture of the planned activities and locations.

Custom Itinerary options #
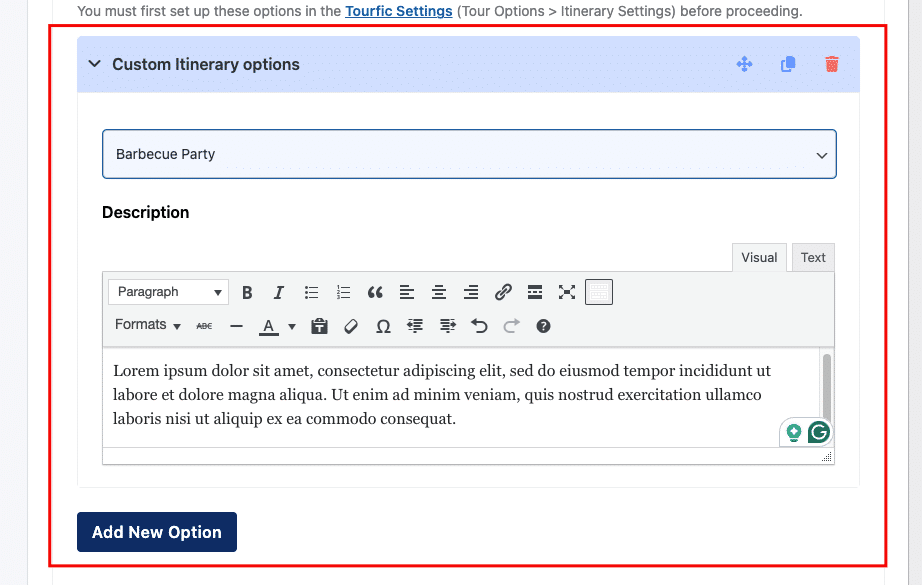
Access custom itinerary options you’ve previously configured in Tourfic Settings (Tour Options > Itinerary Settings). These might include things like transportation types, activity levels, or accommodation details, providing further insights into the tour experience.
Click on the Add New Option and then select from the dropdown (Please Select Itinerary Option). You can also provide a detailed description in the text box below.
Meals Included (Pro Version): Access meal options you’ve previously configured in Tourfic Settings (Tour Options > Itinerary Settings). Indicate which meals (breakfast, lunch, dinner) are included within the specific itinerary section.
The meals you’ve added will appear with a checkbox by their side. Click on the meals you’d like to add.
Location: Pinpoint the location of the itinerary activities on a map using latitude and longitude coordinates.
Altitude (Pro Version): Specify the altitude (in meters) of the location. This could be relevant if the altitude is a bit on the extreme side.
Besides that, we have a chart option in the Frontend section. This allows you to visualize your altitude values better.
Elevation Input (Pro Version): Choose the unit of measurement for the altitude (e.g., Meter).
Location Latitude: Enter the latitude coordinate for the location.
Location Longitude: Enter the longitude coordinate for the location.
Latitude and longitude are only needed for itinerary maps.

Itinerary Downloader Settings #
These settings allow you to configure options for the downloadable itinerary PDF (available in the Pro version). The option to download it is also available in Settings Panel.
Global Settings: These are the default settings applied to all tours regarding Downloadable Itinerary.
Custom Settings: Here you can override the global settings for this specific tour.
Within Custom Settings ( View global settings ) #
Tour Itinerary Downloader Section
Itinerary Downloader Title, Description, and Button Text: In these boxes, you can determine the title for the downloader, followed by the description below it, and then the download button text.
Thumbnail Settings in PDF #
You can change the thumbnail’s size that customers will see when they download the itinerary PDF. You can set height and width for pdf thumbnail
Default Company Info in PDF #
You can change the default company info that customers will see in the downloaded PDF. Here, you can upload the company logo from your WordPress image gallery, and add the company description, email address, address, and phone number.
Note: this will be the company info customers see unless the vendor doesn’t change it in the Single Tour Settings page. as an admin you can change the access permission for vendors
Talk to Expert Section #
If you enable the Talk to Expert Section in PDF, it’ll show the contact information of the designated expert in the downloaded itinerary. You can change the section label, add the expert name, email address, and phone, and upload an avatar image. Additionally, you can enable information for Viber and WhatsApp contacts.
Note: Global settings will apply to all tours. If you select “Custom,” the settings will only apply to that specific tour.
