In this section, you can set up a personalized cancellation policy for your car bookings, giving you more control over how cancellations are managed. For example, you might want to offer free cancellation for up to 10 hours after booking, but after 7 days, apply a 10% cancellation fee.
Cancellation Condition #
Do you want to show this section on the front end? #
Enabling this option will display the cancellation policy, so users can review it before completing their booking.
Add Cancellation Condition #
When you click Add New Condition, a few options will appear to further customize your policy. Let’s dive into these options:
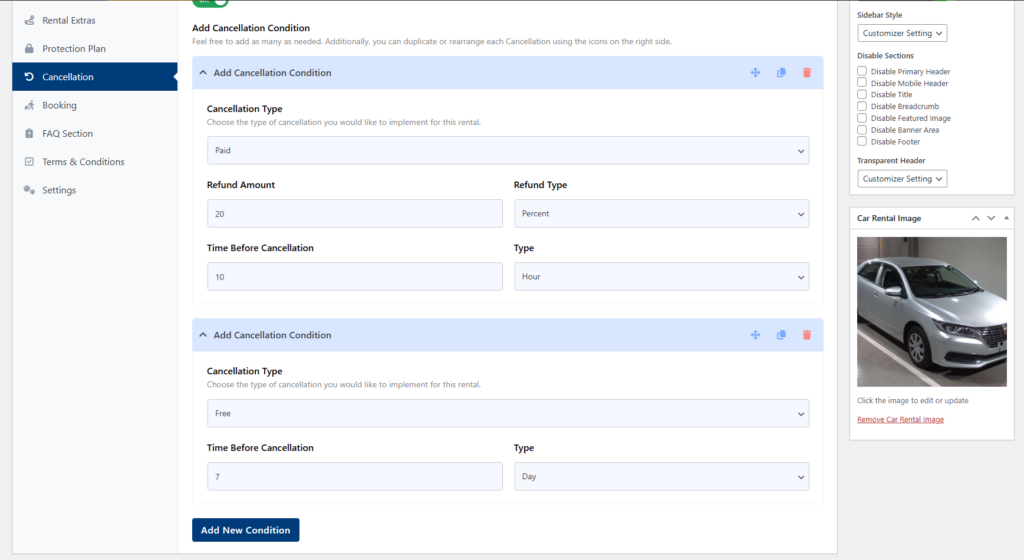
- Cancellation Type: This setting lets you choose between free and paid cancellations. For example, select Free for cancellations within 10 hours and Paid for cancellations beyond that timeframe, where you might apply a 10% fee.
- Time Before Cancellation: Set the number of days or hours that define when each condition applies.
- Type: Choose Day or Hour as the time unit for the condition, based on the flexibility you want to offer.
For the “Paid” cancellation type, there are a few extra options to help you manage refunds:
- Refund Amount: Enter the amount you’d like to refund if a user cancels the booking. Suppose in our example case, it will 90 percent.
- Refund Type: Choose the type of refund—either as a “Percentage” of the booking amount or as a “Fixed” amount.
Here’s my backend options for the Cancellation.
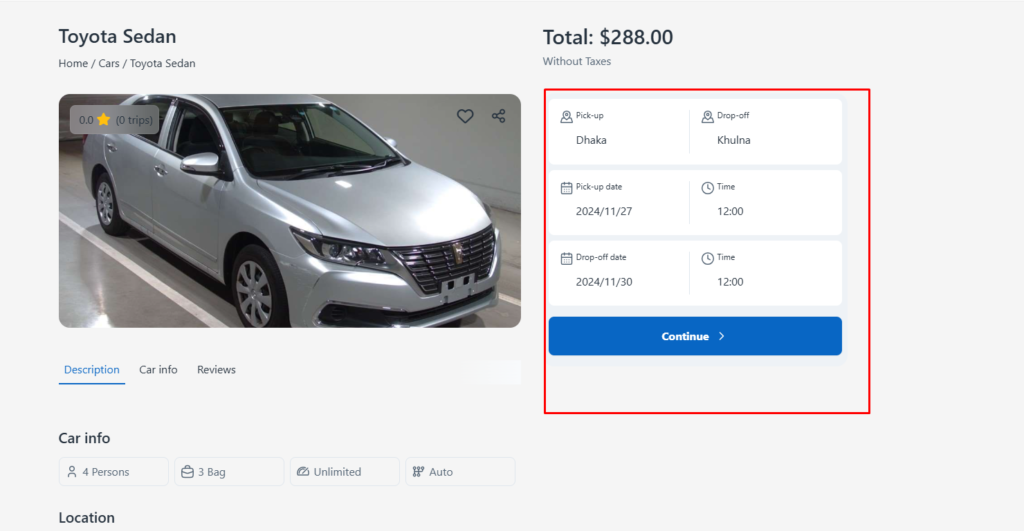
And here’s the frontend view.
Please Note: The cancellation policy with the shortest notice period will appear at the top of the booking popup.
How Cancellation Condition Works? #
First, you need to set up the cancellation conditions in the backend, as discussed earlier.
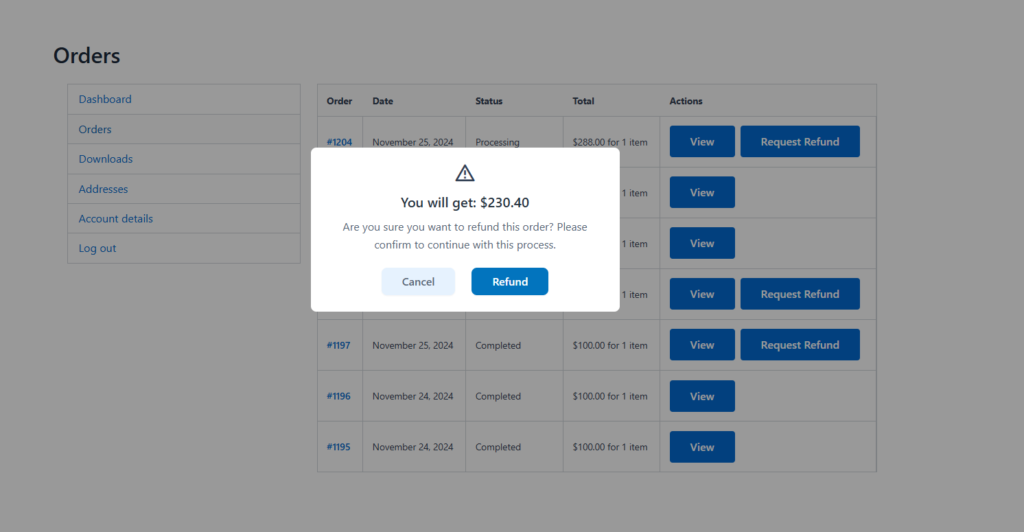
In the client portal (e.g., yoursite.com/my-account), customers will see an option to “Refund Request”. The system will apply the conditions based on the time period between the booking time and the refund request, ensuring that the most favorable refund condition for the client is applied on that day.
I know this might sound a bit confusing, so let’s break it down step by step for better clarity.
Step 1: Start by specifying the cancellation conditions in Single Apartment > Booking > Cancellation Condition. This step ensures the rules are properly set for the system to calculate refunds based on the booking and cancellation timeline.
Here are my cancellation conditions,

Step 2: Now, let’s say a customer books your service from 27/11/2024 to 30/11/2024.

Step 3: In the client portal, customers will see an option called “Refund Request”. When someone clicks on this button, a popup will appear displaying the refundable amount. The refund will be processed and confirmed once the customer clicks the “Refund” button in the popup.

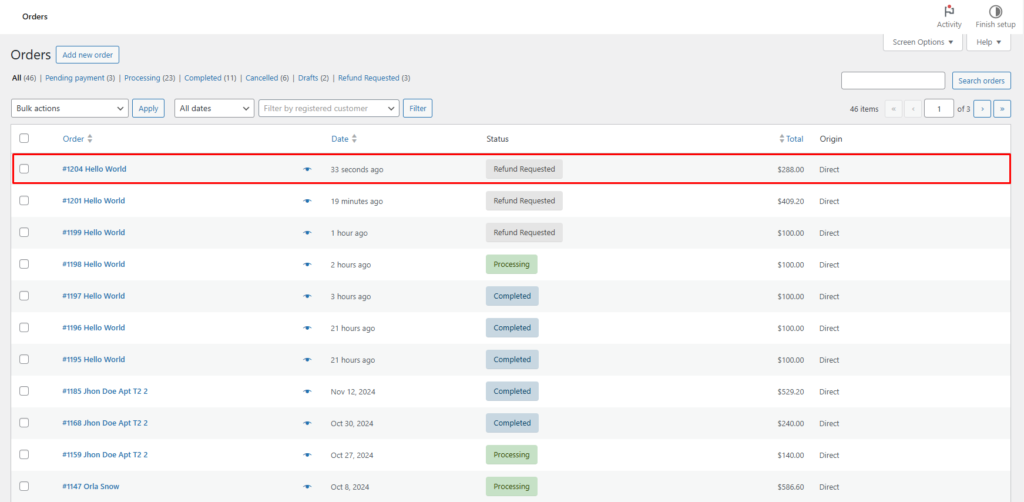
Step 4: Navigate to WooCommerce > Orders, where you’ll find orders with the status “Refund Requested”. You can process the refund for the user directly from this section.

