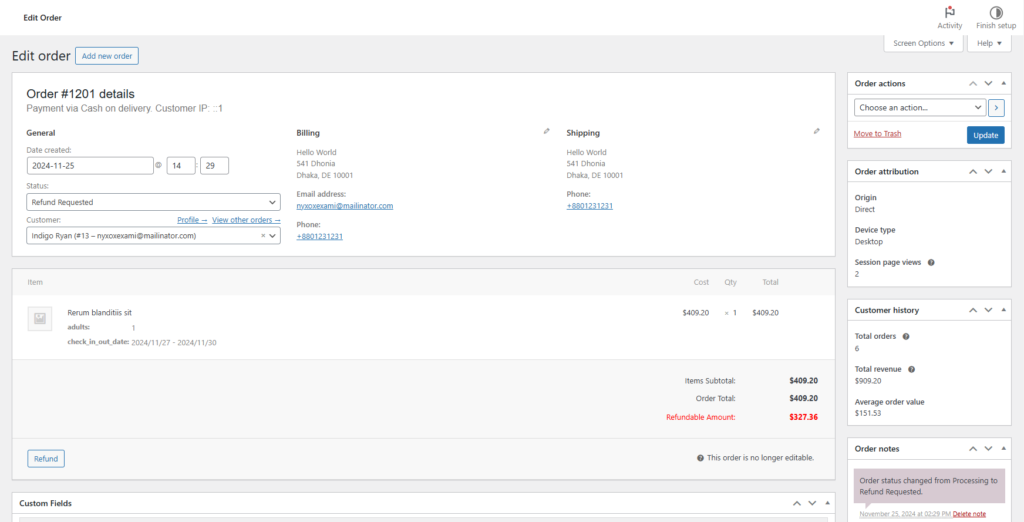
This section allows you to modify the booking experience for customers.
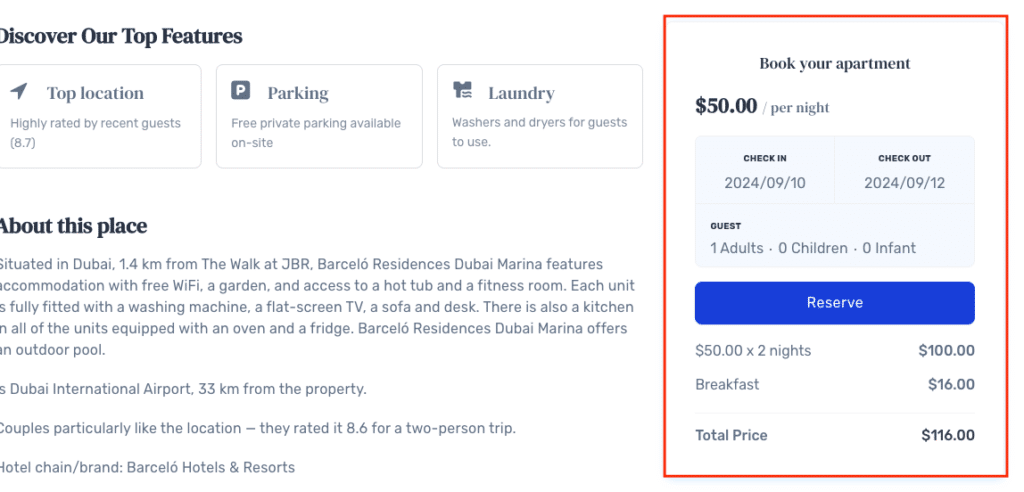
Section Title #
This will be the header of the booking section.
Pricing Type #
You can choose to have two types of pricing strategies — per person or per night.
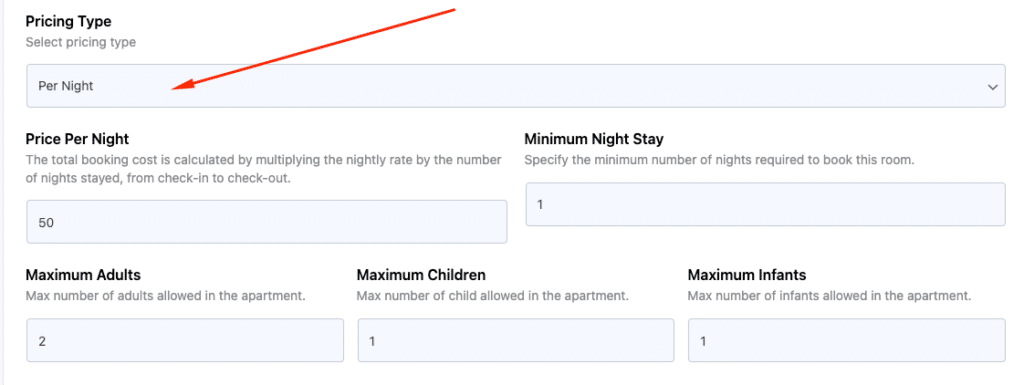
Per Night #
If you choose the Per Night option, you’ll be presented with the settings below
Price Per Night #
This is the standard pricing for the apartment listings for every night. Simply write the number here, and the currency will be automatically added.
Per Person #
These are the settings presented if you choose the per-person option.
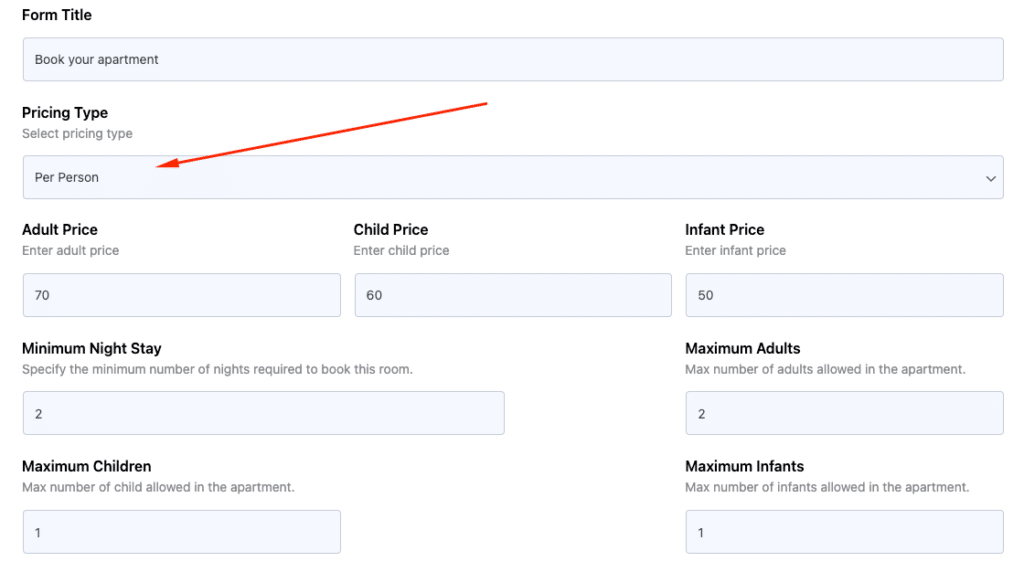
These are the settings presented if you choose the per-person option. As shown above, you can separately select the prices for adults, children, and infants. This allows for total control over the pricing structure.
Minimum Night Stay #
You can also determine a minimum number of nights a customer must stay in the apartment.
Maximum Number for Adults, Children, and Infants #
You can determine the highest number of adults, children, and infants separately. This allows for the highest level of control for the apartment listings.
Additional Fees #
If you provide any additional services or apply any added charges, this is the section to do so. You can add as many sections as you want here, with control over the fee type. It is also available in a free version. But you will have some limitations.
- First, add a new additional fee category by clicking the add new button.
- Next, add a label for the additional fee. This is entirely upon your choice.
- In this step, specify the payable amount. Note that the total fee will depend on the next section, which is the fee type.
- The Fee Type determines the payment structure for the additional fees. You get three options — per stay (only once during their total stay), per night, or per person.

Discount Type #
If you provide any discounts for your apartment listing, this is the section to modify it.
Discount Type #
Firstly, you can determine the type of discount provided to customers. Choose either a fixed amount or a percentage, which will change depending on the total expenditure. It’s also possible to turn the discount option off by selecting the none option.
Discount Amount #
Input the discount amount from this portion. Note that you only need to write the amount here. Tourfic will automatically pick either a percentage value or a currency value (depending on the chosen discount type).
Booking Type #
Tourfic allows you to use either WooCommerce’s default booking structure or an external one. Simply choose your preferred one from the dropdown menu.
External Booking #
If you choose External Booking as the booking type, you’ll find some additional options.
- Firstly, you’ll have to input the URL for your external booking. This depends on which external service you’re using.
- You can also hide the booking form from your single apartment page by toggling hide booking form on.
- If you want to hide the pricing from your single apartment page, turn the Hide Price toggle on.
- If you want to add custom query attributes to the apartment listing, turn Allow Attribute on. This allows you to sync the attributes between Tourfic and your external booking website.
Taxable #
If you want tax to apply for the apartment, turn the taxable toggle on.
Tax Class #
Assuming that you’ve turned the taxable toggle on, you’ll now get to choose the tax class. It is only available for Woocommerce tax rate
You can pick one among standard rates, reduced rated, Tourfic rates, or zero rates. Users can further customize their tax class and rates from WooCommerce. Read this document to know how you can do that.

Cancellation Condition (Pro) #
The Apartment Booking section allows you to define cancellation conditions specifically for apartment bookings. If someone books an apartment and later decides to cancel, these conditions will be applied based on the specified time frame.
When you click Add New Condition, a few options will appear to further customize your policy. Let’s dive into these options:
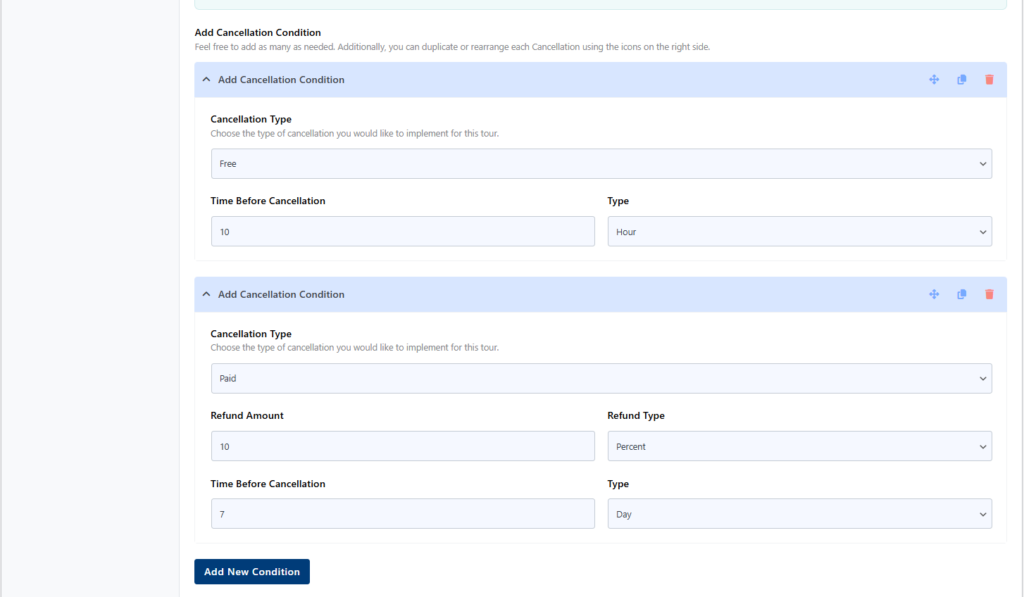
- Cancellation Type: This setting lets you choose between free and paid cancellations. For example, select Free for cancellations within 10 hours and Paid for cancellations beyond that timeframe, where you might apply a 10% fee.
- Time Before Cancellation: Set the number of days or hours that define when each condition applies.
- Type: Choose Day or Hour as the time unit for the condition, based on the flexibility you want to offer.
For the “Paid” cancellation type, there are a few extra options to help you manage refunds:
- Refund Amount: Enter the amount you’d like to deduct if a user cancels the booking. Suppose in our example case, it will 90 percent.
- Refund Type: Choose the type of refund—either as a “Percentage” of the booking amount or as a “Fixed” amount.
Here’s my backend options for the Cancellation.
How Cancellation Condition Works? #
First, you need to set up the cancellation conditions in the backend, as discussed earlier. Once a customer book a service, the time and days will be calculated automatically based on the specified time zone and check-in time.
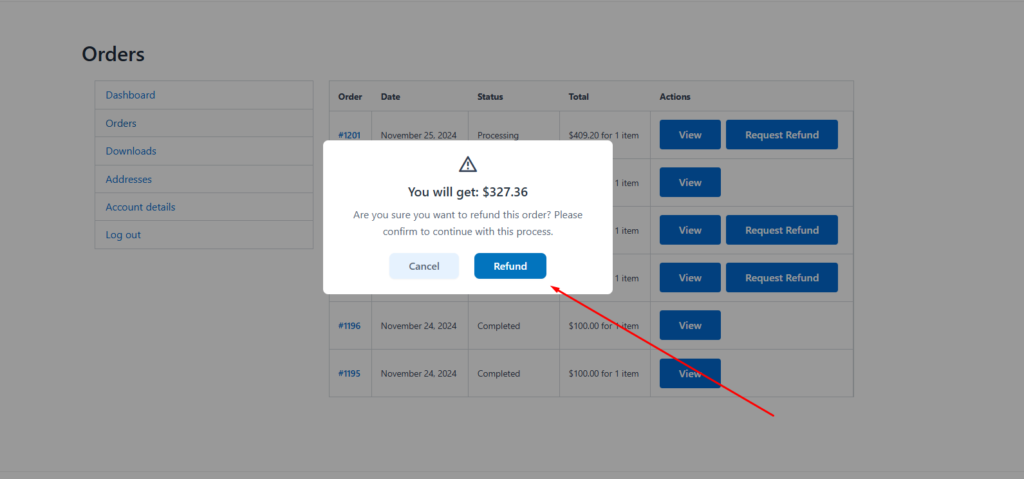
In the client portal (e.g., yoursite.com/my-account), customers will see an option to “Refund Request”. The system will apply the conditions based on the time period between the booking time and the refund request, ensuring that the most favorable refund condition for the client is applied on that day.
I know this might sound a bit confusing, so let’s break it down step by step for better clarity.
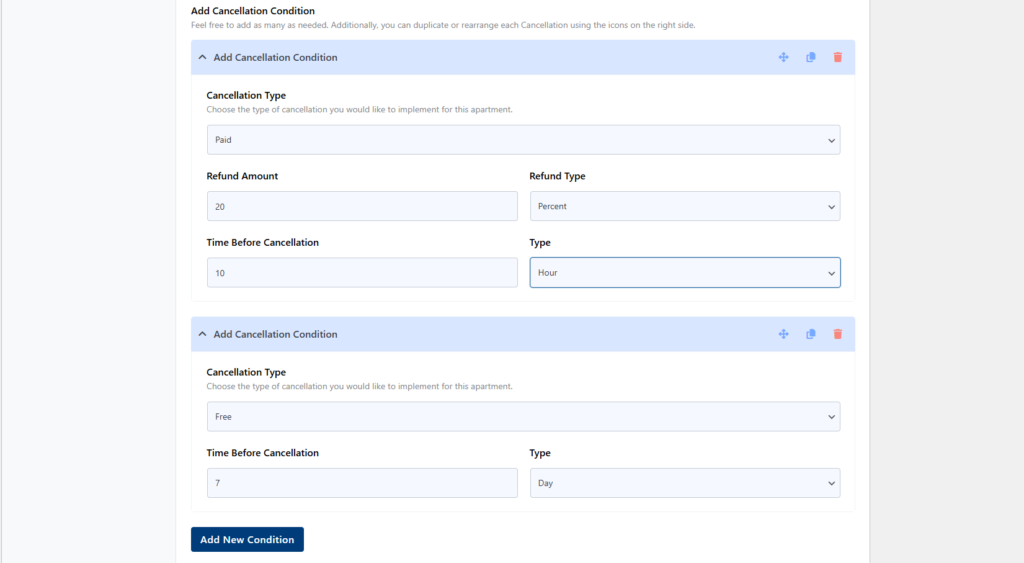
Step 1: Start by specifying the cancellation conditions in Single Apartment > Booking > Cancellation Condition. This step ensures the rules are properly set for the system to calculate refunds based on the booking and cancellation timeline.
Here are my cancellation conditions,
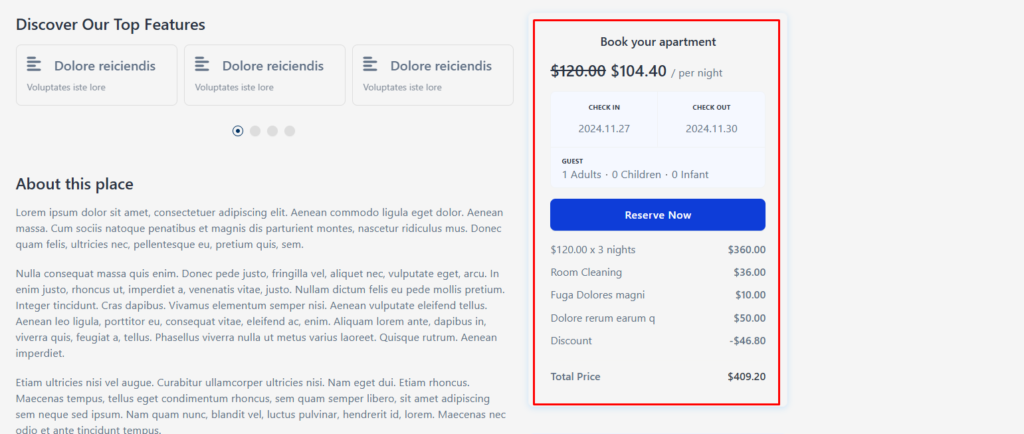
Step 2: Now, let’s say a customer books your service from 27/11/2024 to 30/11/2024.
Step 3: In the client portal, customers will see an option called “Refund Request”. When someone clicks on this button, a popup will appear displaying the refundable amount. The refund will be processed and confirmed once the customer clicks the “Refund” button in the popup.
Step 4: Navigate to WooCommerce > Orders, where you’ll find orders with the status “Refund Requested”. You can process the refund for the user directly from this section.
