In this article we will discuss how to style the placeholder text on your contact form using Contact Form 7 Placeholder styling addon of Ultra Addons for Contact Form 7 Plugin.
Watch Complete Video
If you are still confused, we suggest you watch this video. In this video, we tried to describe the whole step of how to style your Contact Form 7 Placeholder Text:
What’s needed
- Ensure that both Contact Form 7 and Ultra Addons for Contact Form 7 are installed on your WordPress site.
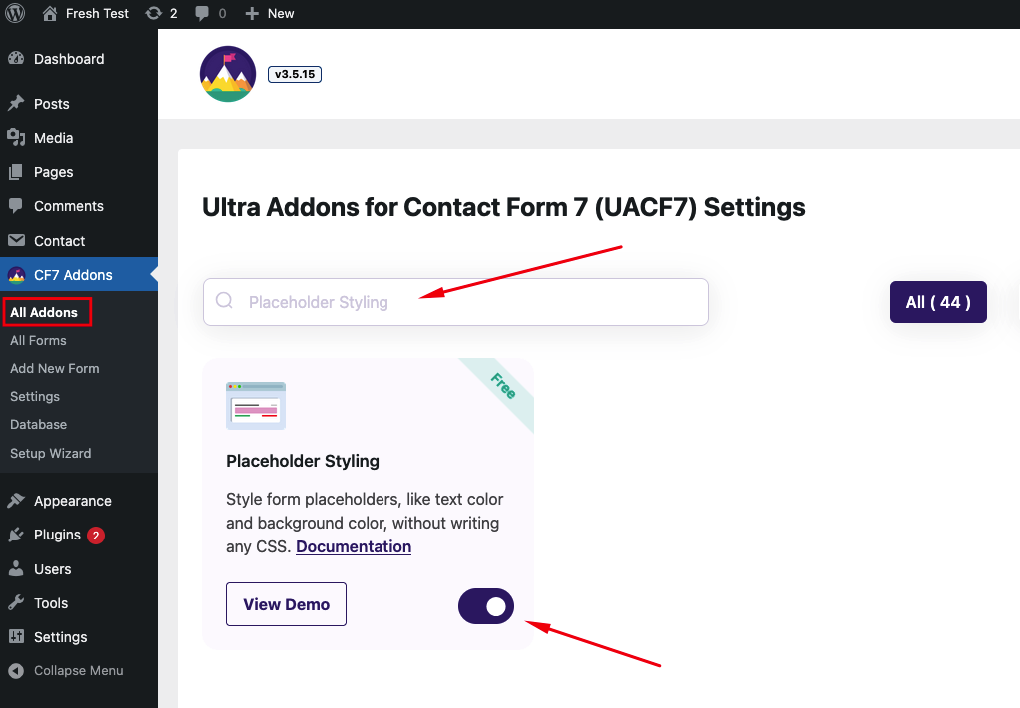
- Navigate to the Ultra Addons menu in your WordPress Dashboard, enable the “Placeholder Styling” checkbox/toggle.
What is Contact Form 7 Placeholder Styling
Placeholder styling in Contact Form 7 (CF7) refers to the ability to customize the appearance of placeholder text within form fields. Using the Placeholder Styling addon in Ultra Addons for Contact Form 7, you can adjust various aspects of the placeholder text, such as its color, background color, font style, font weight, font family and size, without needing to write any custom CSS.
CF7 Placeholder Styling – Live Example
In this tutorial, we’ll show how to style placeholders in Contact Form 7, as demonstrated in the example below. You can easily create your own form by following these steps.

Visit our main demo to see all supported fields for Contact Form 7 placeholder text color and other styles.
How to Add a Placeholder in Contact Form 7
Go to Contact -> Add New in your WordPress Dashboard and add a title for your form.

Add a Text Field
- Add a text field to your form (e.g., a telephone number field). Select Tel from the admin panel and in the pop-up, add a default value (e.g., “Your Number”).
- Tick the box labeled Use this text as a placeholder of the field to apply the placeholder.


Insert tag
Click Insert Tag to add the placeholder tag inside the admin panel and save your changes.
Add Other Fields
Once you’ve added your placeholder field tags, you can include additional fields (e.g., name, email, address) based on your needs.
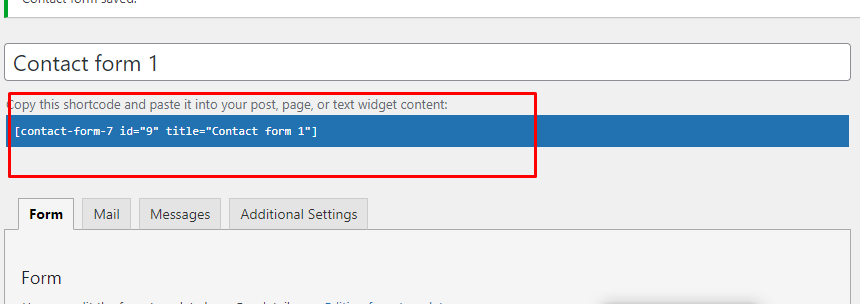
Copy the Shortcode
When your form is ready, click Save and copy the Contact Form shortcode.
Time to Publish
You can either create a new page or add the form to an existing page by pasting the shortcode. In this example, we’ll add the form to a sample page and save the changes.

This will show you a Contact Form just like given below.

That’s how you can add a placeholder in Contact Form 7. Now, let’s design the placeholder using our placeholder styling addon.
How to Design a Placeholder in Contact Form 7
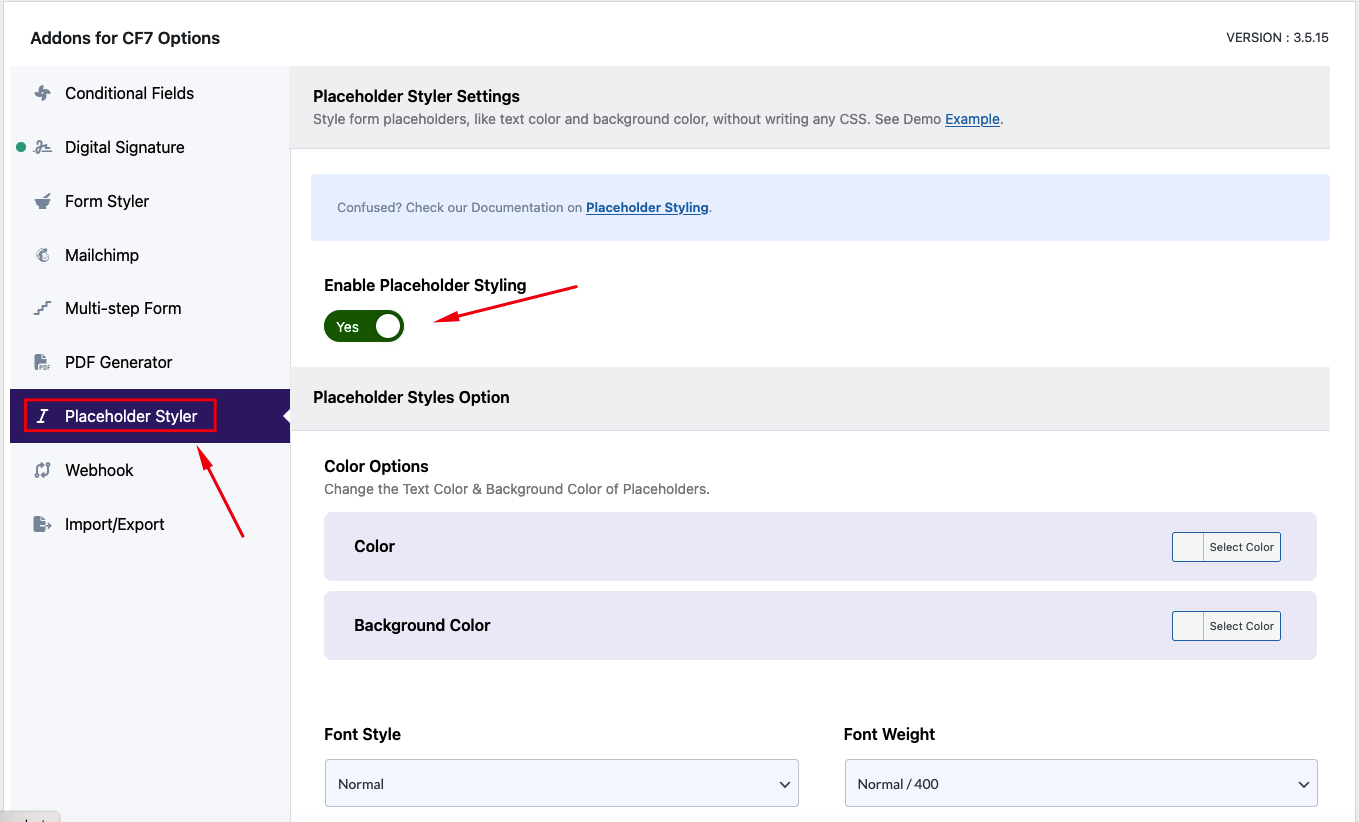
Scroll down to the Ultra Addons for CF7 Options section and click the Placeholder Styler tab.
- Tick the Enable Placeholder Styling toggle to activate the feature.
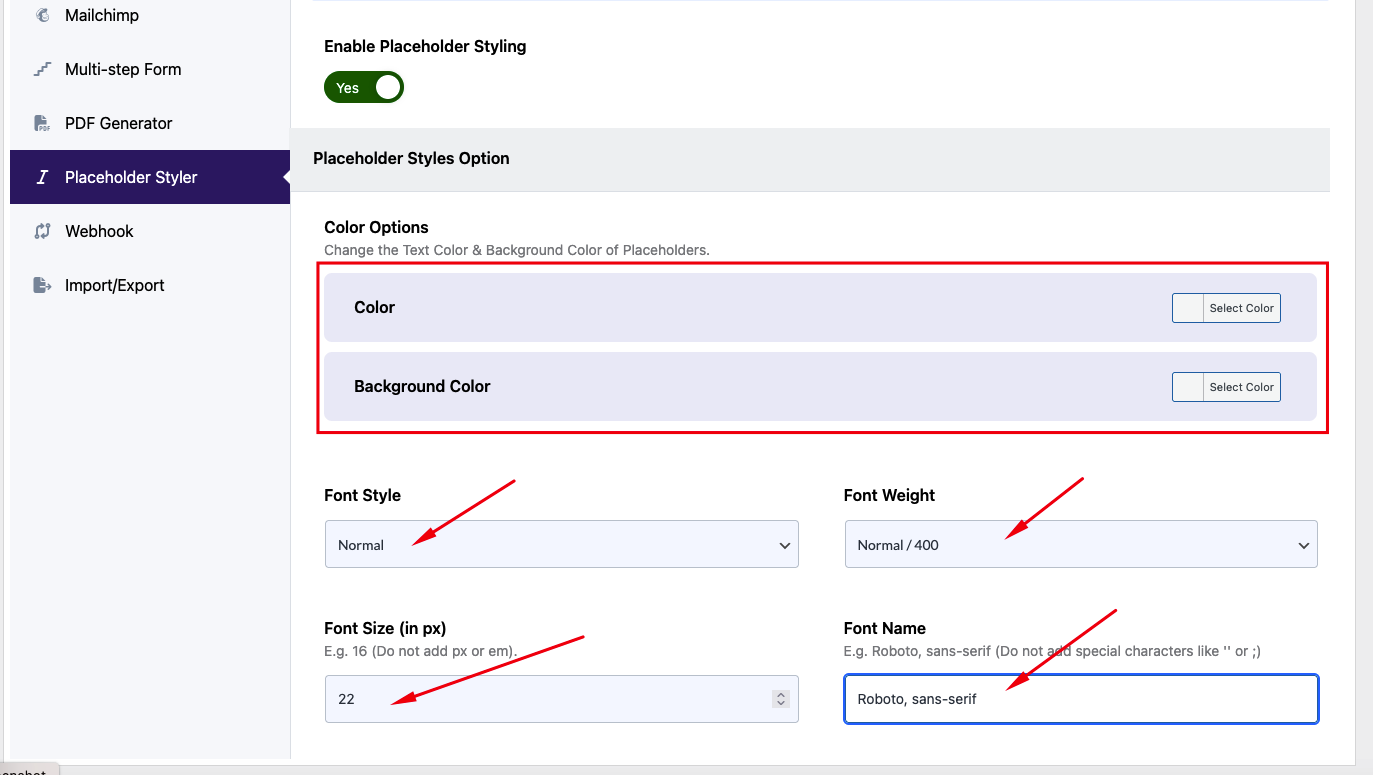
- You can now customize various options such as the color, background color, font style, and font weight of your placeholder text.
- You can also adjust font size and choose a specific font family by entering the correct name. Make sure to Save Changes after you’re done.
As demonstrated in the example below, the styling allows you to change the appearance of the placeholder text, and you can see the result on the frontend. (Note: The template shown here may vary based on the themes you use, we used a basic one for demo purpose)

Still Not Clear? Please contact us. If you are a free User, you can open a ticket from here. If you are a pro user, you can open a ticket from here.