Many websites rely on user-generated content, where users or contributors submit posts without requiring backend access. In such cases, manually creating posts from the WordPress admin panel can be time-consuming. The Frontend Post Submission feature simplifies this process, allowing users to submit posts directly from a form without accessing the backend.
Video Guide
Contact form 7 to Blog
Contact form 7 to Custom Post Type
Contact form 7 to ACF
What is Frontend Post Submission in Contact Form 7?
Frontend Post Submission in Contact Form 7 allows users to submit content, such as blog posts, custom post types, or other entries, directly from a form on your website—without accessing the WordPress dashboard. This feature is useful for guest post submissions, user-generated content, job listings, product submissions, or any scenario where you need users to submit content from the frontend.
- Create Posts from Form Submissions – Convert form entries into blog posts, product listings, or job postings.
- Supports Custom Post Types – Submit data to pages, posts, portfolios, testimonials, or WooCommerce products.
- File Upload for Featured Images & Attachments – Allow users to upload media as part of their submission.
- Custom Field Support – Map form fields to post title, content, categories, tags, and custom fields.
What’s Needed
- Ensure that both Contact Form 7 and Ultimate Addons for Contact Form 7 are installed on your WordPress site.
- Download and install Ultimate Addons for Contact Form 7 Pro from our client portal.
- Activate your license key.
- Go to Ultimate Addons > All Addons page in your WordPress dashboard and enable the Frontend Post Submission Addon.
Using Frontend Post Submission
Once you’ve activated the addon, move over to the editing section of the Contact 7 form.
Frontend Post Submission – Tags
Now you will notice some new tabs appear in the form editing panel. These tabs allow you to map form fields directly to post attributes, making it easy to create posts from user submissions.
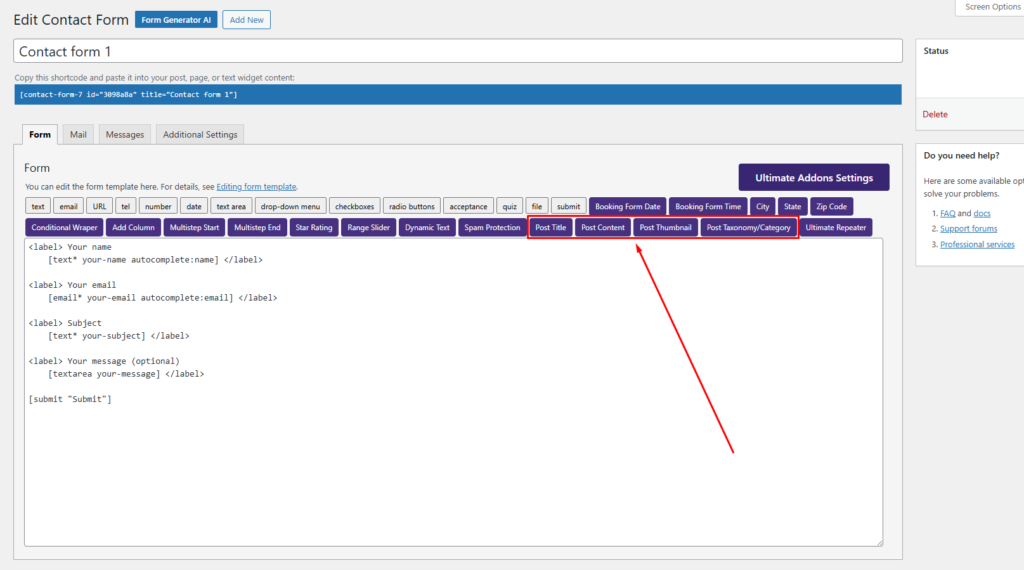
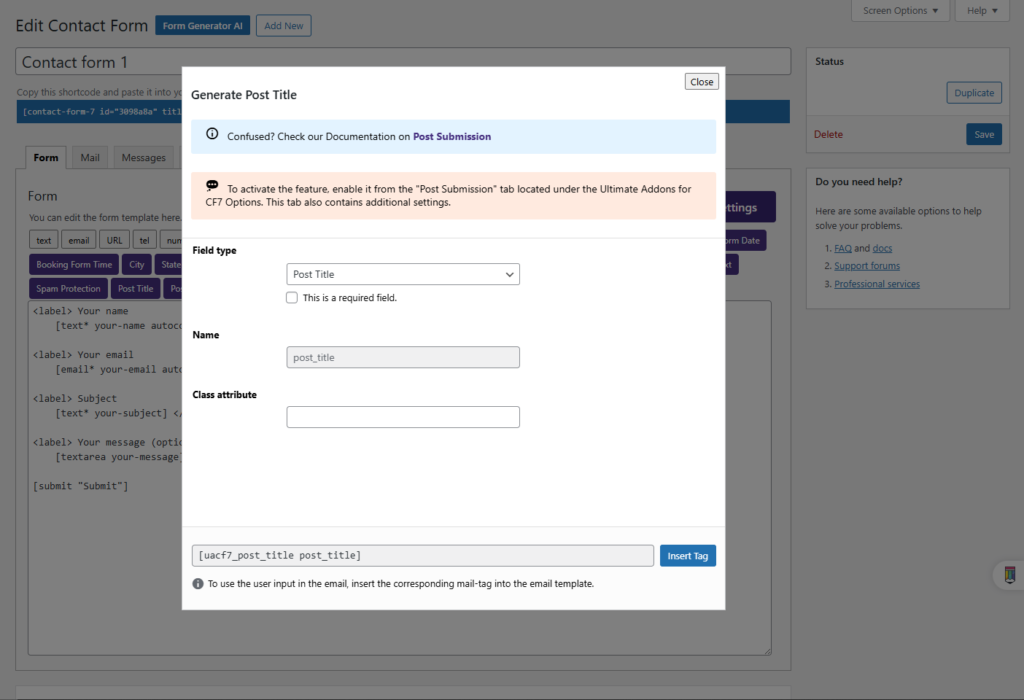
Post Title
The Post Title tab in the Post Submission Addon allows you to map a form field as the post title. This means that whenever a user submits a form, the value entered in this field will automatically be set as the title of the post created from the submission.
Post Content
The Post Content tab in the Post Submission Addon allows you to map a form field to the post content. This means that when a user submits the form, the text they enter in this field will be automatically saved as the body of the post in WordPress.

Post Thumbnail
The Post Thumbnail tab in the Post Submission Addon allows users to upload an image that will be set as the featured image of the submitted post. This means when a user submits a post using the form, the uploaded image will automatically be assigned as the post thumbnail in WordPress.

You can specify file type on Acceptable file types filed.
Post Taxonomy/Category
The Taxonomy and Category option in the Post Submission Addon allows users to assign categories, tags, or custom taxonomies to their submitted posts. This ensures that posts are organized properly within your WordPress site.
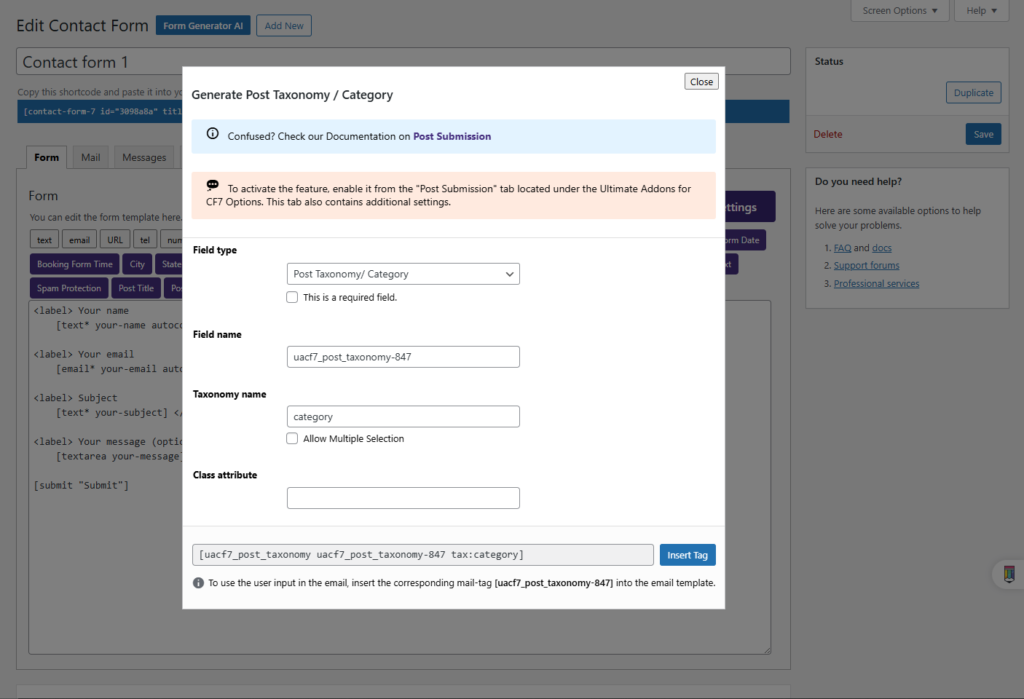
you can specify a taxonomy name and allow users to select multiple categories when submitting a post.
Frontend Post Submission – Configuration Options
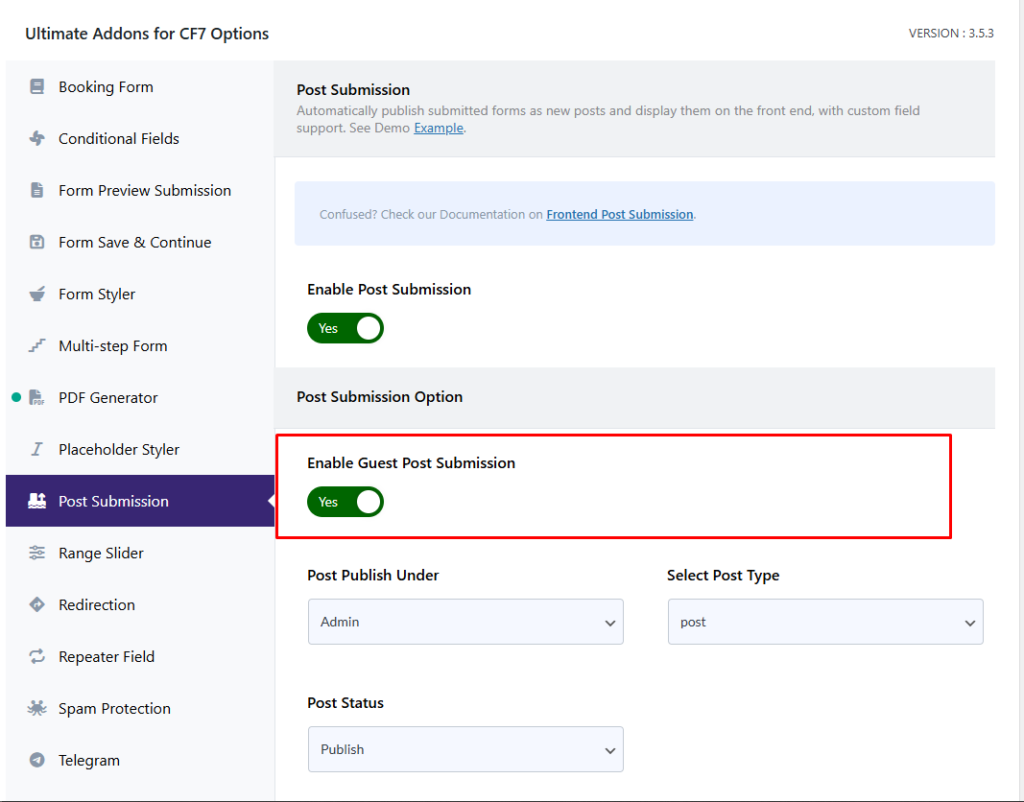
Beyond the form editing panel, Ultimate Addons for Contact Form 7 (UACF7) provides additional options to fine-tune how posts are created from form submissions. These settings can be accessed under the Post Submission section in the UACF7 options panel. To enable the Post submission, go to the UACF7 addon settings > Post Submission and then enable the post submission. Please note without enabling this option, the post submission will not work.
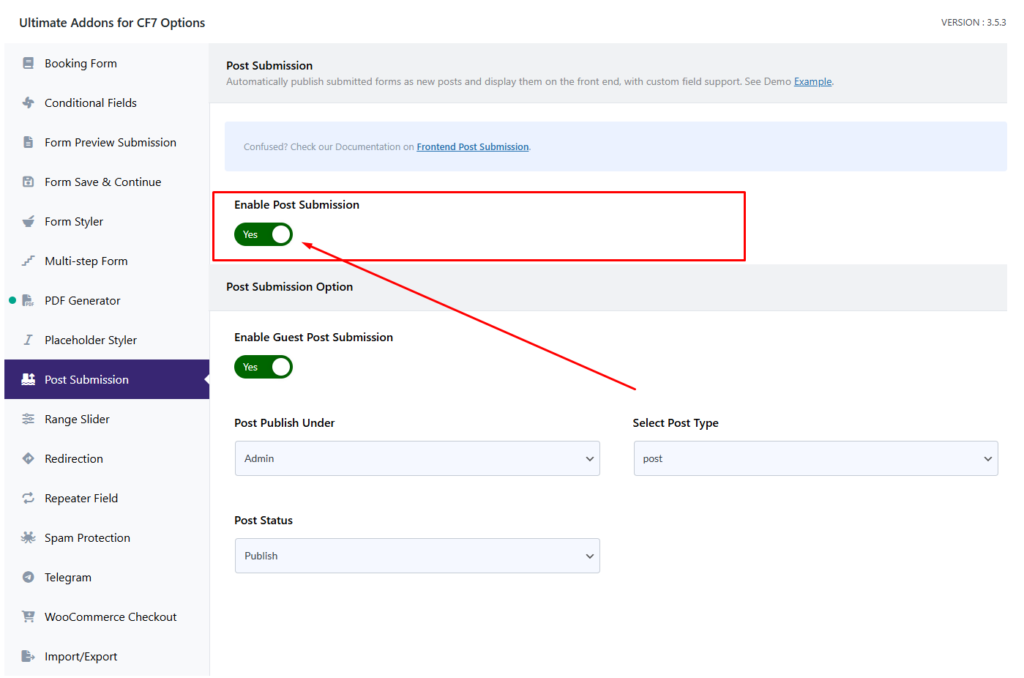
After enabling the option, you will find several options. Let’s talk about the options.
Enable Guest Post Submission
With the Post Submission Addon in Ultimate Addons for Contact Form 7 (UACF7), you can allow guest posting or anonymous submissions without requiring users to log in.
By enabling this option, submitted posts will be published under the admin account, and the original user will remain anonymous. This feature is particularly useful for websites that accept guest contributions, community posts, or public submissions without requiring user registration.
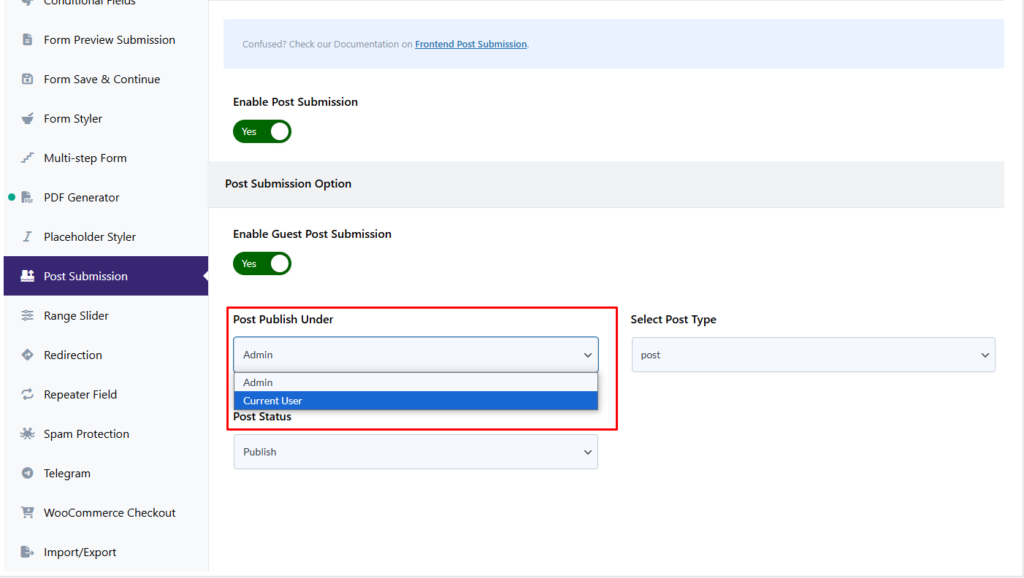
Post Publish Under
With the Post Submission Addon in Ultimate Addons for Contact Form 7 (UACF7), you have the flexibility to assign submitted posts to a specific user account.
Using this option, you can select a default author from the list of all registered users on your website. This is useful when you want all guest submissions to be attributed to a particular user, such as an admin account or a generic contributor profile.
Select Post Type
With the Post Submission Addon in Ultimate Addons for Contact Form 7 (UACF7), you can specify which post type should be used when a user submits content through the frontend form.
This option allows you to choose from all available post types on your website.

Post Status
With the Post Submission Addon in Ultimate Addons for Contact Form 7 (UACF7), you can control the status of posts when users submit them from the frontend form.

Showing all the fields made by ACF on your post necessitates modifying the post template you’re using, which has to be done outside the Post Submission plugin.
Live Example of CF7 Post Submission
If you want to see how the frontend post submission works in real-time, you can check out our live demo form at the following link. This interactive demo allows you to experience how frontend post submission works.
Click here to test the Post Submission Addon in action!
Still Not Clear? Please contact us. If you are a free User, you can open a ticket from here. If you are a pro user, you can open a ticket from here.