In this article, we will try to explain how to set up Conditional Redirect for Contact Form 7 with the help of our Pro Addon “Contact Form 7 Conditional Redirect”.
Watch Complete Video #
If you’re still unsure, we recommend watching our tutorial video, where we explain the entire process of setting up the Contact Form 7 Conditional Redirect:
What is Contact Form 7 Conditional Redirect? #
One of the common features of a form is to redirect the user to a thank you page after form submission. But what if you want to redirect to different pages based on each user? With the Contact Form 7 Conditional Redirect feature, you can guide users to a designated page based on their choices after they submit the form. For instance, if a user chooses “Yes” from a dropdown, they’ll be taken to a specific page, while selecting “No” redirects them to a different one. In this tutorial, we will try to show how to create such a Contact Form 7 redirect on submit.
What’s needed #
- Ensure that both Contact Form 7 and Ultimate Addons for Contact Form 7 are installed on your WordPress site.
- Download & Install Ultimate Addons for Contact Form 7 Pro from our Client Portal.
- Activate your license key.
- Go to Ultimate Addons menu in your WordPress Dashboard and enable both Redirection & Redirection Pro Checkboxes.

Conditional Redirect for Contact Form 7 – Live Example #
In this tutorial, we will create a Contact Form 7 form that redirects users to different pages based on their input, similar to the example provided below. You can easily replicate this form by following the same steps. In the form, if a user selects “Yes” from the dropdown, they will be redirected to a specific page, and if they select “No,” they will be redirected to a different page.
[Note: the redirection page will open in a new tab]
Check our main demo to see all the features of our Conditional Redirect for Contact Form 7 addon.
Let’s Create Our Condition-based Redirection #
Go to Contact -> Add New in your WordPress Dashboard to create a new form.
Setup your Conditions & Fields #
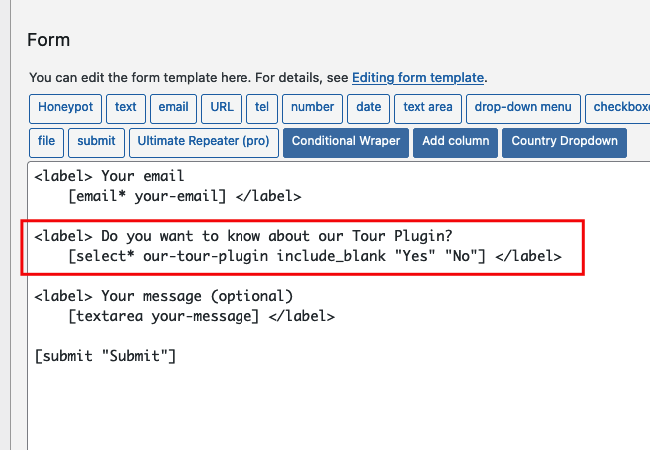
While still on the form editor, add all the necessary fields. Then, add the conditional field that will determine the redirection. In the above form, we used a dropdown menu with simple Yes/No answers.

Setup Conditional Redirection #
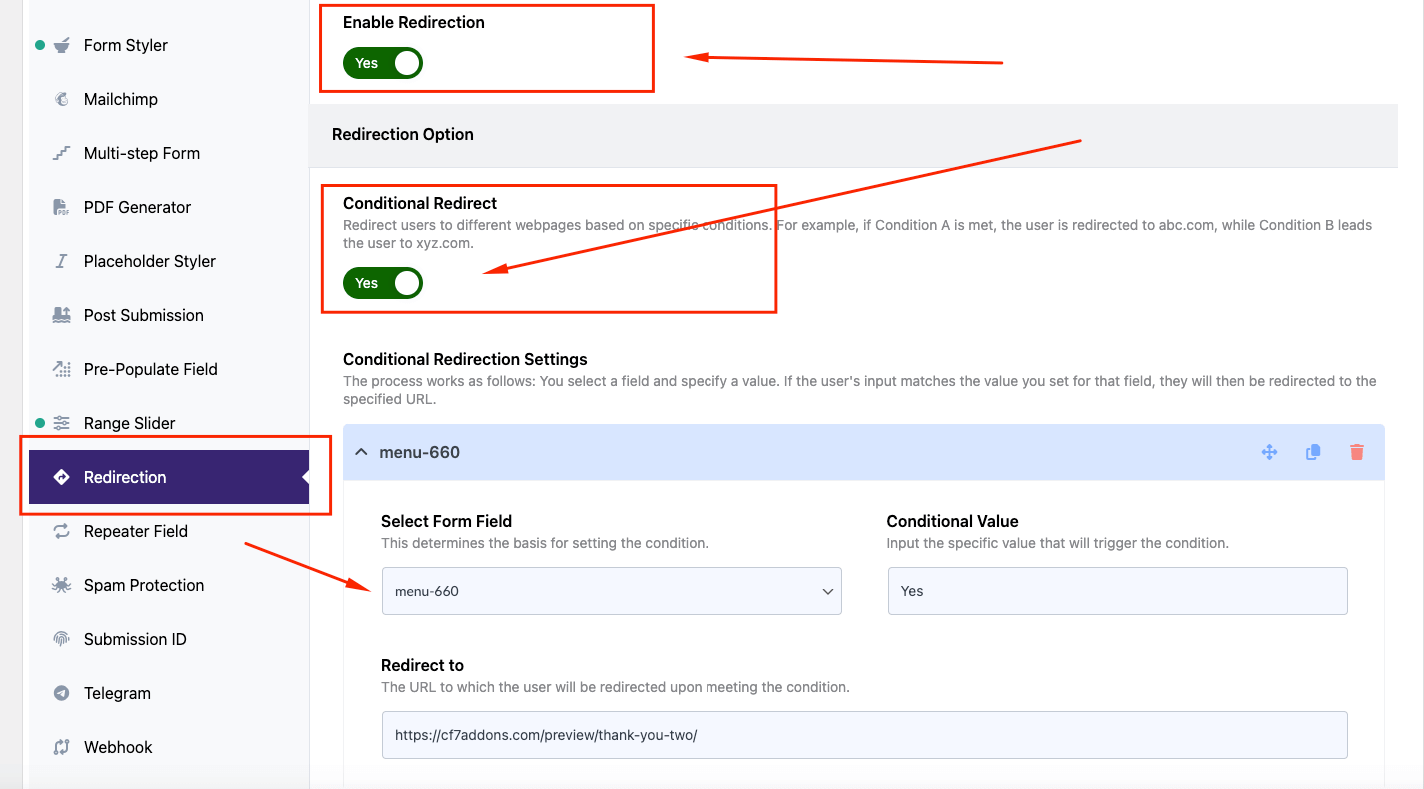
After saving the form, scroll down to the Redirection tab under Ultimate Addons for CF7 Options. Follow these steps:
- Enable both Enable Redirection and Conditional Redirect options by clicking on them.

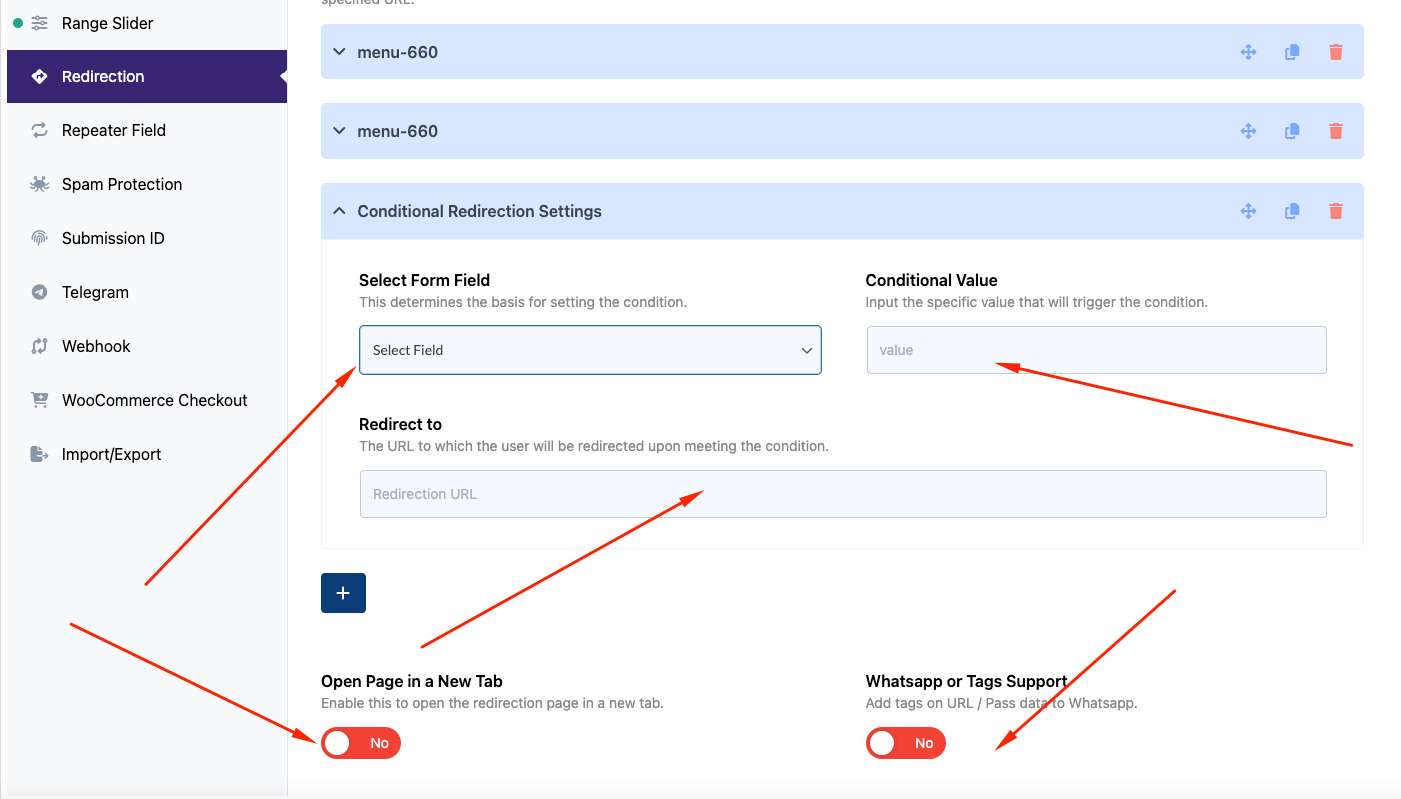
- Click the +Add Condition button. If you need one condition, click once; for multiple conditions, click as many times as needed.
-
- For each condition:
- Select Form Field: Choose the field to base the condition on.
- Value: Add the expected response from the user.
- Redirect to: Enter the URL where the user will be redirected based on their input.
- For each condition:
See the above/below screenshots to understand how we set it up.

- Optionally, check the box for Open page in a new tab if needed.
- The Tags support to redirect URL option allows you to pass data to platforms like WhatsApp. This is a Pro feature. Learn more here.
Once you’ve configured everything, hit the Save Changes button, and your Contact Form 7 will now redirect users based on their input.
Copy the Shortcode #
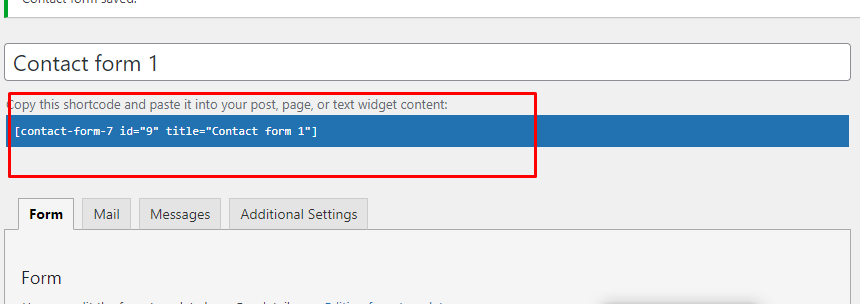
After saving, copy the Contact Form shortcode.

Time to Publish #
Paste the shortcode wherever you want to display the form (Pages/Posts/Custom Post Types/Sidebars). The end result should resemble the example form provided above.
Still Not Clear? Please contact us. Open a ticket from here.

I want to redirect based upon the combination of two different fields.
How can I do this?
Hi Stan
Unfortunately, we don’t have this option yet. U can post this as an idea here: https://app.loopedin.io/ultimate-addons-for-contact-form-7#/ideas
And we can possibly bring it in future versions, Inshallah.