Webhooks are one of the most effective methods for transmitting data from one platform or system to another in real time. In Ultra Addons for Contact Form 7, we provide a Webhook Addon that allows you to send form submission data to any webhook-supported platform such as Pabbly, Zapier, HighLevel, and more.
In this documentation, we will guide you through the process of sending form data to another platform using webhooks. For demonstration purposes, we will use Svix to capture and review webhook requests, but the steps will remain the same for any platform that supports webhook integration.
Let’s get started!
Video Guides #
Contact Form 7 to Pabbly #
Contact Form 7 to Zapier #
Contact Form 7 to FluentCRM #
Contact Form 7 to Fluent Support #
What is Webhook for Contact Form 7? #
A Webhook for Contact Form 7 is a feature that allows you to send form submission data to third-party applications, APIs, or automation platforms like Zapier, Pabbly, Integromat, and CRMs in real-time. This helps automate workflows, integrate Contact Form 7 with external services, and process form data efficiently.
- Send Form Data in Real-Time – Instantly transfer form submissions to external platforms.
- Supports Multiple Webhook URLs – Send form data to multiple services at once.
- Customizable Request Format – Send data as JSON, form-data, or raw text.
- Header & Authentication Support – Securely pass API keys and authentication tokens.
- Conditional Webhook Triggers – Only send data when specific form conditions are met.
- Works with Multi-Step Forms – Trigger a webhook after the final step of a multi-step form.
By using Webhooks for Contact Form 7, you can connect your forms with external platforms, automate data processing, and improve business efficiency—without any manual effort!
What’s Needed #
- Ensure that both Contact Form 7 and Ultra Addons for Contact Form 7 are installed on your WordPress site.
- Download and install Ultra Addons for Contact Form 7 Pro from our client portal.
- Activate your license key.
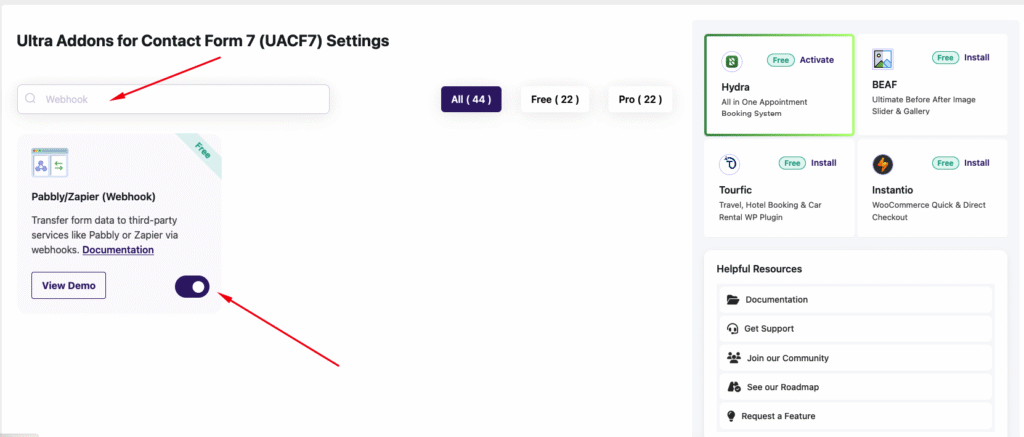
- Go to Ultra Addons > All Addons menu in your WordPress dashboard and enable Pabbly/Zapier (Webhook) checkbox.
How to use Contact Form 7 Webhook?
Step 1: Create your desired contact form #
Before taking about the settings and the webhook feature, the first step is to create a Contact Form 7 form according to your requirements.
For simplicity, I will use a basic contact form in this demonstration. However, you can customize the form to fit your specific needs, whether it’s for invoices, order confirmations, application forms, or registration submissions.
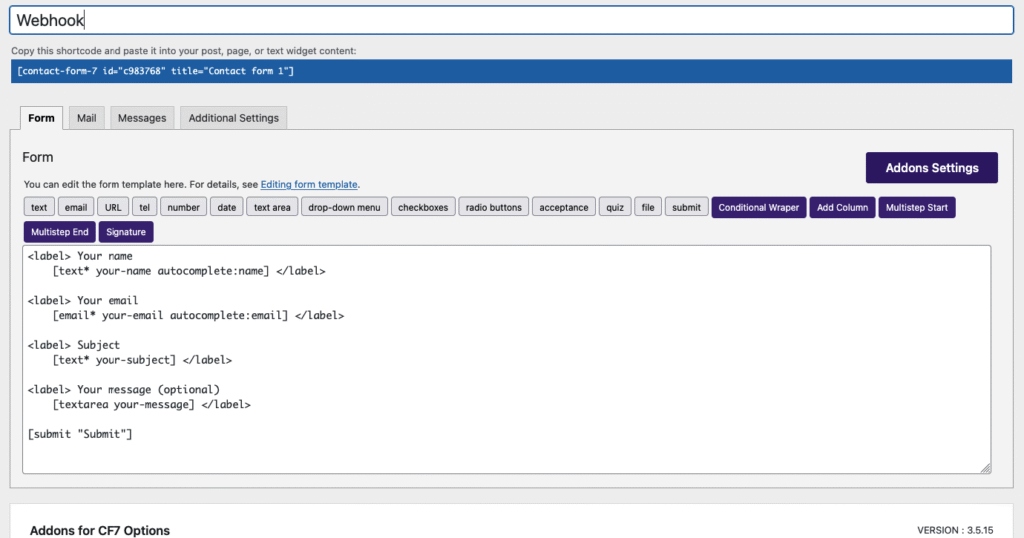
Step 2: Configuring the Webhook Settings #
After creating your form, the next step is to configure the webhook settings to send form submission data to your desired platform. To do this, go to Ultra Addons for Contact Form 7 Options and navigate to the Webhook section.
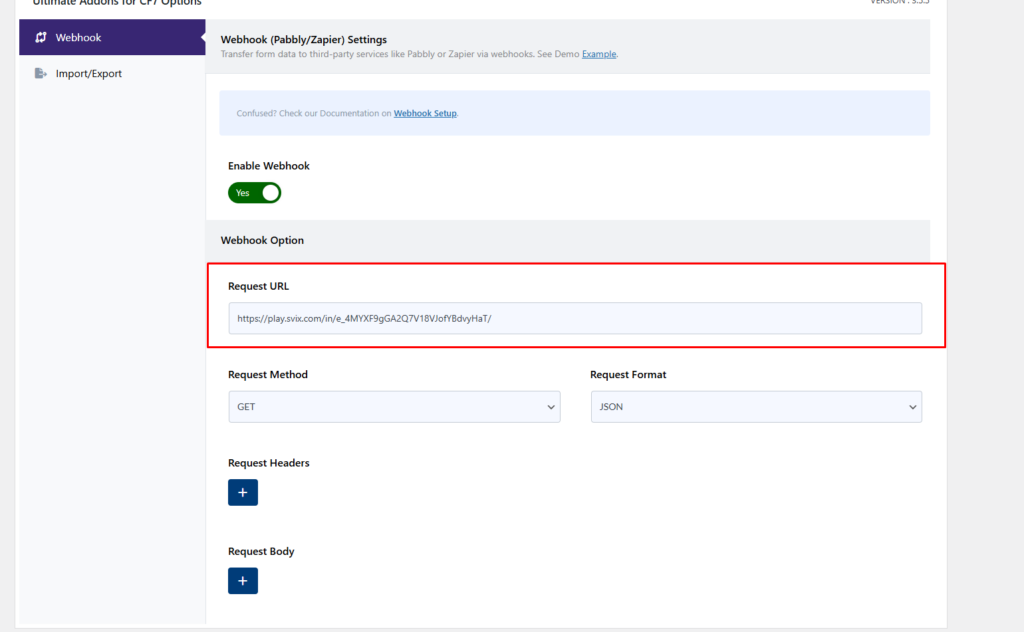
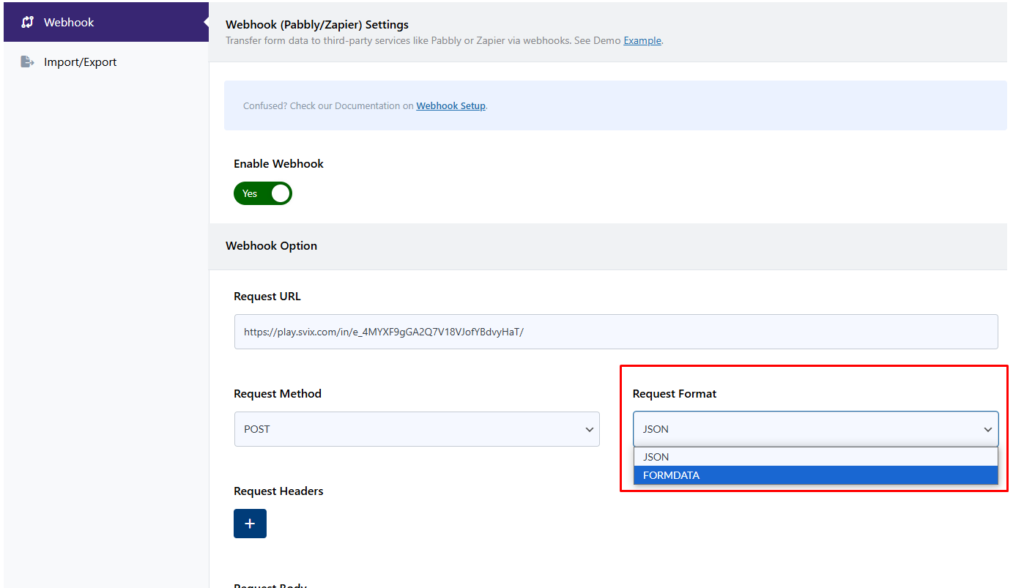
Here, you need to toggle the “Enable Webhook” button on. Without enabling this option, the webhook will not function. Once enabled, additional options will appear, allowing you to configure how the form data is sent to external platforms.
Let’s talk about the options we have.
Request URL #
Using this option, you can specify the URL of the receiving webhook where the form data will be sent. This URL should be the endpoint provided by the platform or service you want to integrate with, such as Zapier, Pabbly, or any custom API that supports webhooks.
I am using Svix webhook tester, so putting that webhook URL, but you can use any other platform webhook you want.
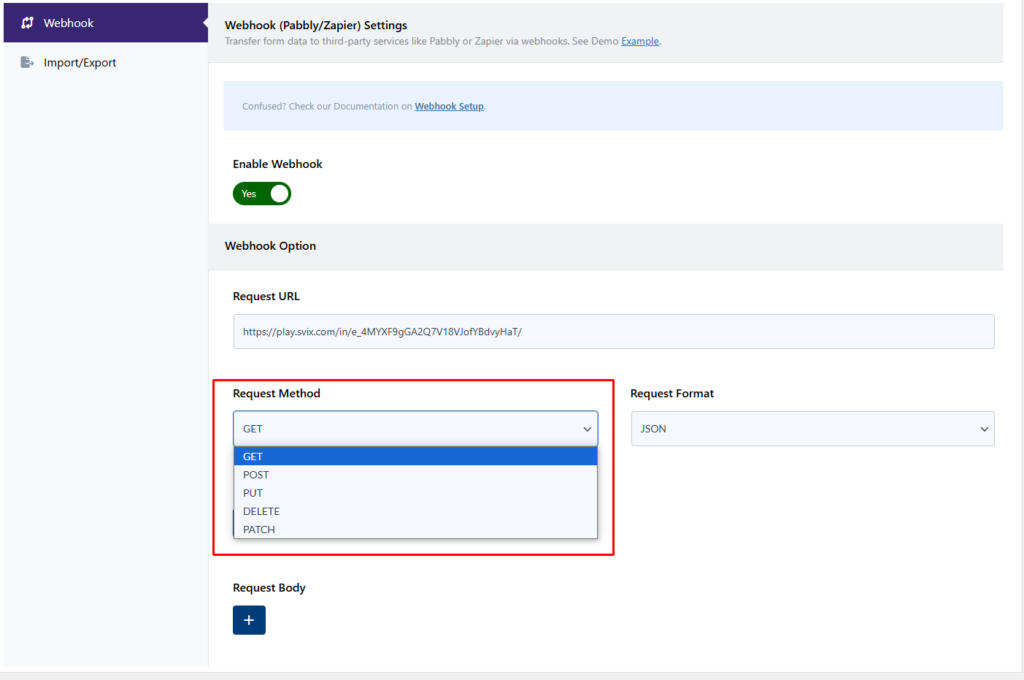
Request Method #
With this option, you can specify the request method you want to use to send the form submission data.
Request Format #
Using this option, you can specify the format in which the data will be sent to the webhook. You can choose between JSON or Form Data, depending on the requirements of the receiving endpoint. JSON format is commonly used for APIs and structured data, while Form Data is useful for traditional form submissions.
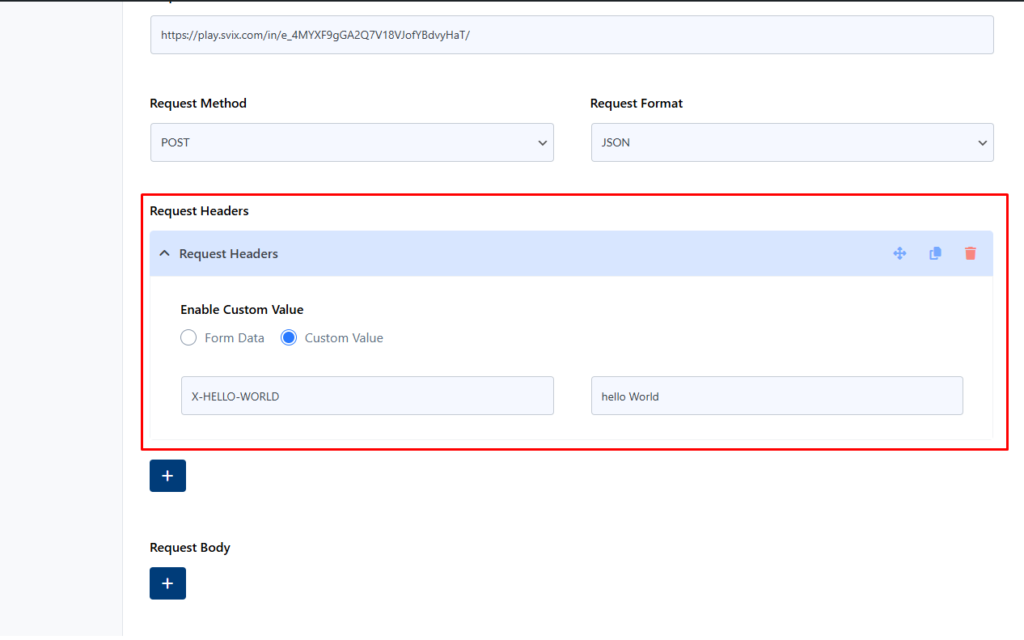
Request Headers #
Using this option, you can send custom headers along with the webhook request. This can include authentication tokens, API keys, or any other header data required by the receiving system to process the request correctly. You can send multiple headers if you want.
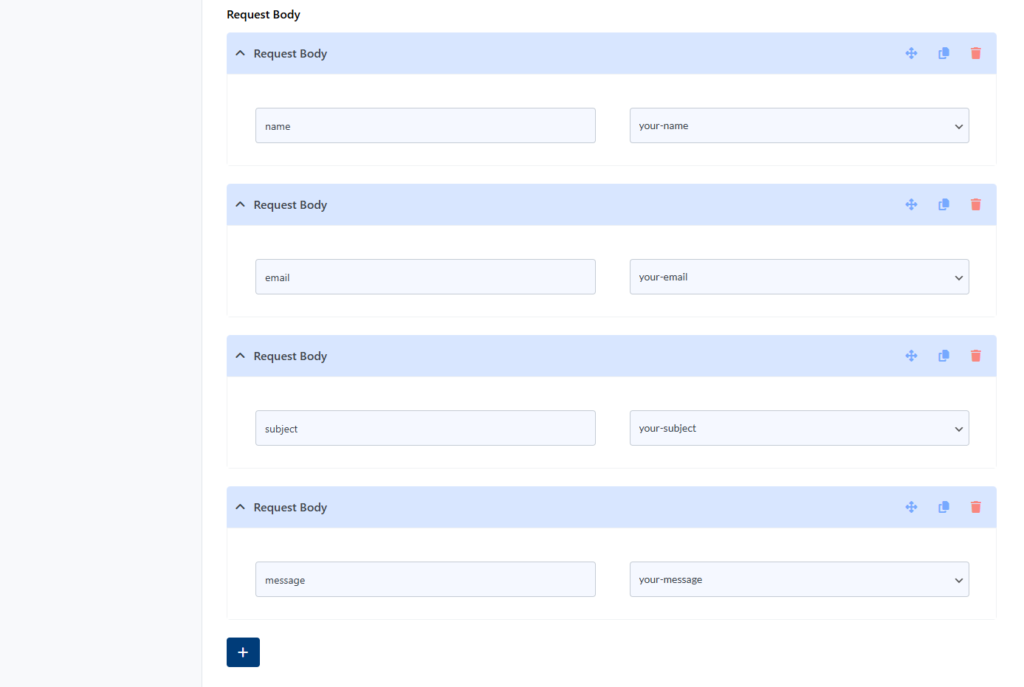
Request Body #
After the request header, you will find the option to configure the request body for the webhook. The request body is a crucial part of the webhook setup as it contains the actual data being sent. Here, you can choose to send form data dynamically based on user submissions. Additionally, you have the flexibility to add custom data fields if needed, allowing you to tailor the webhook request to meet specific integration requirements.
Now customize the setting according to your preference. After finishing the configuration, let’s dive into the next step.
Step 3: Testing the Webhook Data #
After setting up all the data, it’s time to test the configuration and ensure everything is working as expected. To do this, submit a test form entry and check whether the data is successfully sent to the specified webhook URL. Verify the request headers, body, and response to ensure the correct data is being transmitted. If any issues arise, review the settings and adjust accordingly. Proper testing will confirm that the webhook integration is functioning smoothly and delivering the expected results.
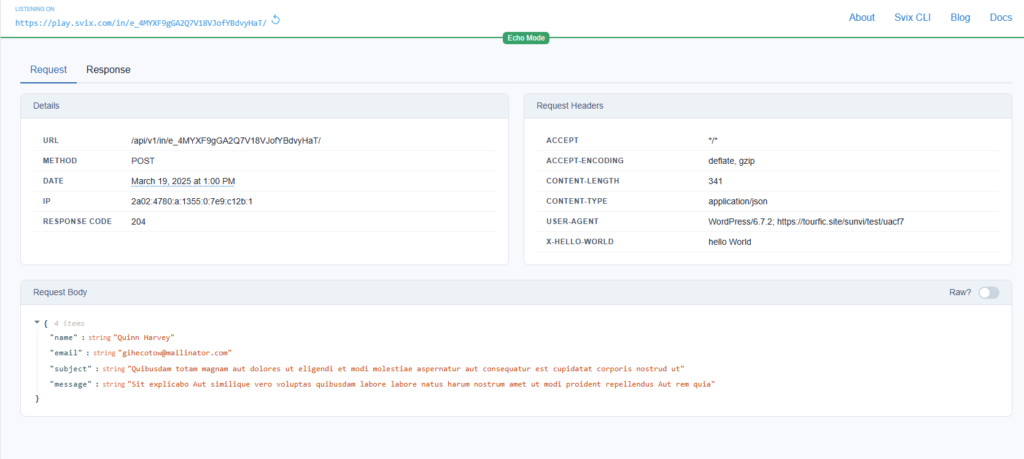
Here, you can see that on the Svix platform, all of my request body and request headers have been successfully fetched. This confirms that the webhook integration is working as expected. The transmitted data is properly structured and received by the webhook endpoint, ensuring seamless data transfer between the form and the designated platform. If needed, you can further customize the request body and headers to match your specific requirements.
Live Example of CF7 Webhook Addon #
If you want to see how the Contact Form 7 Webhook works in real-time, you can check out our live demo form at the following link. This interactive demo allows you to experience how webhook works.
Click here to test the CF7 Webhook Form add-on in action!
Still Not Clear? Please contact us. If you are a free User, you can open a ticket from here. If you are a pro user, you can open a ticket from here.
Is the webhook will work with any site? I want to sent data to Monday CRM
Hi Rubb
Yes, it will work with any webhook setup. Does monday CRM offer any incoming webhook? If so, u can just connect through this.