In this article, we will try to explain Contact Form 7 Telegram Integration with the help of our Free Addon “Contact Form 7 to Telegram”.
Watch Complete Video #
If you are still confused, we suggest you watch this video. In this video, we tried to describe the whole step of how to connect your WordPress form with Telegram:
What’s needed #
- Ensure both Contact Form 7 and Ultra Addons for Contact Form 7 are installed on your WordPress site.
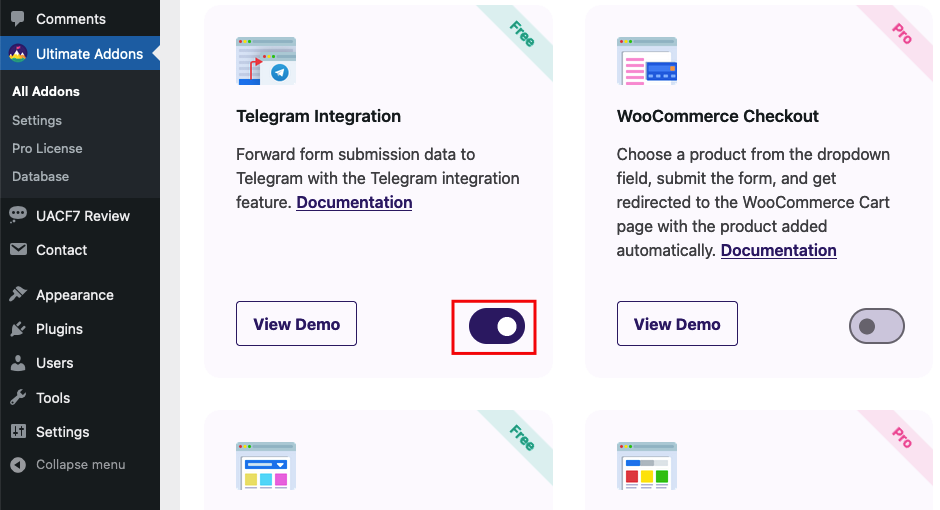
- Go to Ultra Addons -> All Addons menu in your WordPress Dashboard and enable the Telegram Integration checkbox/toggle.
What is Telegram? #
Telegram is a cloud-based instant messaging service where users can send messages and exchange photos, videos, stickers, audio, and files of various types. It is one of the most popular messaging app globally.
What is Contact Form 7 Telegram Addon? #
The Contact Form 7 Telegram Addon is an extension that integrates Contact Form 7 with Telegram, allowing form submissions to be automatically sent to a Telegram chat or group. This addon helps you receive instant notifications of form submissions directly on your Telegram account, making it easier to track and respond to inquiries without checking email. You can configure which forms send notifications and customize the message format.
Contact Form 7 to Telegram Form – Live Example #
In this tutorial, we will create a Contact form 7 to telegram form. Check our main demo to see all the supported fields for CF7 columns.
Contact Form 7 to Telegram Setup Guide #
First of all, go to Contact -> Add New in your WordPress Dashboard to create a new form. But before moving further, you need to get Two information from Telegram: Telegram BOT Token & Telegram CHAT ID.
Creating a Bot with BotFather #
BotFather is a bot created by Telegram that you can use to create and manage bots of your own. To use it, visit your Telegram account, search for BotFather, and tap on the result or you can just click here. Then, do the following 4 steps:
1. Once inside, you’ll find a Start button to initiate the bot API. It will show you a list of available commands. In this case, we want to create a new bot, which is done with the /newbot command.
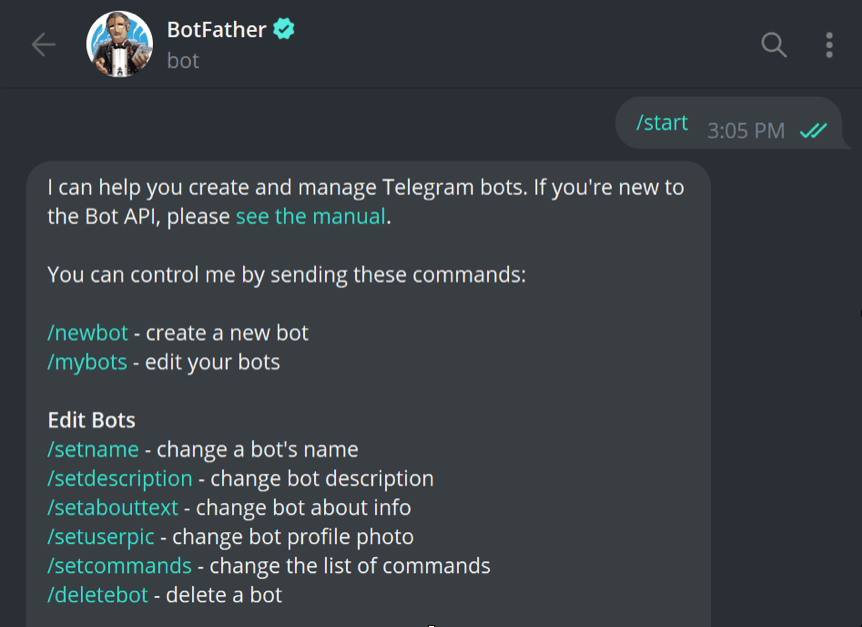
2. After you click the command or type and send it, the interface will ask you to create a name for your bot. This name isn’t the bot’s unique identifier, so feel free to choose whatever you want.
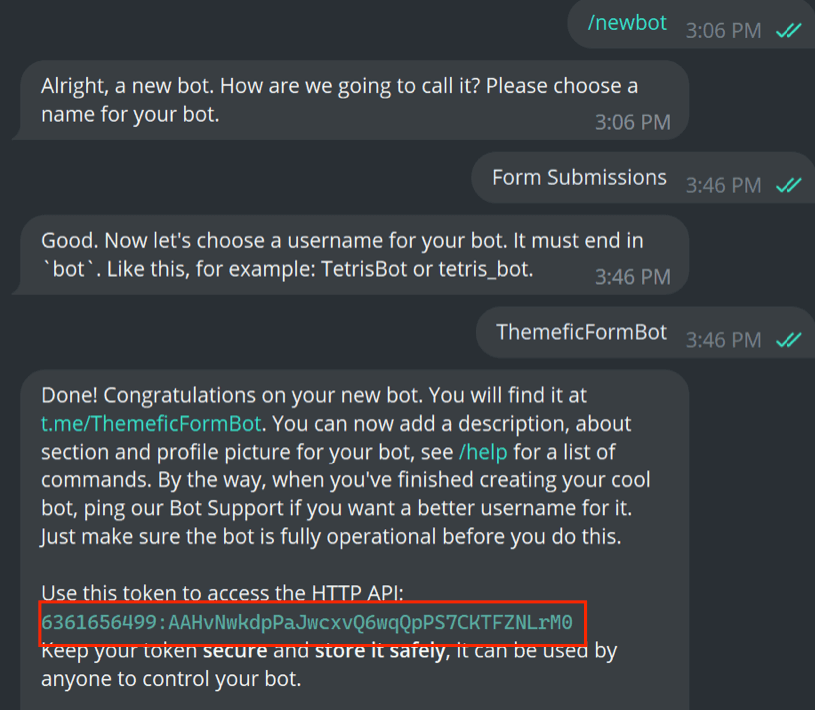
3. Next, you’ll have to configure a username. Note that this element has to be unique, as it acts as the identifier for the bot. Additionally, the username requires the suffix bot. It can be upper or lower case or include an underscore, but has to end with the suffix bot.
4. Once you enter the username, the reply will include a unique token that you’ll have to use to access the API.
Getting the User / Chat ID #
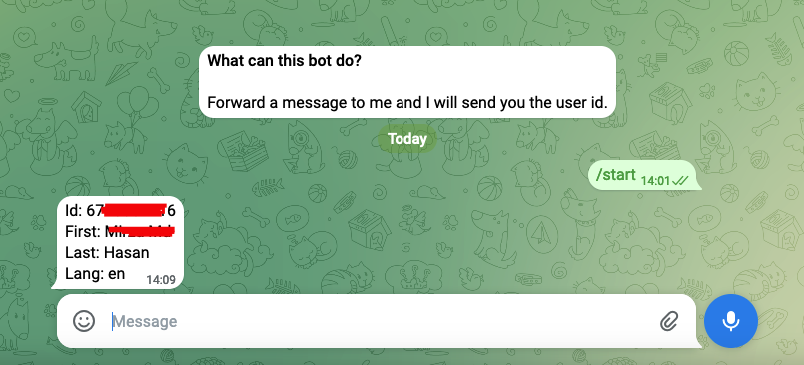
Another element that we need is the user ID. You can find your unique user ID through another Telegram bot named userinfobot. Search for userinfobot on Telegram (or click here), and click the Start button to initiate the bot. It should send you a message consisting of your user ID, among other things.
Settings Panel Setup #
Now that, we have both the information, lets do our setting panel setup. In the form editing panel, if you scroll down, there should now be a new tab named Telegram.
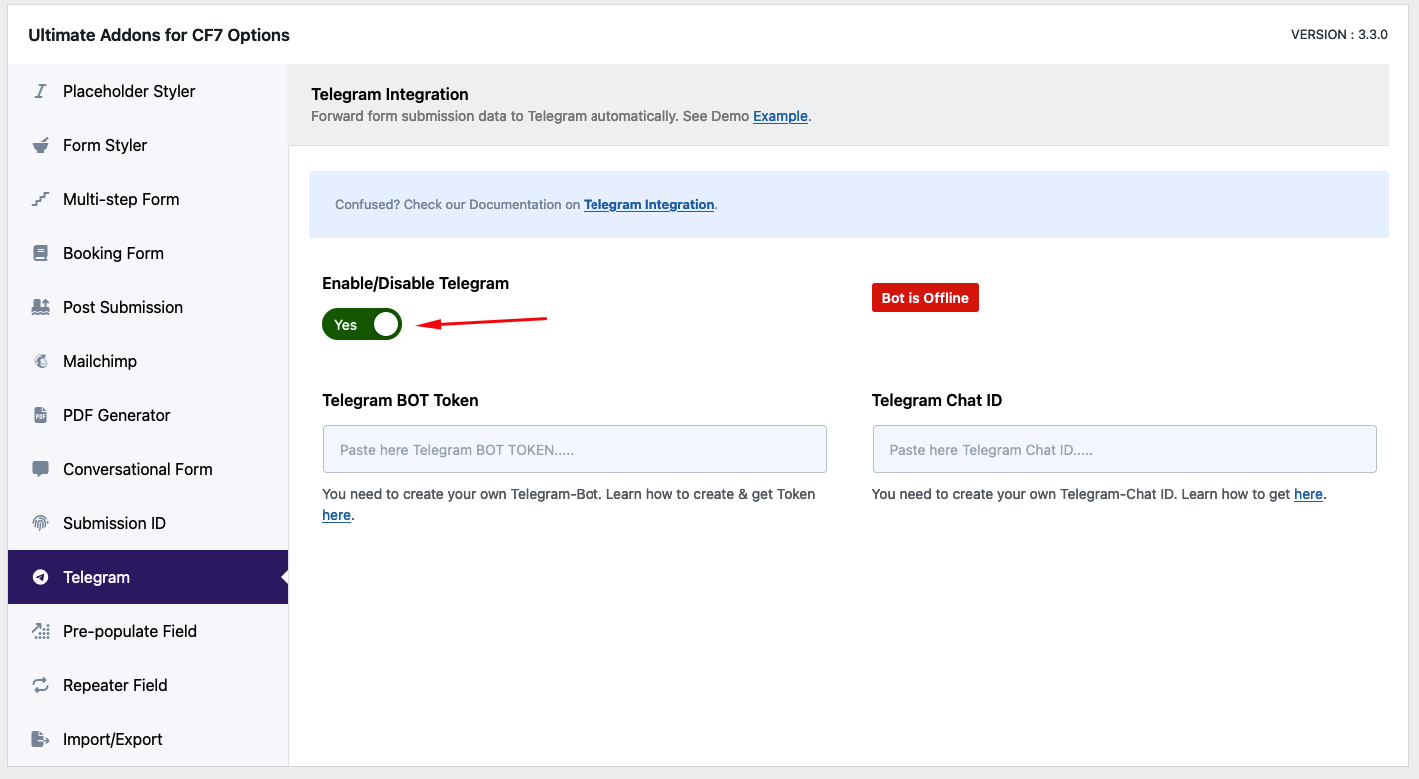
- In this tab, first check the Enable Telegram Settings box. Next, paste the Bot Token and Telegram Chat ID that you created in the Telegram bots in the two fields, respectively. Then hit “Save”.
- Once you hit save, if the information are correct, the token and ID have been verified, you’ll see a confirmation text showing Bot is Online, along with the Bot Name and Username that you created.
Add Other Fields #
Once you are done adding your telegram setup, you can add your remaining form fields (based on your needs). For example, name, email, address and so on.
Editing the Mail Template #
To edit the mail template (or the message forwarded to your Telegram bot), head to the Mail tab in the form editing section. You can use UACF7’s form tags and customize the format and contained elements in the Telegram message.
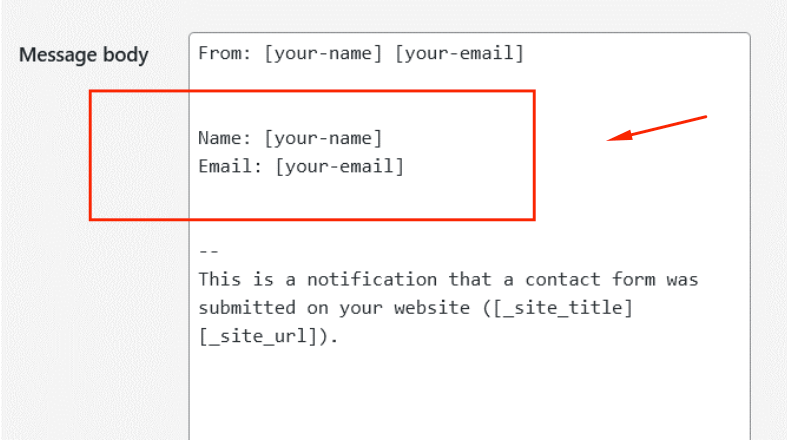
For instance, listing the [your-name], [your-email], and such tags will format the information in that order, regardless of how the form looks. You can also exclude lines with blank mail tags and change the content’s type.
Copy the Shortcode #
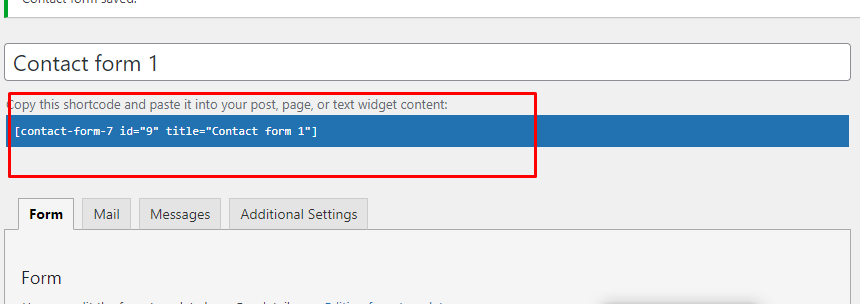
If your form is ready, click save and copy the Contact form shortcode.
Time to Publish #
Paste the shortcode wherever you want to show your form (Pages/Posts/Custom Post Types/Sidebars). The result should be something similar to the above form.
Activating the Bot #
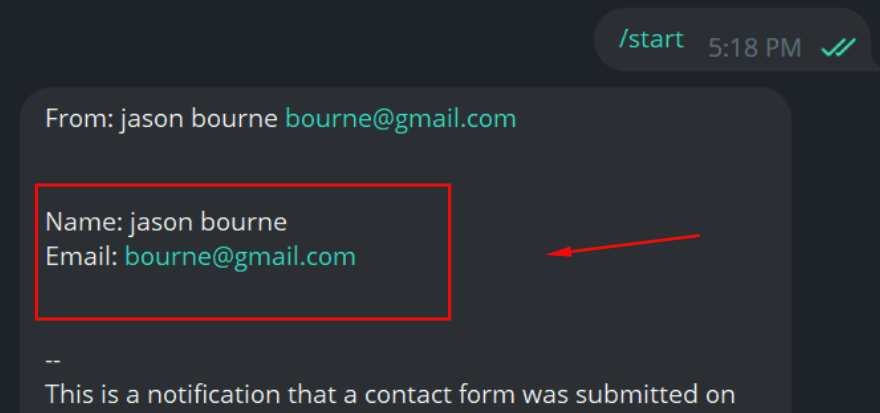
With that done, you only have to activate your bot. Search for its name on Telegram (in our case, it’s @ThemeficFormBot), tap on it, and click on start. From there, any form submissions will automatically be forwarded through the Telegram bot in your specified format and it should look something like below:
Still Not Clear? Please contact us. If you are a free User, you can open a ticket from here. If you are a pro user, you can open a ticket from here.
