You can now create a complete booking and appointment system using Ultra Addons for Contact Form 7 and yes, you can set it up in just seconds! We’ve introduced a free booking addon that helps you create a streamlined booking experience. However, to power this system and unlock its full potential, you’ll need to use our dedicated plugin: Hydra Booking.
In this documentation, I’ll walk you through how to create and manage a booking appointment form using Hydra Booking combined with Contact Form 7. Whether you’re setting up appointments, events, or consultations, this combo gives you both flexibility and control.
Let’s dive right in and explore how it all works, step by step!
How to create a Contact Form 7 booking form? – Step By Step Guide #
What’s Needed #
- Ensure that both Contact Form 7 and Ultra Addons for Contact Form 7 are installed on your WordPress site.
- Navigate to the Ultra Addons section in your WordPress Dashboard and enable the “Booking / Appointment Hydra” checkbox/toggle.
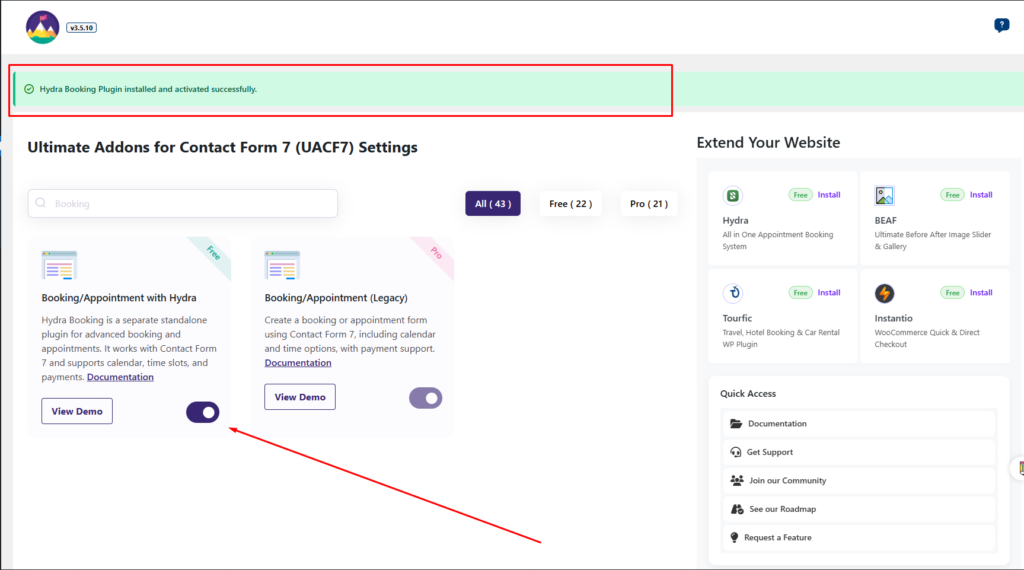
Once you enable the addon, the system will automatically install the Hydra Booking plugin in the background. You don’t need to manually download or upload anything. It’s all handled for you.
You can track the installation progress right from the top of the addon list, where a notification or progress bar will keep you updated. Once the installation is complete, you’re all set to start configuring your booking system with ease!
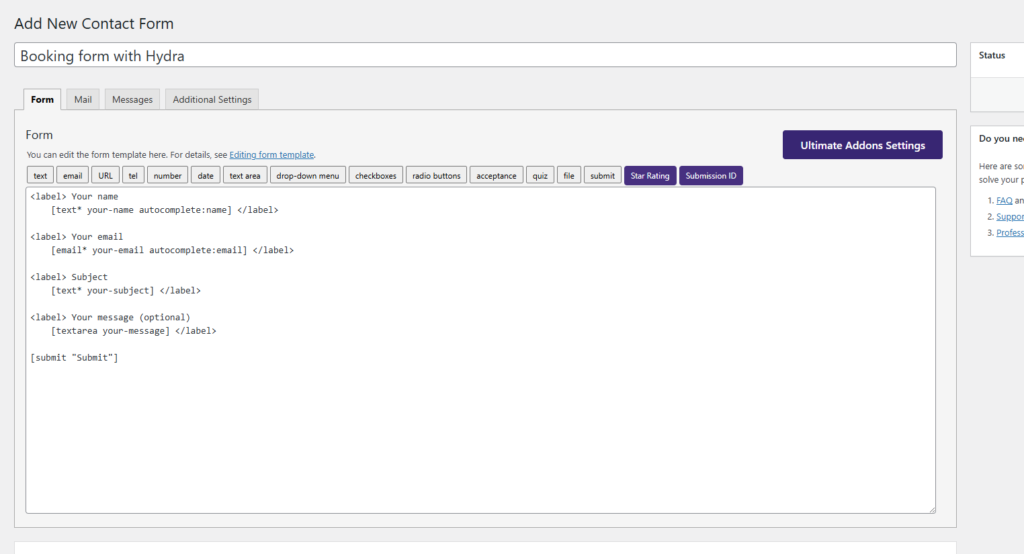
Step 1 – Create your desired Contact Form 7 #
To create a Contact Form 7 booking form with Hydra Booking, the first step is to build a contact form that fits your needs. You can make it as simple or advanced as you want. If you prefer a more dynamic setup, you can enhance the form using our other addons like Conditional Field, Repeater Field, and more.
But for this demonstration, I’ll keep things simple and use a basic contact form, just to walk you through the process clearly and easily. Once the form is ready, we’ll move on to connecting it with the booking system. Let’s get started!
Step 2 – Configure the Hydra Booking Settings #
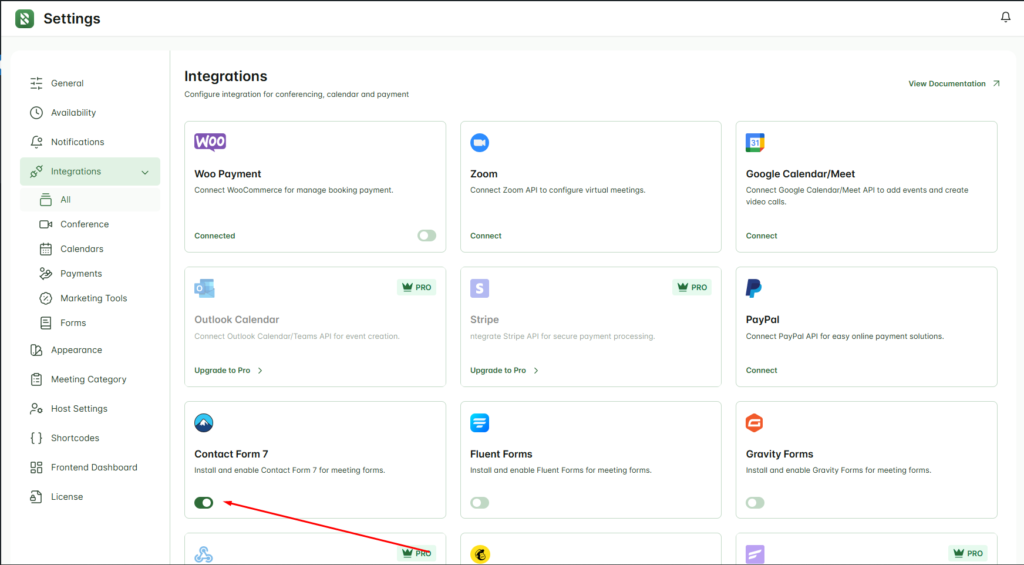
After you’ve created your form, the next step is to configure the Hydra Booking settings to connect Contact Form 7 with the booking system.
To do this, go to your WordPress dashboard and navigate to: Hydra Booking > Settings > Integrations
Once you’re there, look for the Contact Form 7 option and simply toggle it ON. This step enables the integration and allows Hydra Booking to sync with your Contact Form 7 forms.
Step 3 – Create a Host for Hydra Booking #
After setting up the settings, the next step is to create a host. This is essential for managing the bookings under Hydra Booking.
To do this, go to your WordPress dashboard and navigate to: Hydra Booking > Hosts
Click on the “Create New Host” button. A new popup will appire with a dropdown. From the dropdown, you can choose the option to create host between existing users of your website, or create a new host under the “tfhb_host” role.
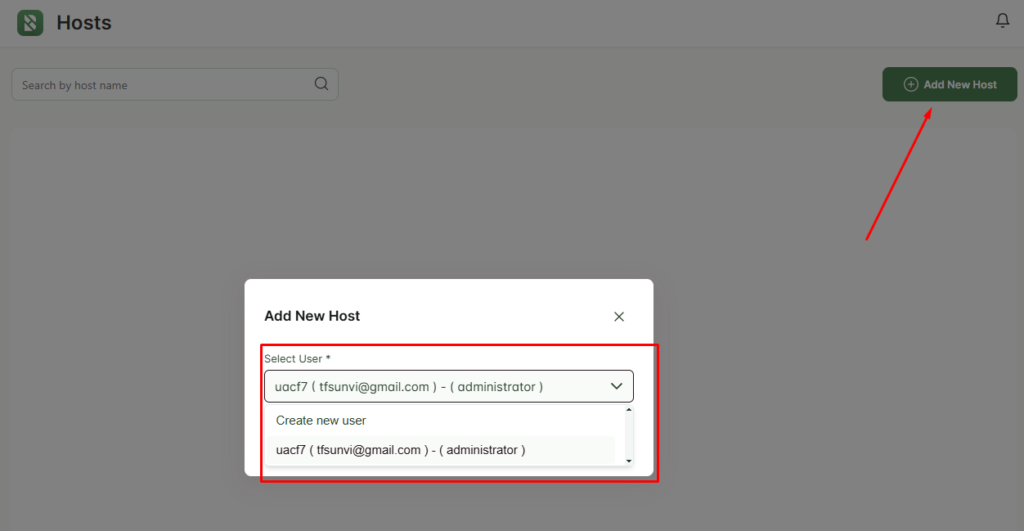
f you want to create a host using your existing users, you can easily select one from the dropdown menu. For example, in my case, I already have a user named “uacf7” with an administrator role, so I could use that if I wanted.
However, if you prefer to create a completely new host with a fresh user profile, just choose the “Create New User” option from the dropdown. For this demonstration, I’m going with that approach to creating a new user from scratch to act as the host. This gives us full control over the host setup and keeps things clean and organized.
Creating a New Host Profile (Optional) #
You can skip this section if you prefer to use an existing user.
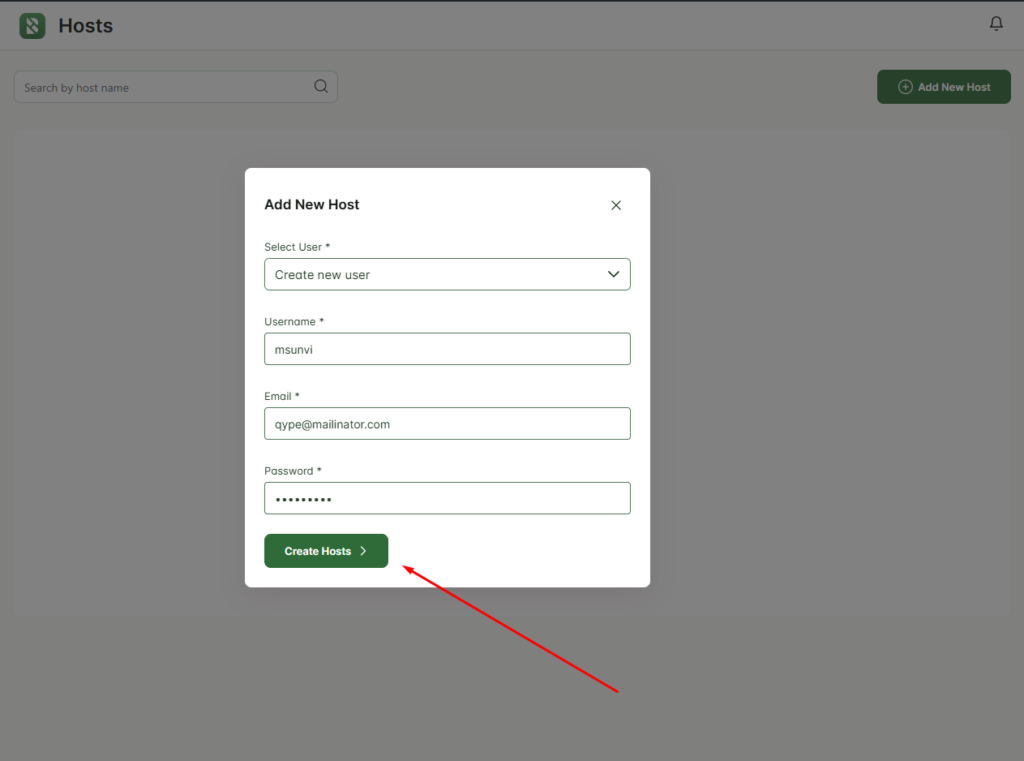
After selecting “Create New User”, a popup will appear asking for a Username, Email, and Password.
Simply fill in the details based on your requirements. Once everything is entered correctly, click the “Create Host” button to proceed.
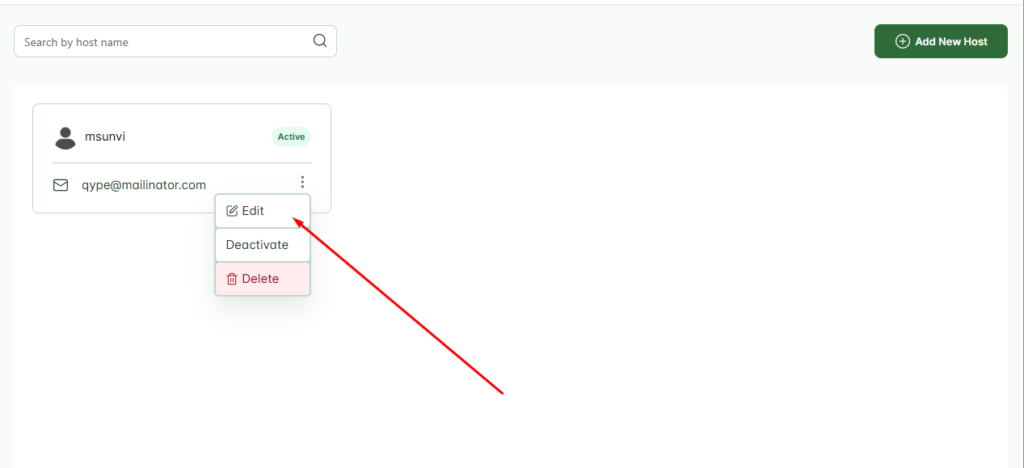
Your new host has been successfully created at this point. Now it’s time to configure a few essential settings for the host profile. These configuration settings are the same for all types of hosts.
To configure the host settings, navigate to Hydra Booking > Hosts, locate your desired host profile, and then click on the Edit button. This will open the host’s profile where you can adjust all the necessary options like availability, integrations, calendar connections, and more based on your booking needs.
After navigating to the edit page of your host profile, you’ll notice several configuration options. We’ve covered all of these options in detail in a separate documentation. You can check the documentation from here.
However, in this demonstration, we’ll keep things simple and focus only on the essential settings required for configuring the host profile properly.
In the Information tab, you need to set the timezone; this is essential for your meetings to function properly. Without it, the system won’t be able to schedule meetings correctly. Also, make sure to fill in all the required fields before proceeding to the next step.

Click on Save and Continue after filling up all the information.
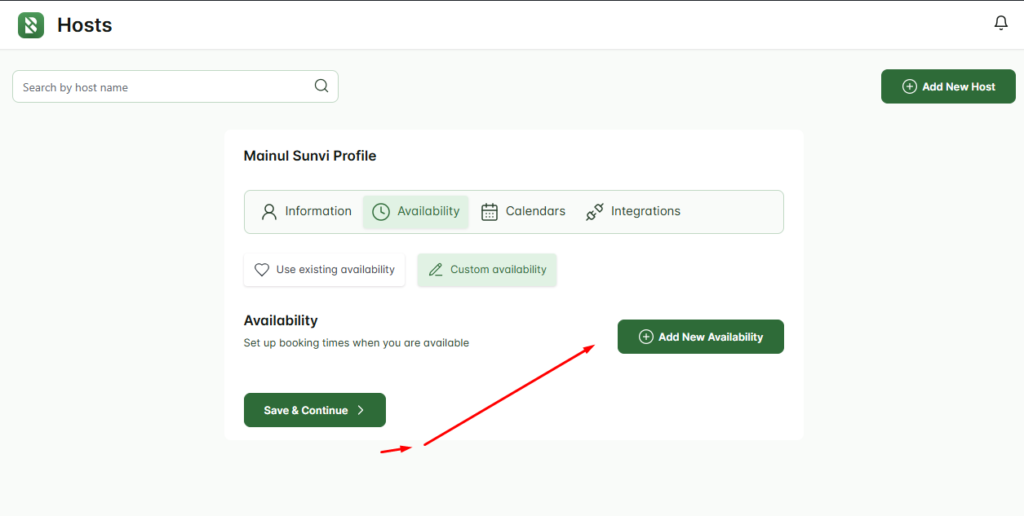
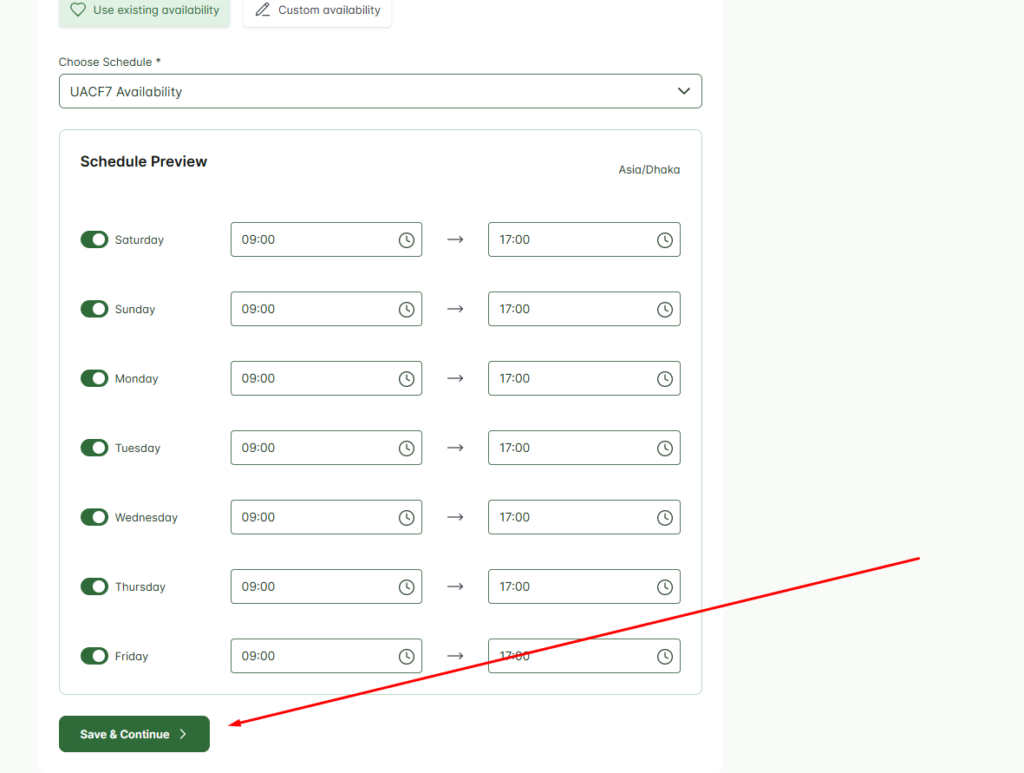
In the Availability tab, you can define when you’re available for meetings. To do this, simply select the “Custom Availability” option, then click on the “Add New Availability” button. This will let you set specific days and time slots for when you’re open to take appointments.
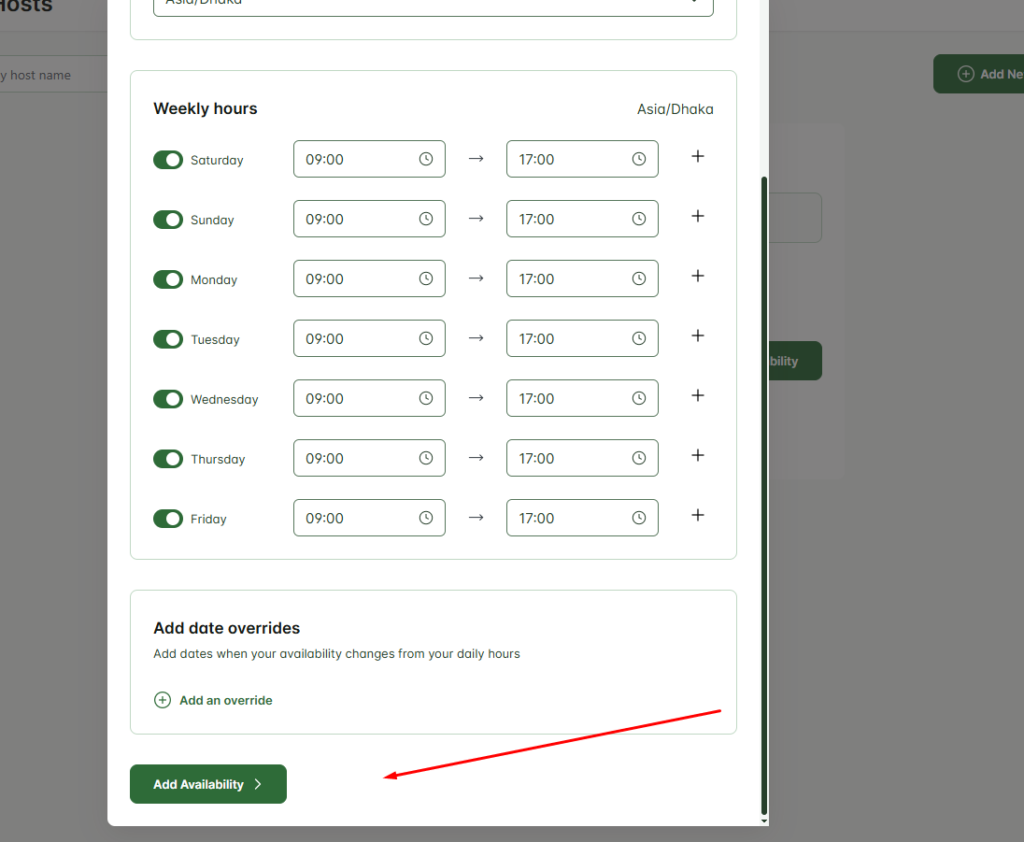
A popup will appire, Fill the information according to your need. And then click on “Add Availability” to save the availability.
There’s nothing mandatory to configure in the Calendars and Integrations tabs, so you can skip them for now. However, if you want to connect tools like Google Calendar, Zoom, or CRMs later, you can come back and set them up anytime based on your needs.
Step 4 – Create a Hydra Booking Meeting #
After toggling the Contact Form 7 integration setting, it’s time to create your meeting.
Head over to your WordPress dashboard and navigate to: Hydra Booking > Meetings
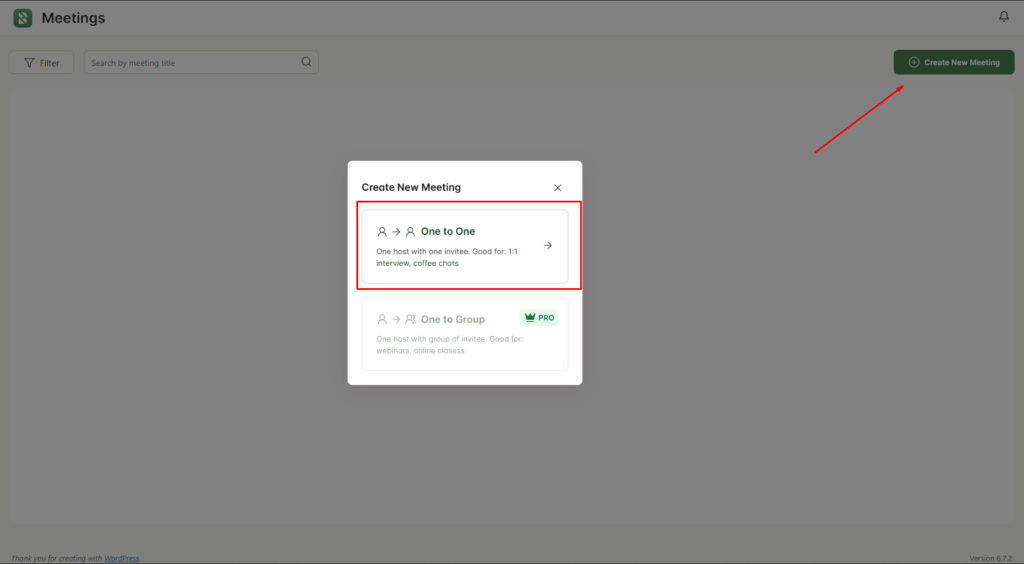
Click on the “Create New Meeting” button. A popup or page will appear with different meeting types.
For this example, select the “One to One” option, which is ideal for personal or individual appointments.
Now let’s move forward and configure the meeting details to connect it with your Contact Form 7 form.
Here you will find some options to configure Meeting title, Description, Duration, Location, Select Host, etc fields according to your need. We have a detailed guide on the meeting configuration. You can check it form here. After filling in all the information, click on “Save and Continue” to go to the next step.
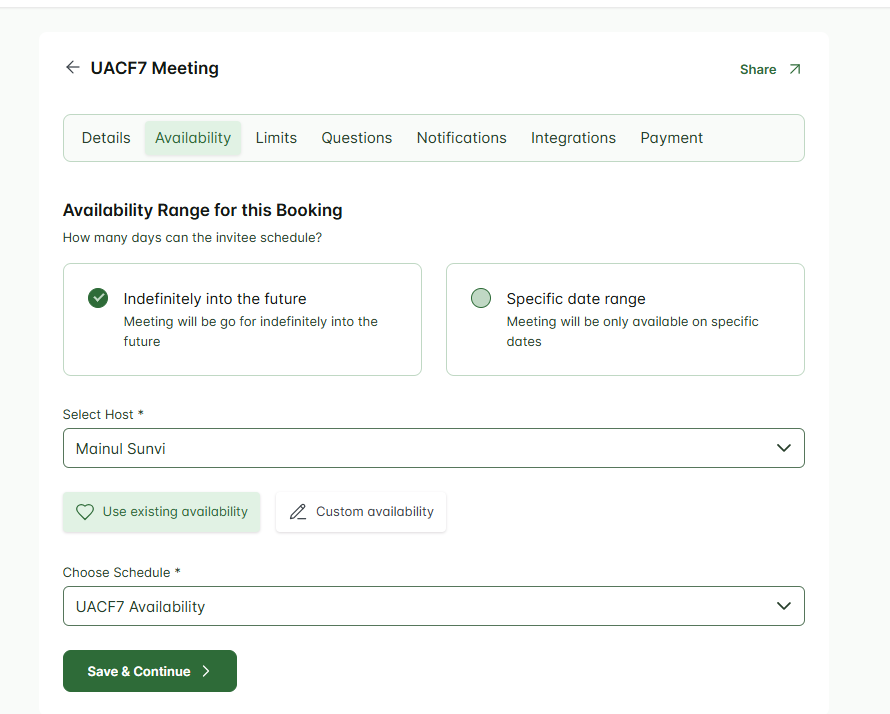
After Details section, you will find the Availability section where you have to set up the availability according to your need. After filling all the information correctly just click on “Save and Continue” to go to the next step.
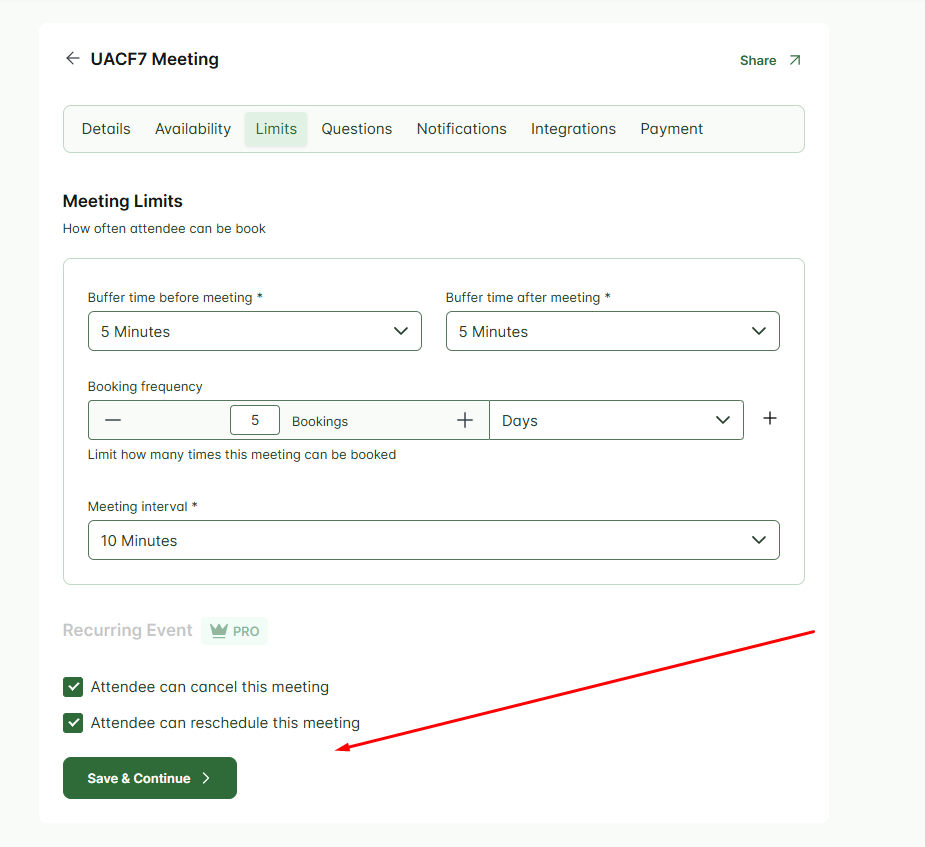
In Limits section, you will find some settings related to Meeting limits, just set the options according to your preference and click on “Save and Continue” for the next step.
In the Question section of the meeting setup, you can assign your Contact Form 7 form as the main form for the booking process. This means whenever someone books the meeting, the selected Contact Form 7 form will be displayed and used to collect attendee information. Just choose the desired form from the dropdown, and you’re good to go!
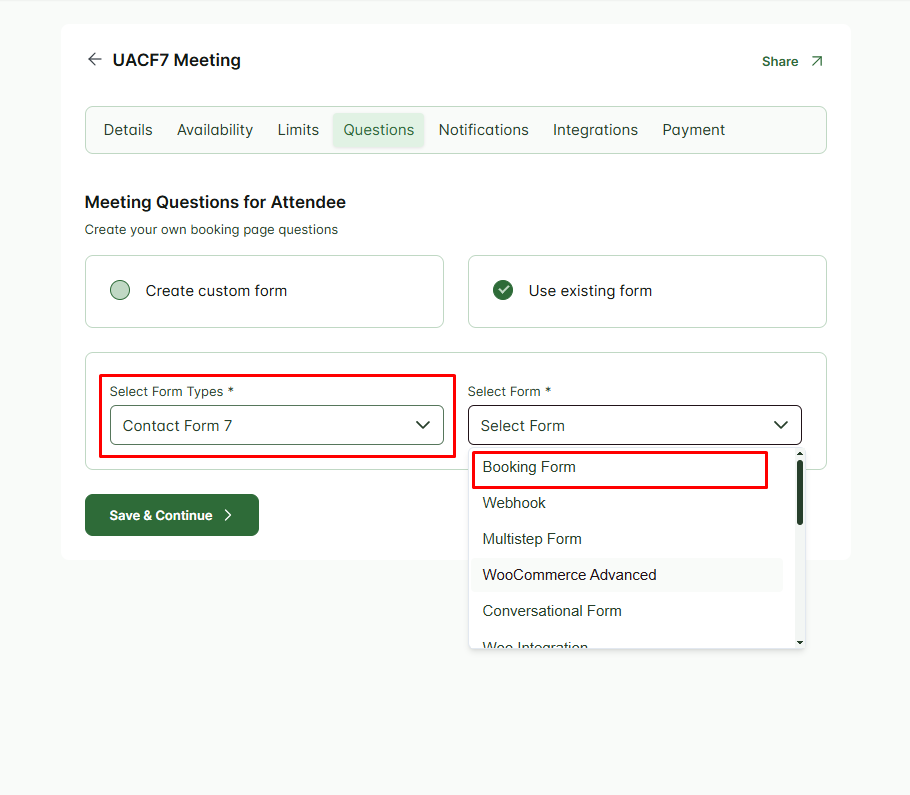
Click on “Use existing form” and then from the dropdown select Contact Form 7 as the form type. And then select the form you have created at the Step 1.
After selecting the form click on “Save and Continune” for the next step.
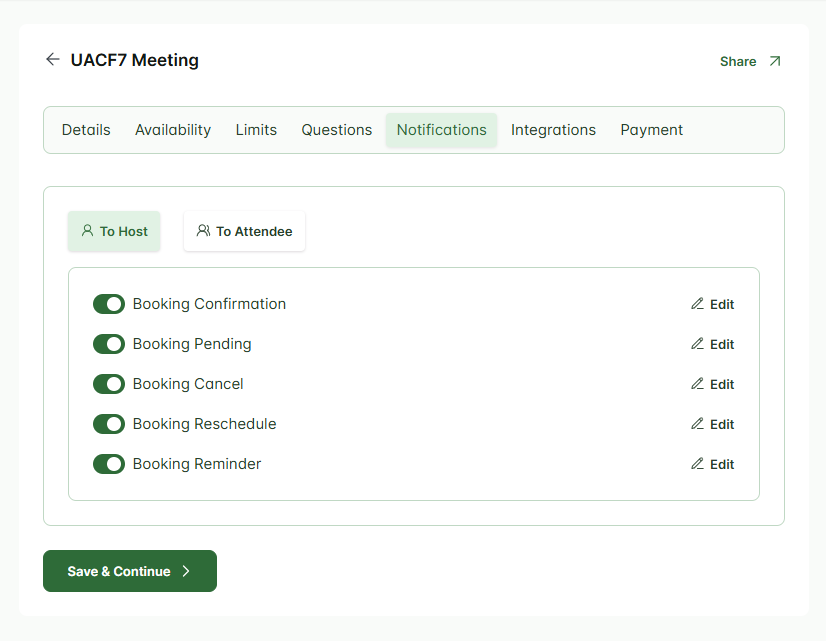
Add or remove the notification preference according to your need.
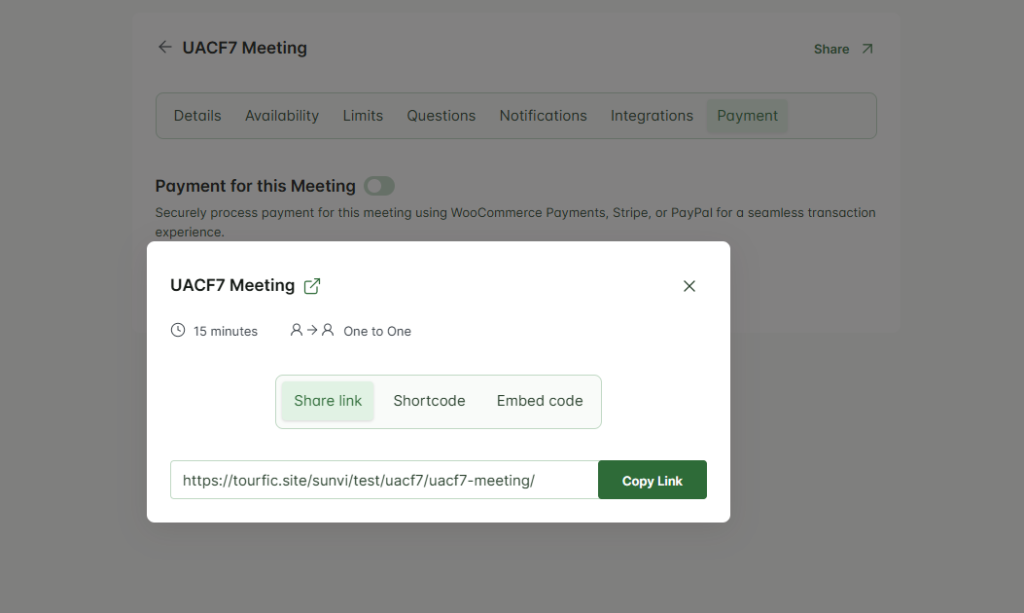
In this demonstration we do not have any integration and payment for this booking. But if you want to integrate some CRM or payment you can do it using the Integrations and Payment tab.
After everything is set up, click on “Save and Finish”. A popup will appear, just click on new tab icon to open the meeting in a new tab.
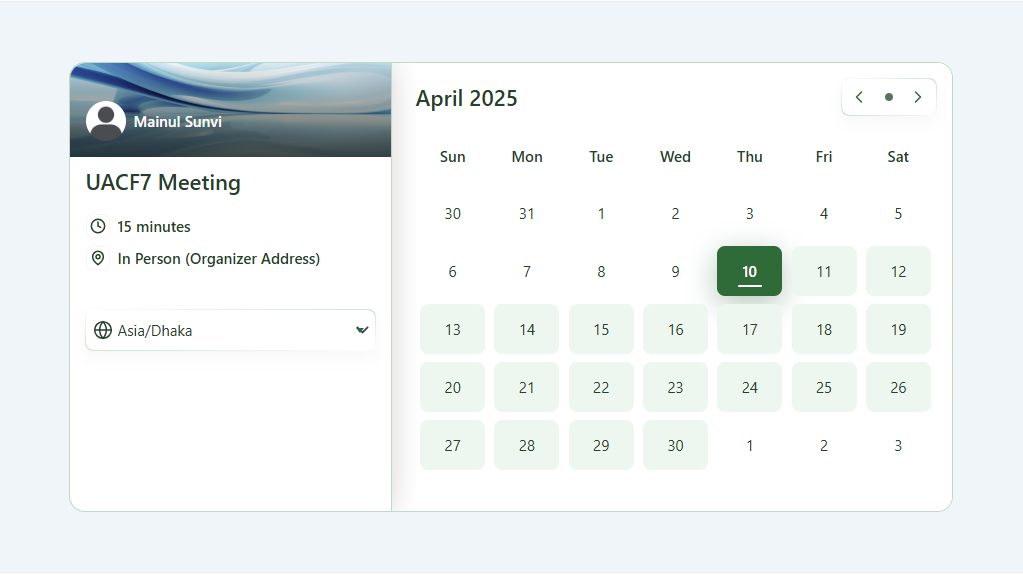
Step 5 – Testing the Meeting in Frontend #
Here is the frontend view of my meeting form.
Live Example of CF7 Booking Form with Hydra #
If you want to see how the Hydra Booking with Contact Form 7 form works in real-time, you can check out our live demo form at the following link. This interactive demo allows you to experience how Hydra Booking works with contact form 7.
Click here to test the Booking Form with Hydra Addon in action!
Still Not Clear? Please contact us. If you are a free User, you can open a ticket from here. If you are a pro user, you can open a ticket from here.