Do you want to make a professional Travel Booking website for your travel agency?
In this technological and post-covid era, everyone wants to do everything from home. Thus, having an online booking site will give you a significant advantage and sales boost over your competitors. If you are a travel agency owner and you don’t have an online booking system, you are losing the game! Fear not; this is what this article is about!
This article will walk you through the nine easy steps of building a tour and travel booking WordPress website using a free WordPress travel theme and plugin.
Should Travel Agency Businesses have a booking website?
Yes, it should! We believe a travel booking website is necessary for any travel agency business. Some of the key reasons are:
- Increased convenience for customers: Customers can access your site from their homes without visiting a physical location.
- 24/7 availability: With a website, customers can access and book travel packages anytime.
- Improved accessibility: A website can reach a wider audience.
- Increased efficiency: A booking website can automate many tasks and processes.
- Better data collection and management: A website can provide valuable insights into customer behaviour and preferences.
- Enhanced credibility: A website can improve the travel agency’s image and reputation.
- Increased revenue: A booking website can help the travel agency to attract more business and increase its revenue.
Why WordPress?
We will be using WordPress to develop the website. But the question is why? According to Colorlib, Around 810 million websites use WordPress as of 2023. This represents around 43% of all websites. And that figure is increasing. There is a reason behind this vast popularity, right? Here are a few we can suggest:
- User-friendly and easy to use
- Customizable
- SEO-friendly
- Responsive design
- Secure
- Large community
- Cost-effective
Which Theme and Plugin will we use for this article?
For this article, we will use one of the most popular WordPress themes, “Astra.” The reason behind using Astra is that it’s fast, fully customizable, and it’s a perfect theme for any WooCommerce-based website. Moreover, it’s being used by over 1 million users worldwide.
For the travel booking and management part, we will use “Tourfic.” Tourfic is considered the Best Travel Booking WordPress Plugin that offers everything from basic to advanced features for your travel booking website. Both of these products have a pro version which you can purchase from their respective websites, but for this article, we will only focus on the free features.
How To Create a Tour & Travel Booking Website: A Step-By-Step Guide
Now, we’re going to discuss the seven-step-by-step guidelines regarding a tour & travel booking website with a free WP theme and WordPress tour plugin. Let’s get started!
Step 1 – WordPress & Theme Installation
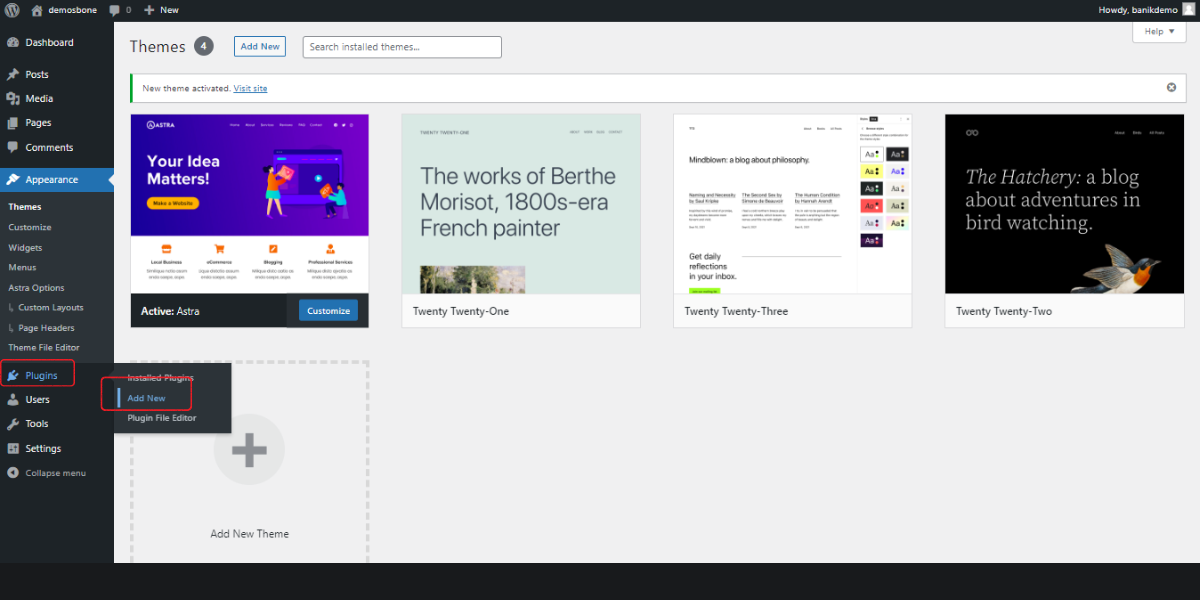
First, you need to install WordPress. Please follow this tutorial if you don’t know how to do that. Once the installation is done, go to your “Dashboard”. Then click on the “Themes” button under Appearance.

Now, search for Astra. Install this theme and activate it.
After you activate, follow any basic instructions it provides and finish those steps.

Step 2 – WooCommerce Installation
Afterward, go to “Plugins” and select the “Add New” option.
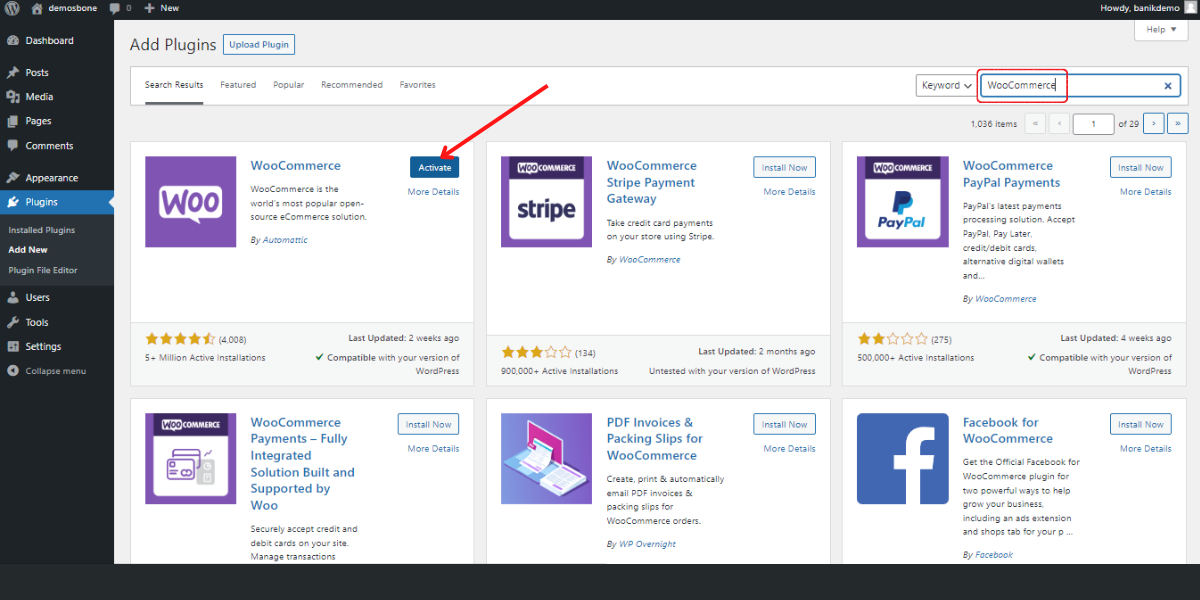
Then type “WooCommerce” in the search box located in the upper-right corner of the page.
Now, install and activate WooCommerce.
Step 3 – WooCommerce Configuration and Payment Gateway Setup
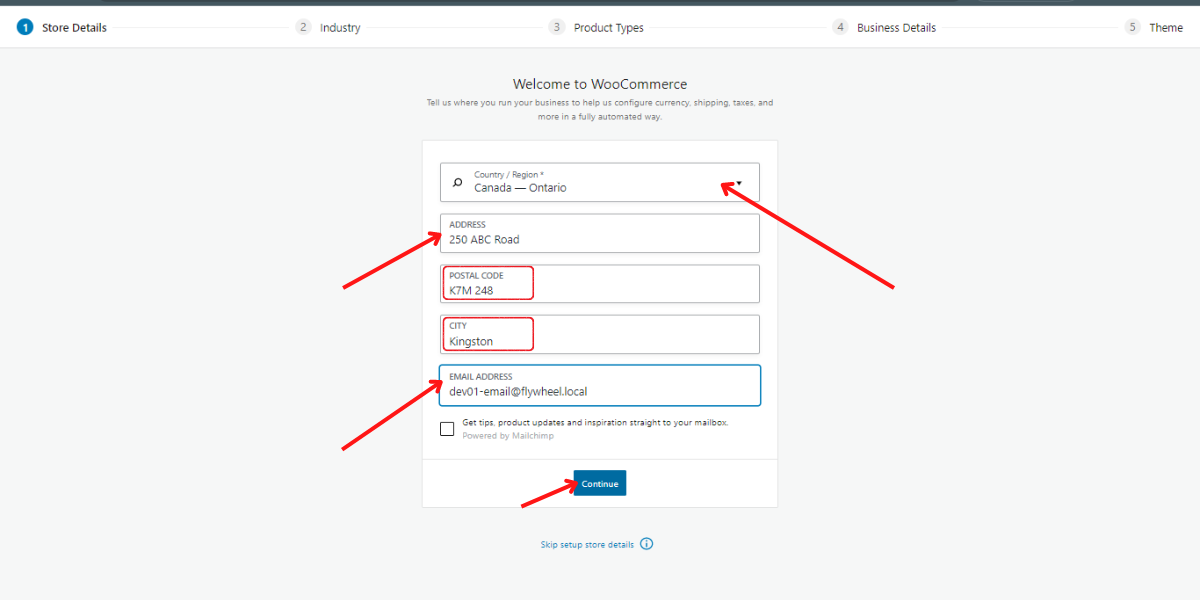
After completing the WooCommerce installation, you will get a quick setup wizard where you have to provide some information based on your tour and travel booking website.
Under “Store Details,” mention your business address, postal code, city, and business email. Then click on the “Continue” button.
Then choose your industry type.
If you don’t find your type, select the “Other” button, and click on “Continue.”

Now, choose your product types and hit on “Continue.”
Then say something about your business site- such as how many products you want to display on your site, selling info, etc. Now, click on “Continue.”

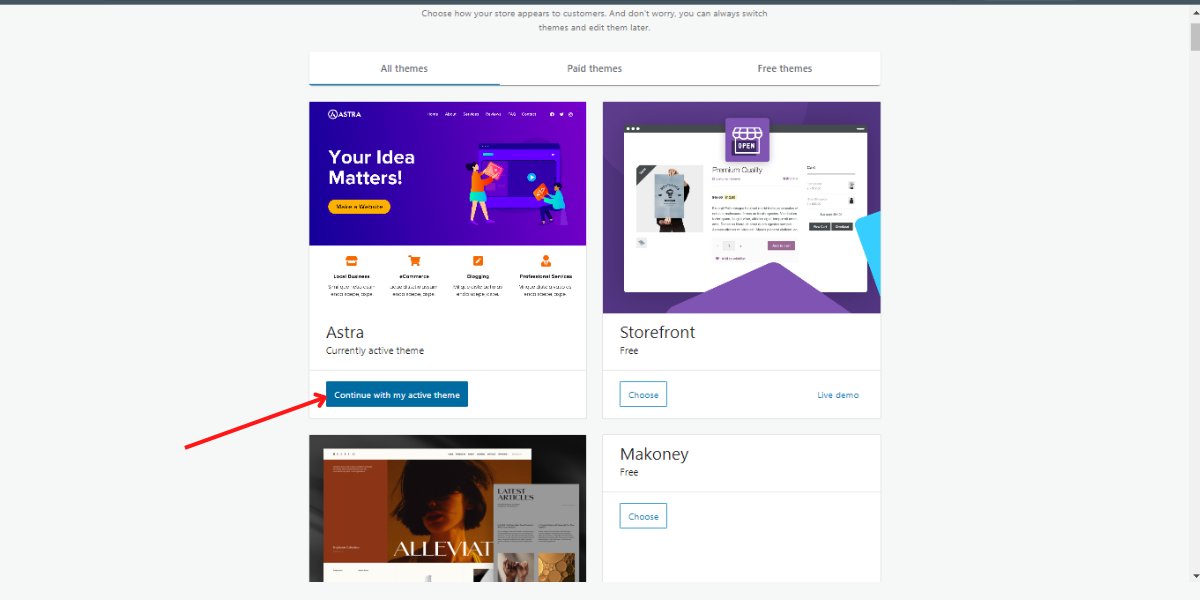
Keep continuing with your active WordPress travel theme- Astra.
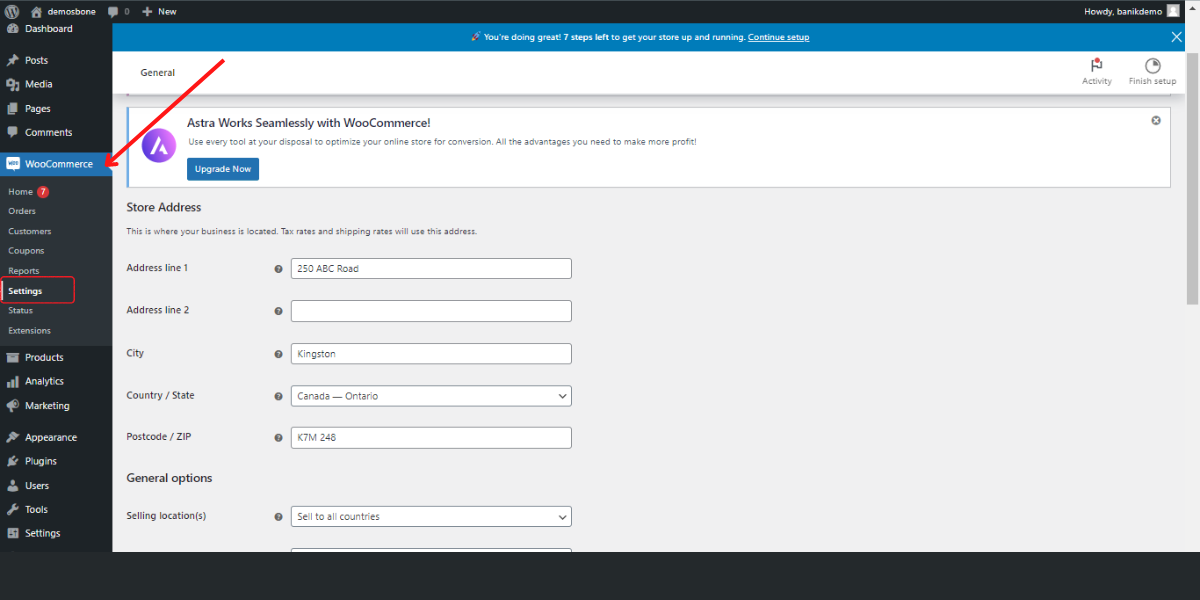
Now you will be taken to the WooCommerce Home section within WordPress.
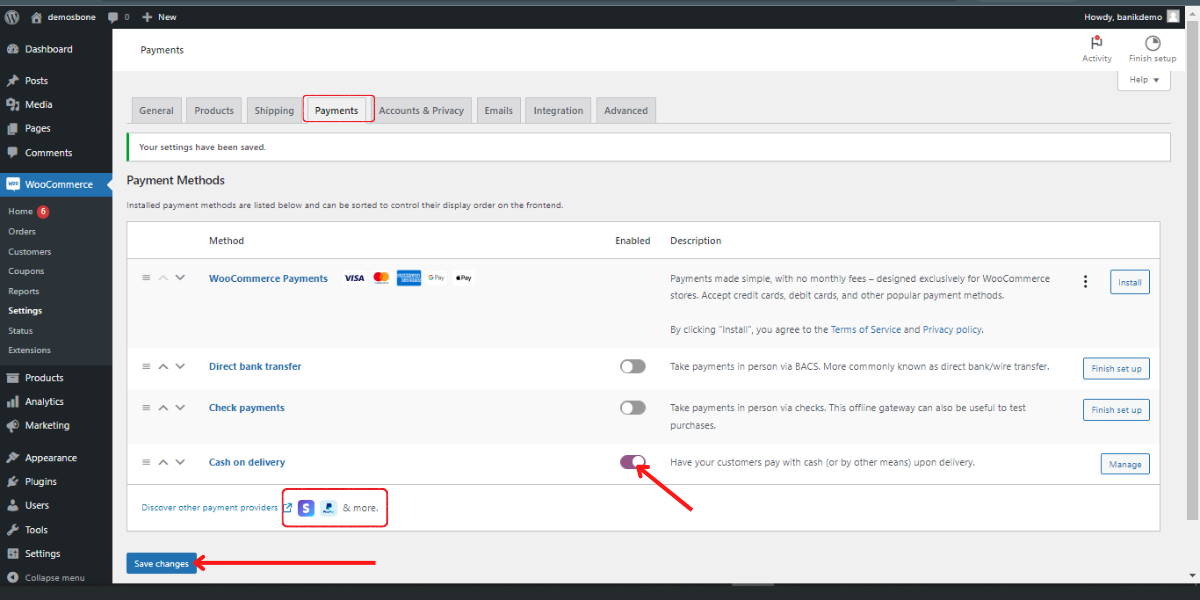
Under WooCommerce, click on “settings” and then the Payment option. You can add any payment method, such as Stripe, PayPal, GPay, etc.
Here, we’ve selected the “Cash on delivery” option for tutorial purposes.
You can rename it from “Cash on Delivery” to “Pay Later” if you want. Then Click on the “Save Changes” button.
Step 4 – Tourfic Installation & Setup
Next, go to the “Plugins” section and click on the “Add New” option. Type “Tourfic” in the search box. Install this free travel booking WordPress plugin and activate it.

Once you activate, the system will take you to a “Quick Setup” wizard like this. You need to click the “Get Started Button.”

In the first step, disable the “hotel” service option and click on “Save.”
(If you want to use hotel booking, u can keep this enabled)

In the next step, select your “Search Result” page and “Wishlist” page.
(If you can’t find any of the pages, please create a new page on your dashboard first)

Next, keep the settings as you prefer and set up your permalink of single tours.
You can keep it as “Tours” if you want.
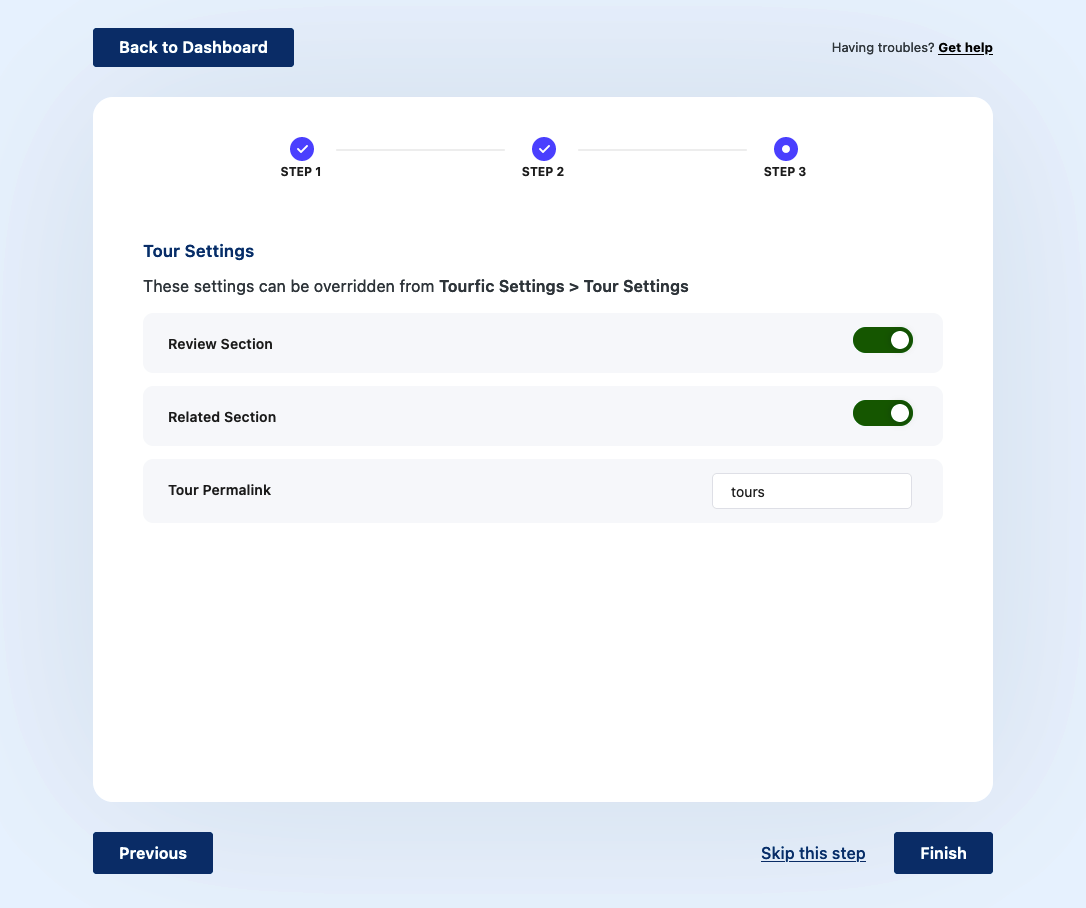
That’s it. You should be good to go. However, you can go to “Tourfic Settings” for more configurations like setting up colours, etc.

Step 5 – Tours Setup
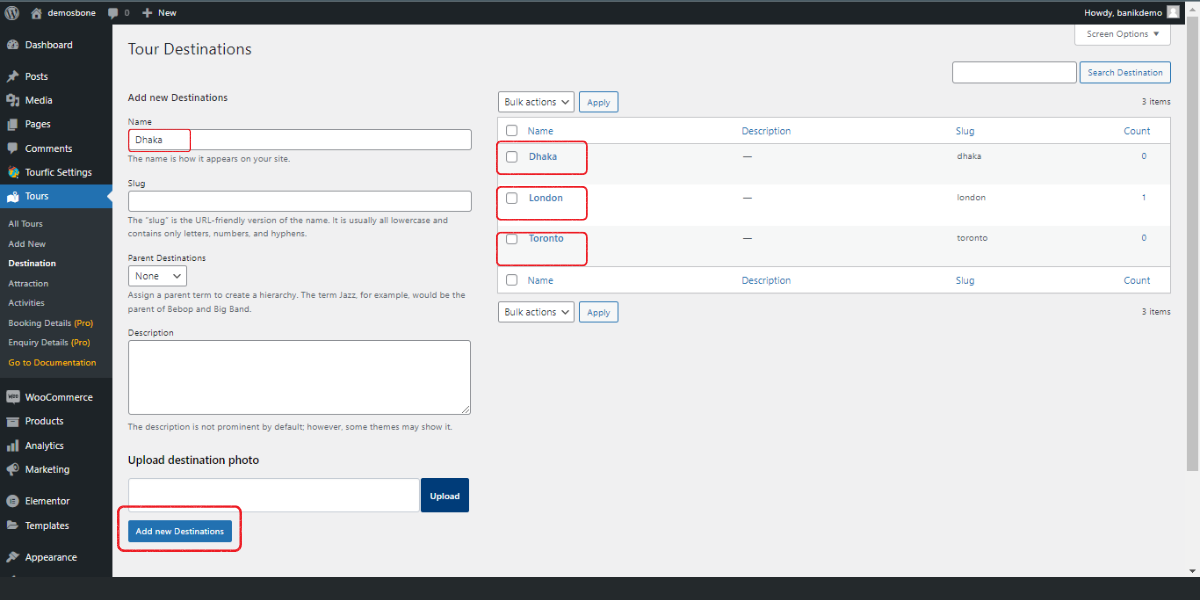
In this stage, click on “Tours”> Destinations. You must create your desired destinations and click on the “Add new Destinations” option.
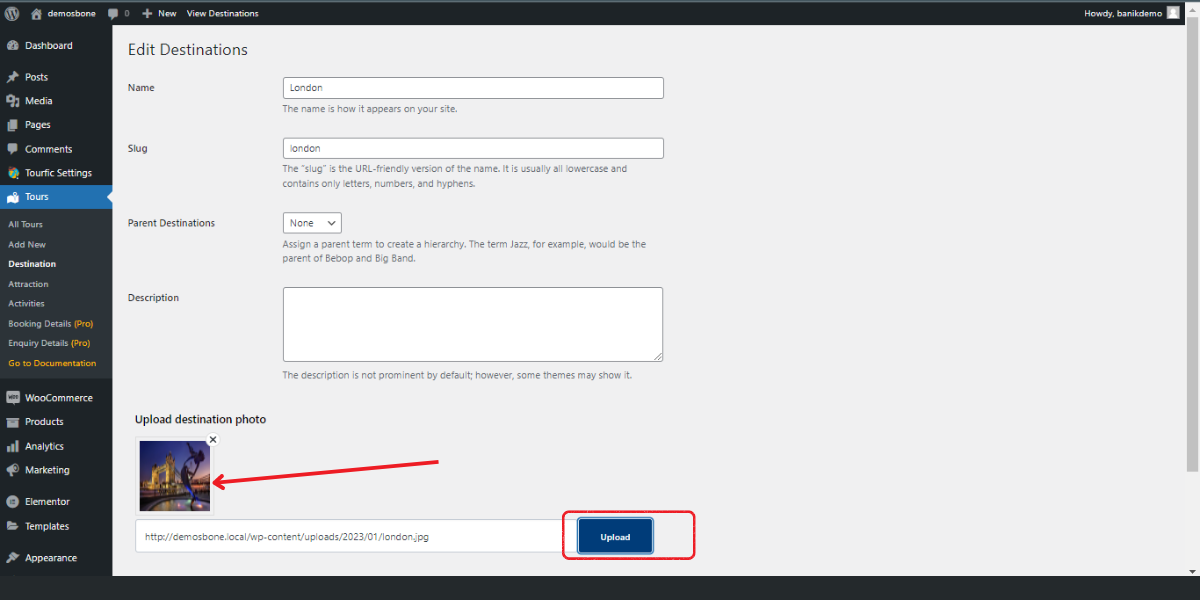
Then, upload the destination photo under each “Edit Destinations” page.
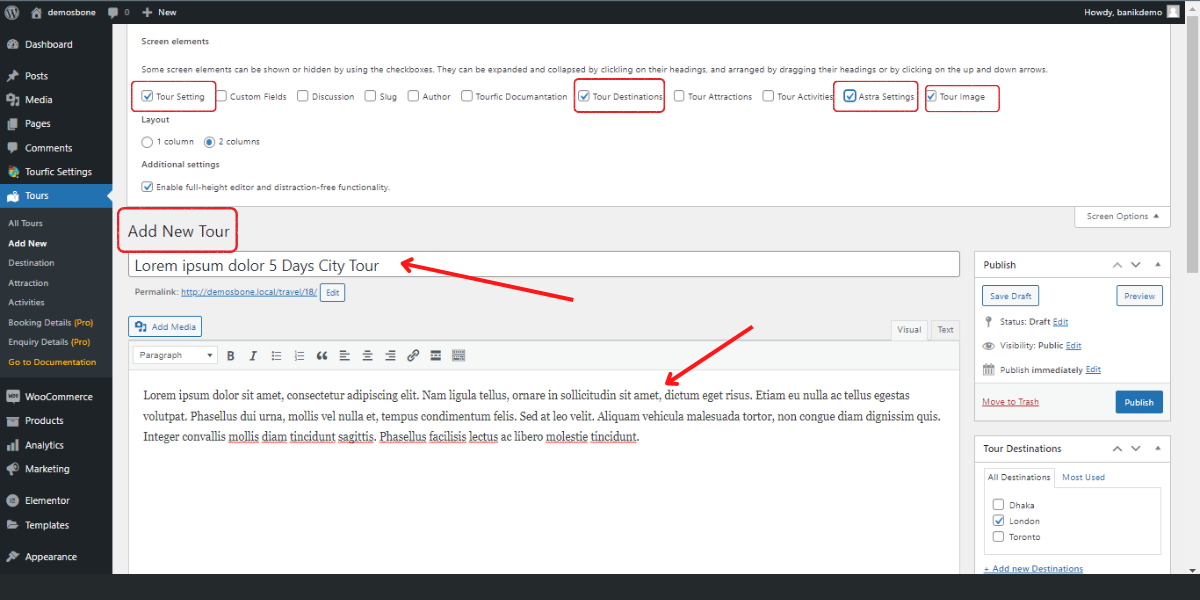
Next, click on Tours> Add New. Under the “Screen Elements,” you can use the checkboxes for Tour Setting, Destinations, Astra Settings, Tour Image, etc.
Then, type your tour package name in the “Add New Tour” box. Write a short description of the tour.
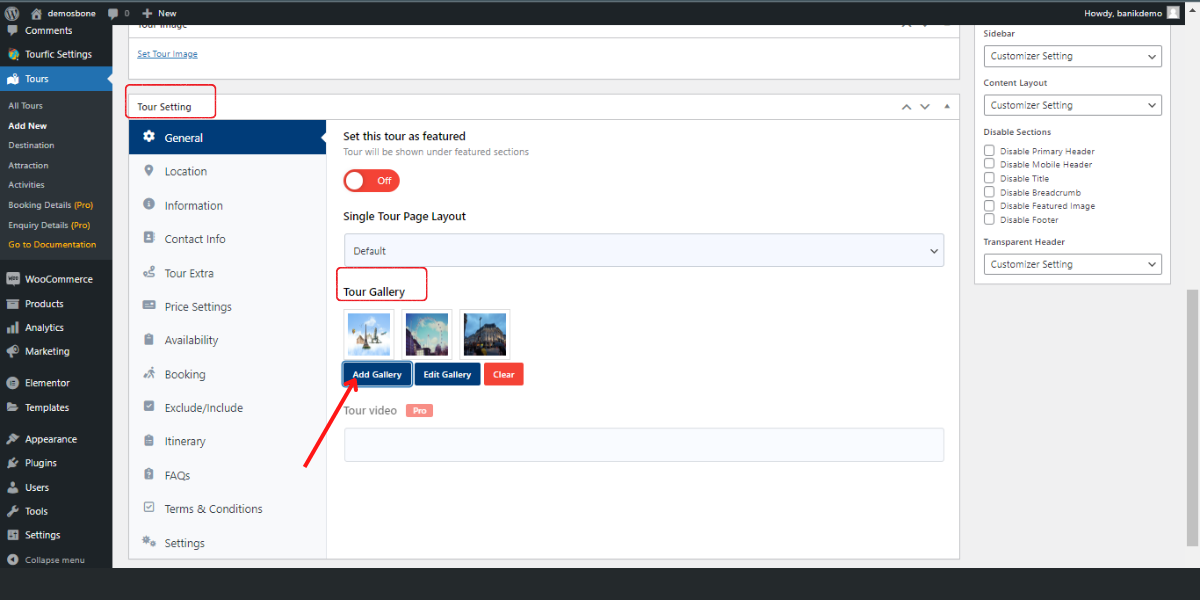
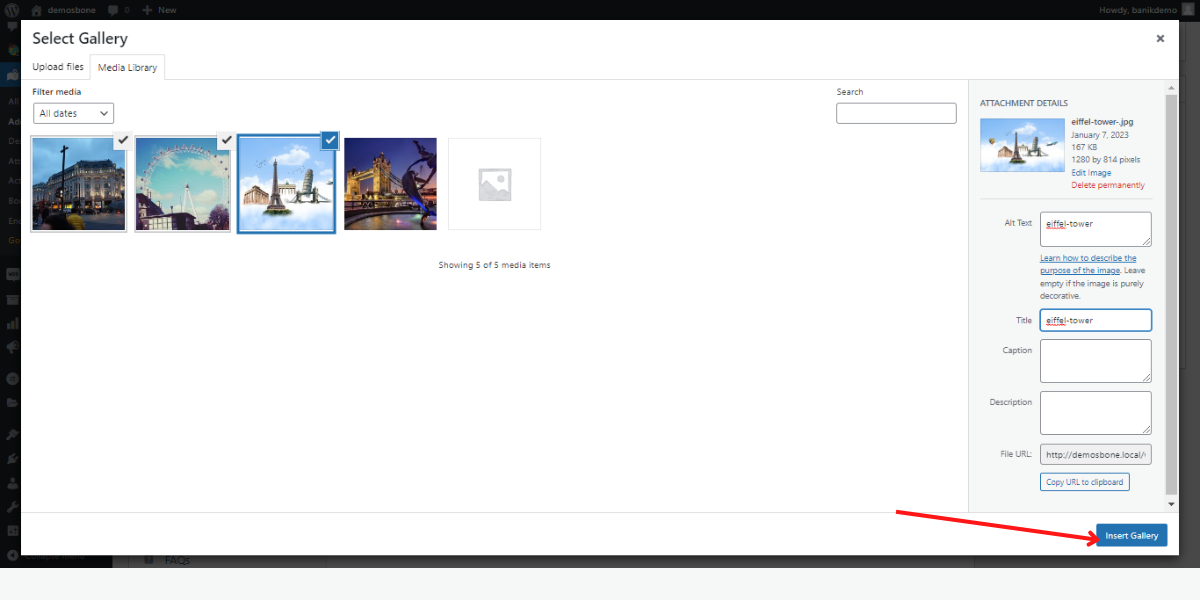
In the general tab, upload your tour destination photos in the “Tour Gallery” section.
Upload photos from your local computer and select the images you need.
Under the location tab, write the tour location.

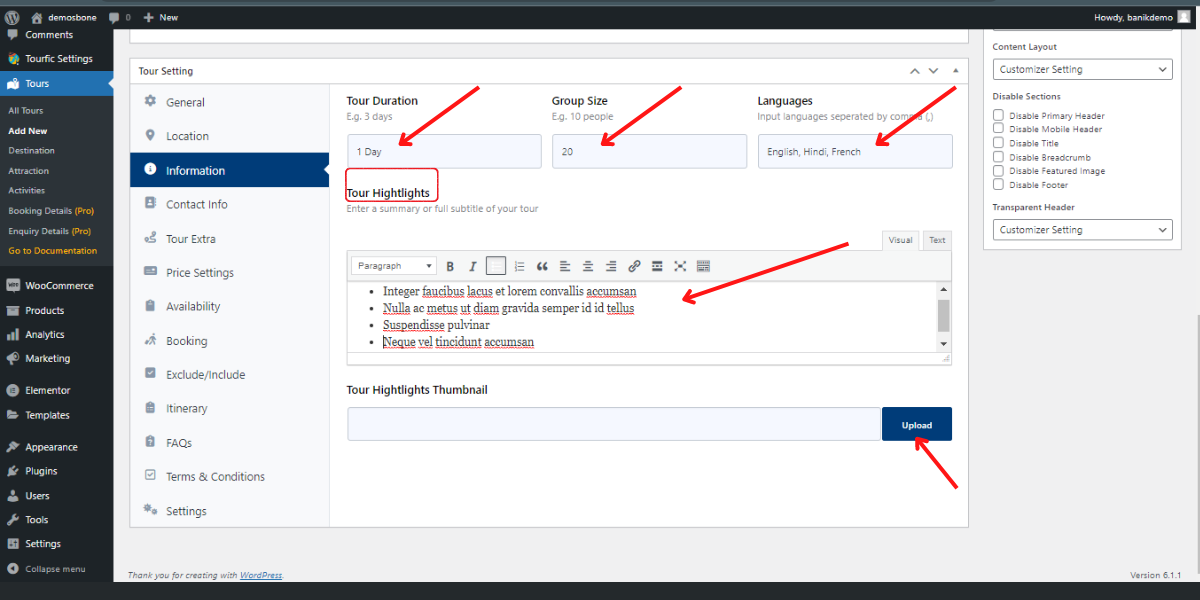
In the information tab, type the tour duration (E.g., one day, two days, three days), group size (E.g., 10, 20, 30, etc.), and Languages.
Then write a short description of your tour. Then, skip the “Contact Info” and “Tour Extra” tabs because they are the Pro features.
Step 6- Price Setup
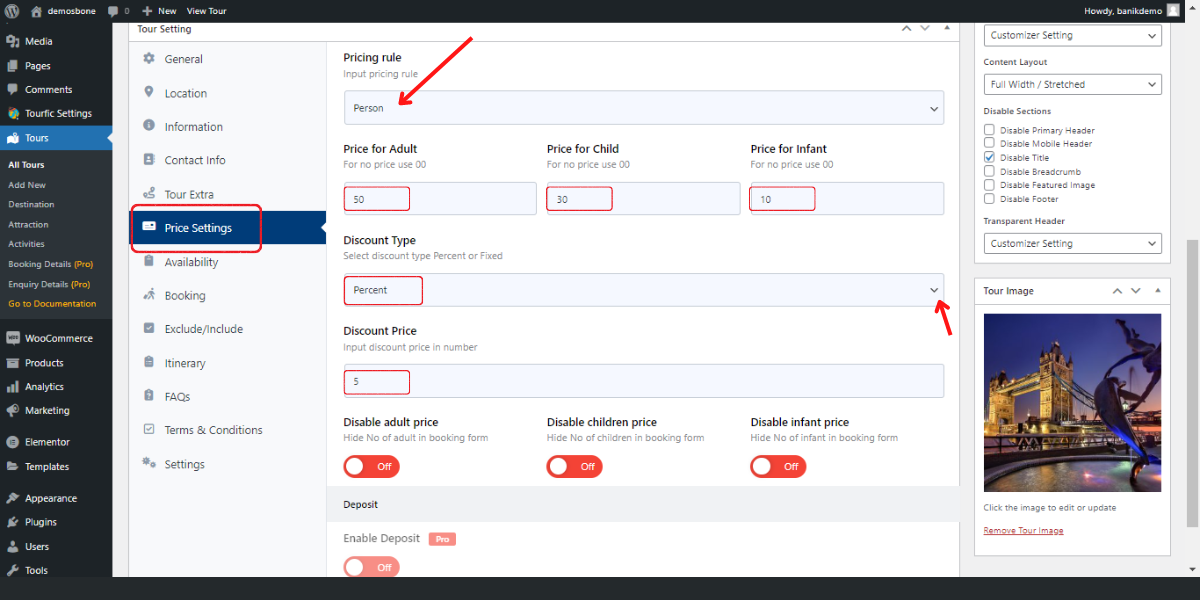
Under the “Price Settings” tab, input the pricing rule for a person or group (PRO feature). Type the price for Adult, Child, and Infant.
Then, choose the discount type along with placing the discount price. You can skip the rest options because they are in the PRO version.
Step 7 – Other Settings
In this stage, you must set up other options appropriately. In the Availability tab, choose your tour type, such as – Continuous or Fixed (Pro). Then place the number of minimum and maximum people. Skip the rest of the Pro features. Skip the booking tab too.

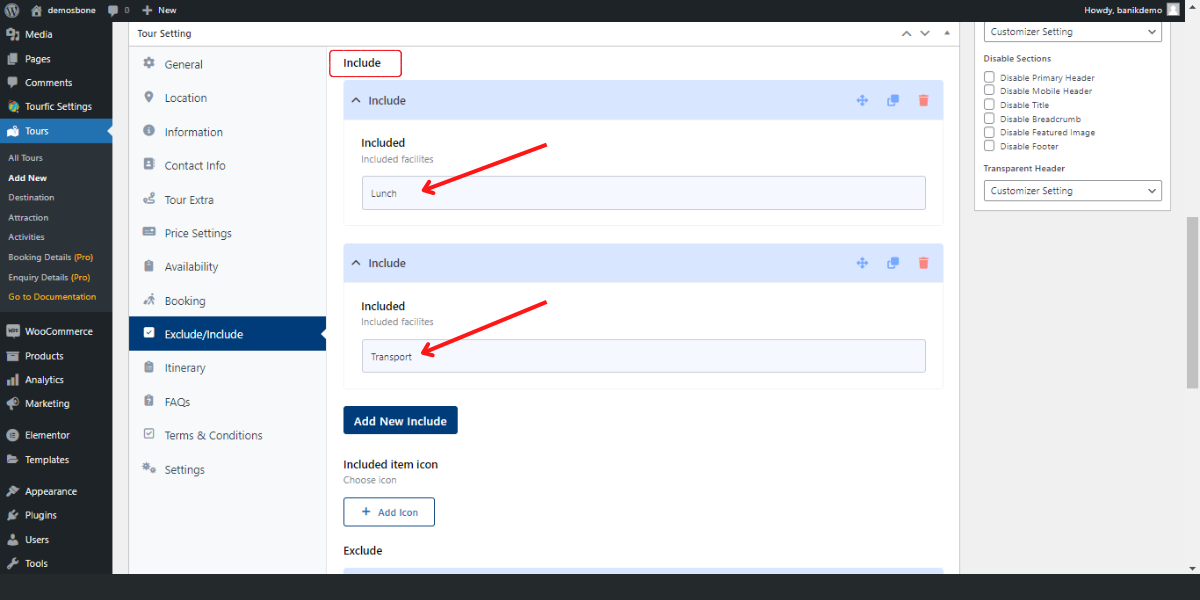
Now, in the Exclude/ Include tab, include some facilities like Lunch, Transport, etc., and exclude some facilities like Insurance, Baby food, etc.

In the Itinerary tab, set up your tour itinerary planner. Place the time and title. Then upload the image and write a short note about the tour plan separately.

Now, add some common questions and answers under the FAQs tab.

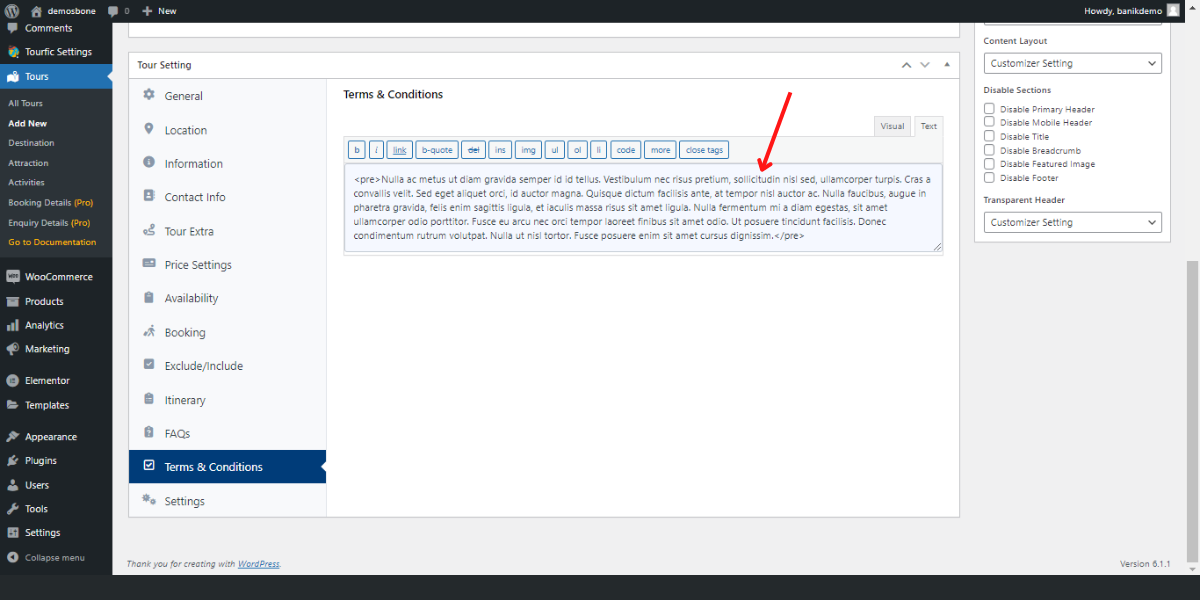
Then write specifically all of your terms and conditions about your tour package. Here, you may use some bullet points. Then skip the last settings.
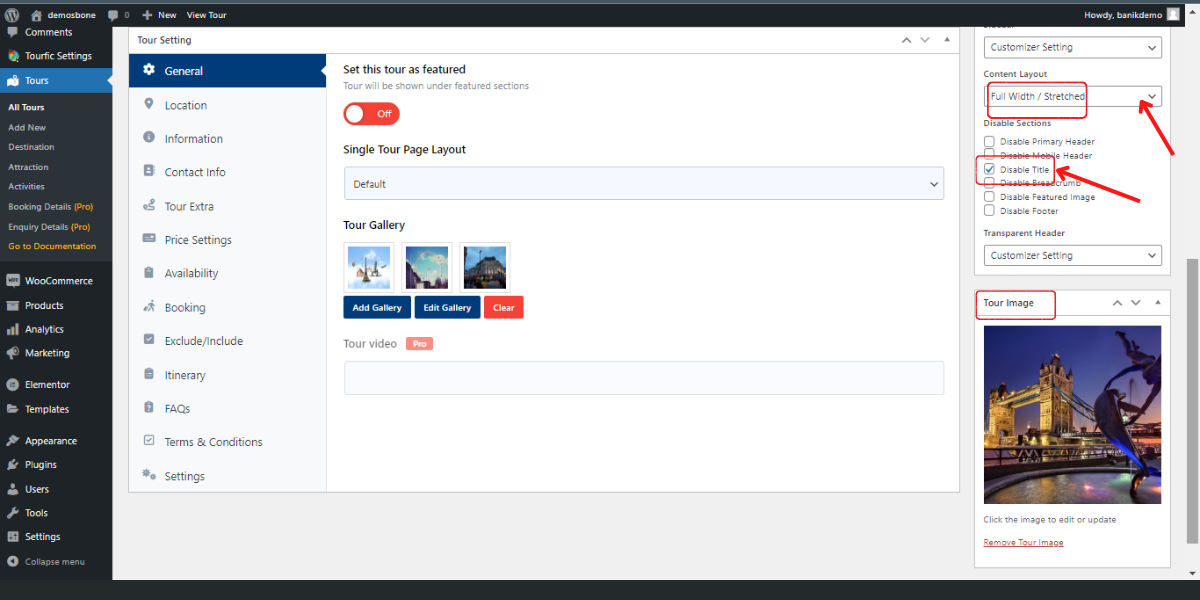
Select the Full Width/Stretched from the Content Layout on the upper-right side of this page. Next, checkmark on the “Disable Title.”
Then, upload the photo under the “Tour Image” option.
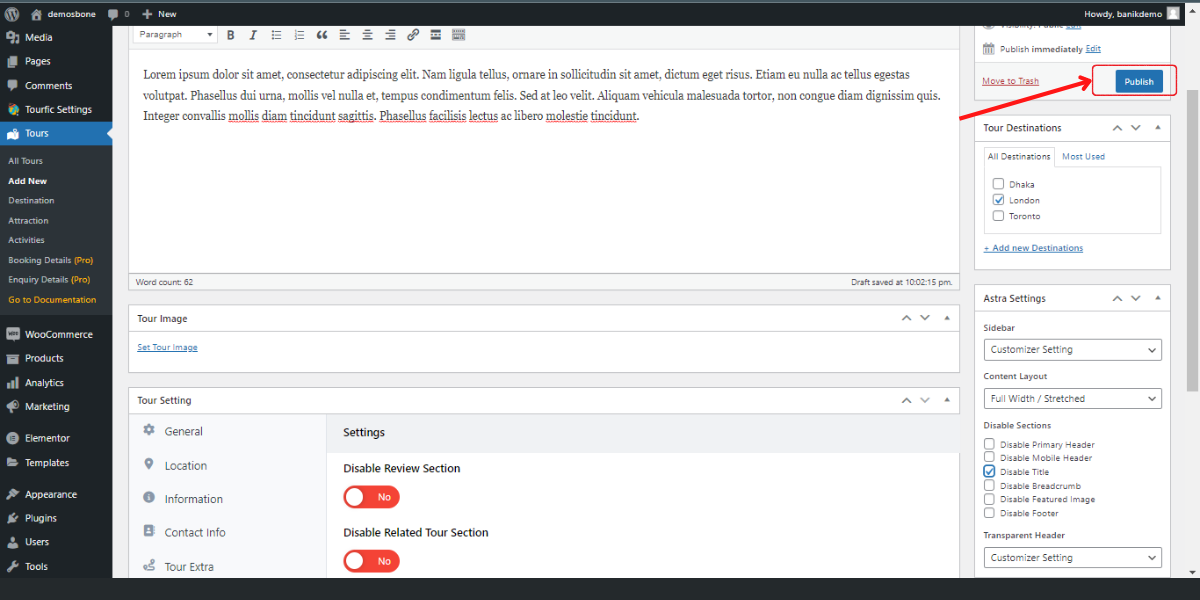
Step 8 – Publishing
After setting up everything appropriately, it’s time to click on the “Publish” button.
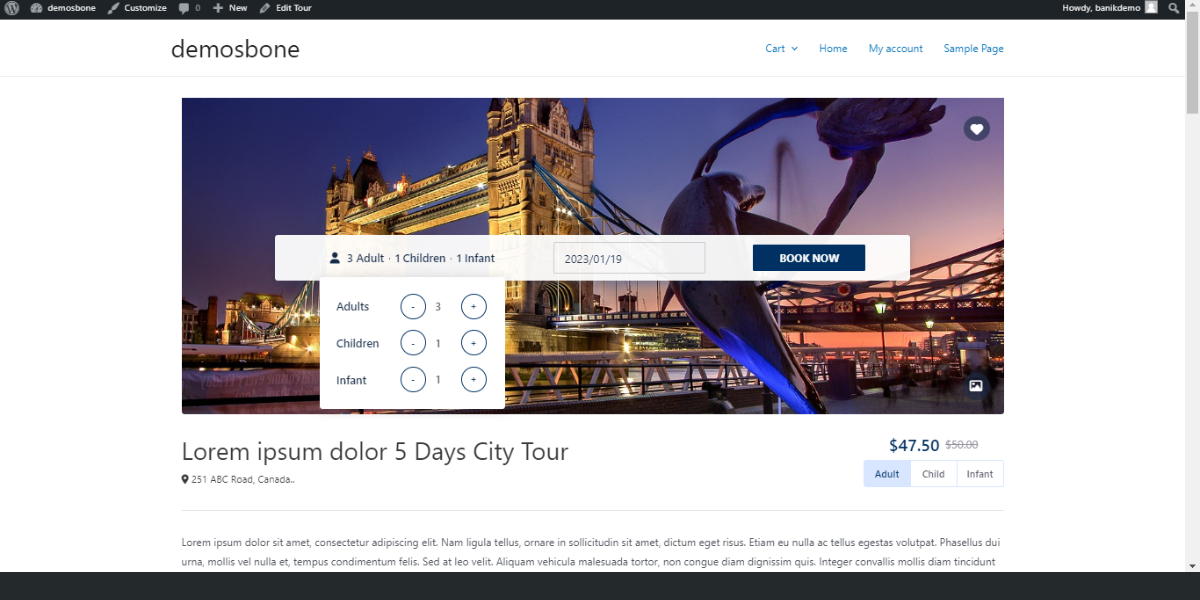
Then click on the permalink and view the post. Your travel booking website should look something like this.
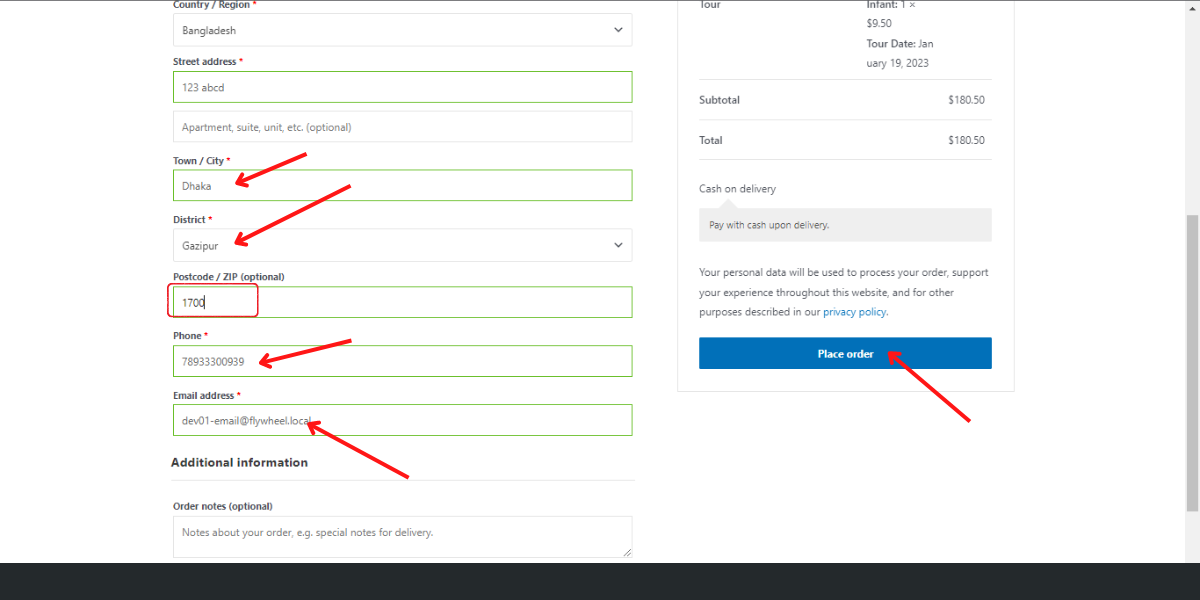
Step 9 – Test Booking Function
For testing purposes, you can try booking or checking out the tour package yourself. Look at the following photos, and you may do the following things to test your tour and travel booking website.

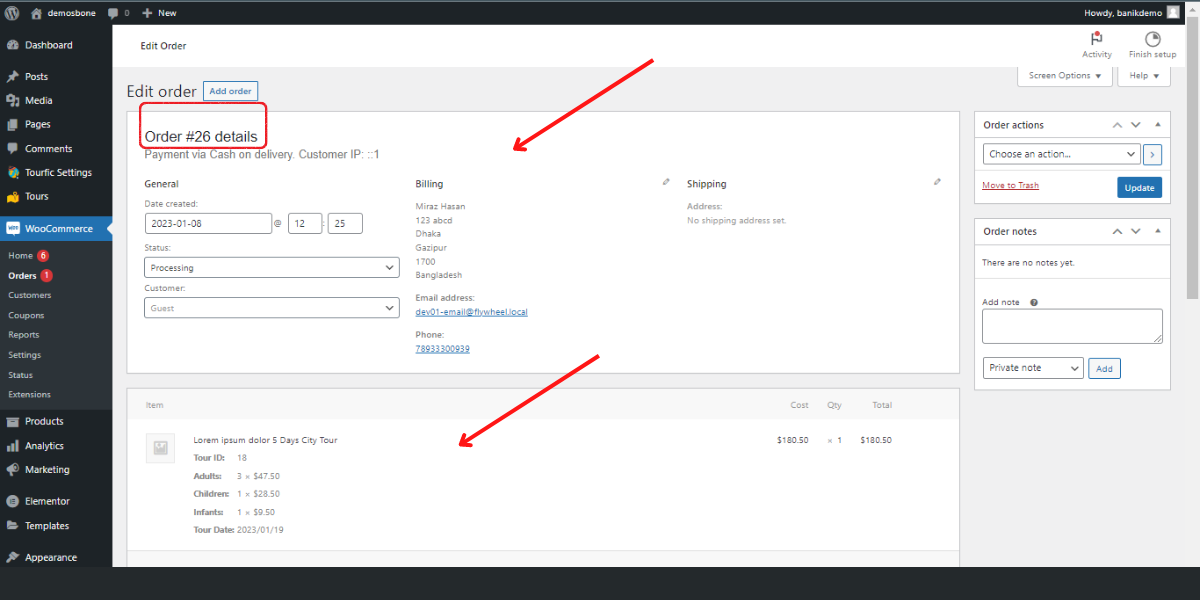
Now, go to the WooCommerce section. Click on “Orders and then click on your customer’s name.

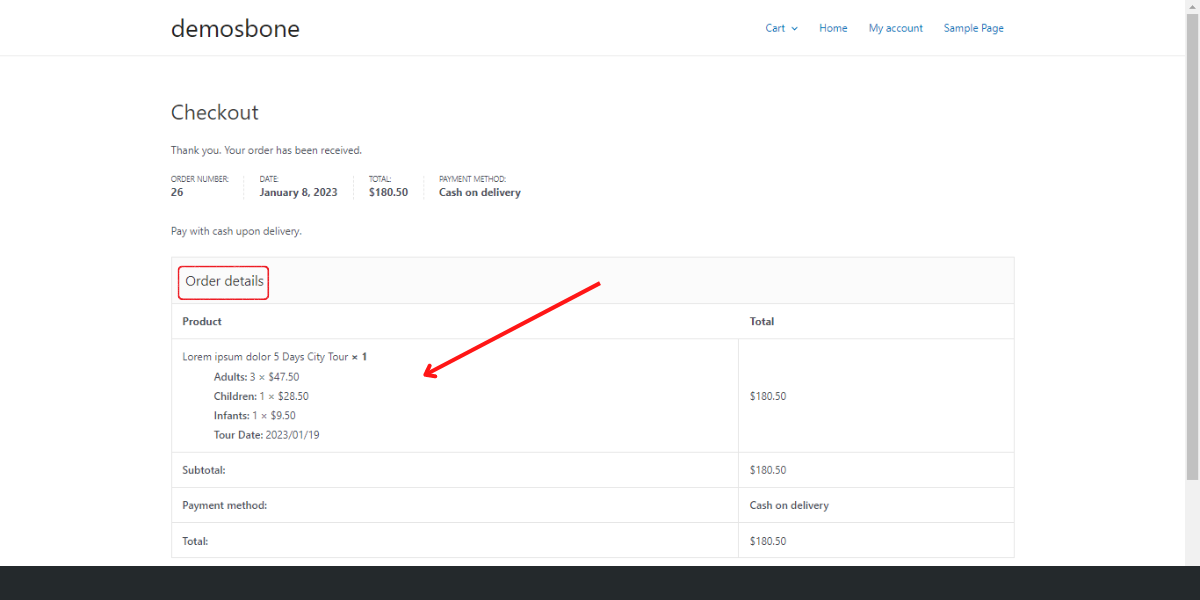
Here are the “Order details.”
That’s it. Congrats! You’ve successfully created your travel booking website in WordPress with a free theme and plugin.
Have any queries? Contact us today.
Video Tutorial
Are you tired of reading a long article? Watch this video to learn How to create a Travel & Tour Booking WordPress Website.
Frequently Asked Questions
What are essential WordPress plugins for travel websites?
Essential WordPress plugins for travel websites are tools that add key features like booking systems, SEO optimization, analytics, and customer support. These plugins improve user experience, increase bookings, and optimize website performance
Which plugin is best for travel booking websites?
Plugins like Tourfic are among the best travel booking plugins for WordPress. They allow you to add tours, hotels, and booking systems directly to your website with WooCommerce integration.
Why is SEO important for travel websites?
SEO is important for travel websites because it helps rank higher on search engines and attract more organic visitors. Using SEO plugins improves content optimization, keyword targeting, and search visibility.
How can I improve my travel website’s speed?
You can improve your travel website’s speed by using caching plugins that store website data and reduce loading time. Faster websites improve user experience and help boost SEO rankings.
Do travel WordPress plugins affect website performance?
Yes, some travel WordPress plugins can affect performance if they are not optimized. Using lightweight and well-coded plugins helps maintain speed and avoid conflicts.
What are the best free travel plugins for WordPress?
Some of the best free travel plugins for WordPress include booking, SEO, caching, and form plugins that help manage tours, improve performance, and increase visibility without extra cost.

