Zapier is a popular online automation tool that connects your favorite apps and services. It allows you to automate repetitive tasks by creating workflows called Zaps. A Zap consists of a Trigger (an event that starts the workflow) and Actions (tasks that are performed automatically as a result).
Now, you can integrate Zapier with Hydra Booking to automate workflows and seamlessly connect your bookings with other apps and services.
In this article, we’ll guide you through the step-by-step process of integrating Zapier with Hydra Booking. Let’s dive in!
How to connect Zapier with Hydra Booking? #
Step 1: Get the Webhook URL from Zapier. #
First of all you need to log in to your Zapier account from here.
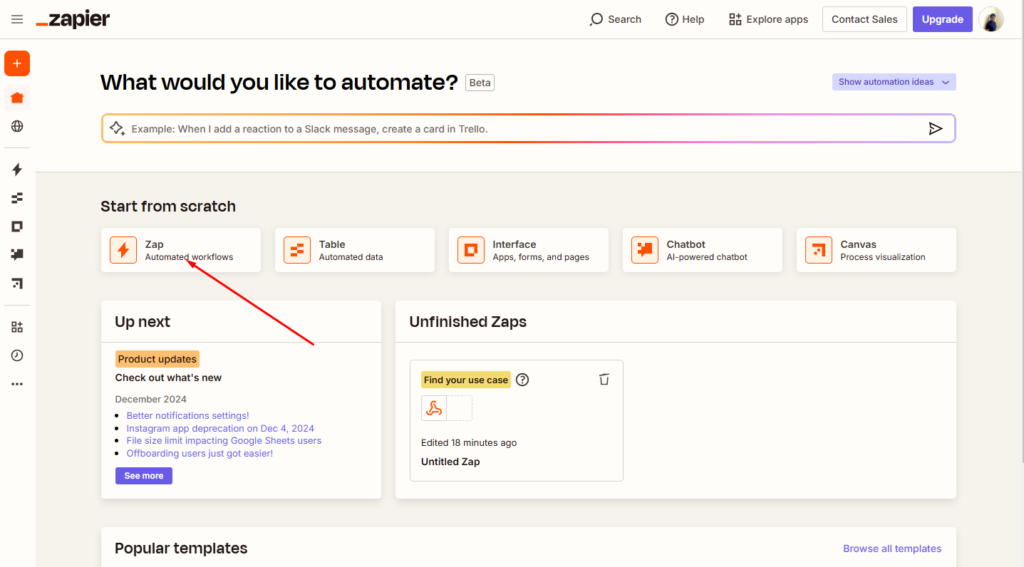
Once you’ve successfully logged in, locate Zap in your dashboard and click on it.
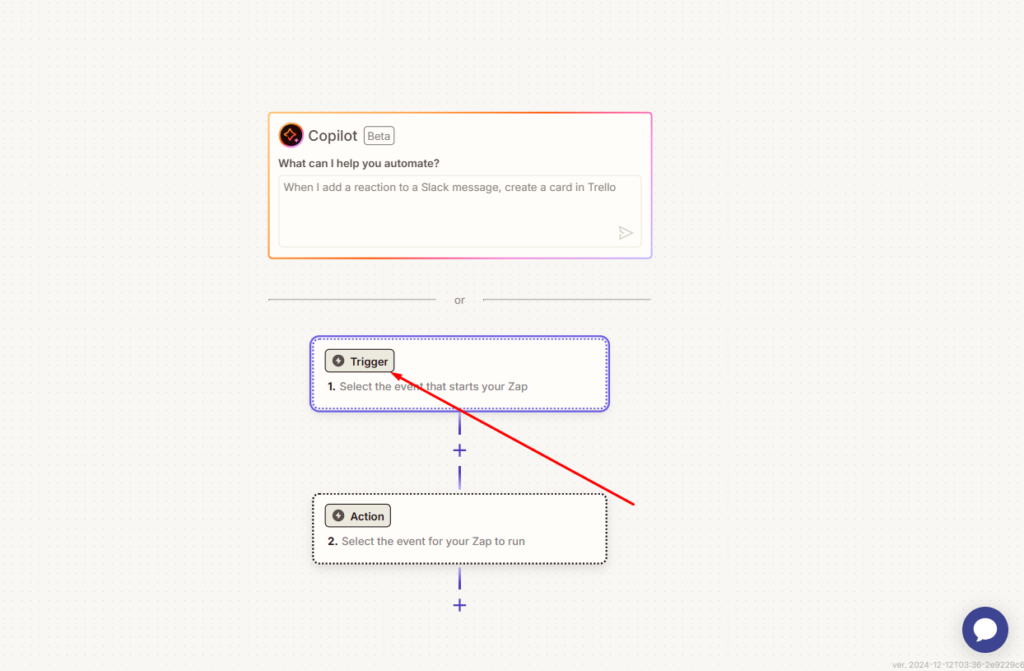
Once the new page loads, locate the Trigger section and click on the Trigger button.
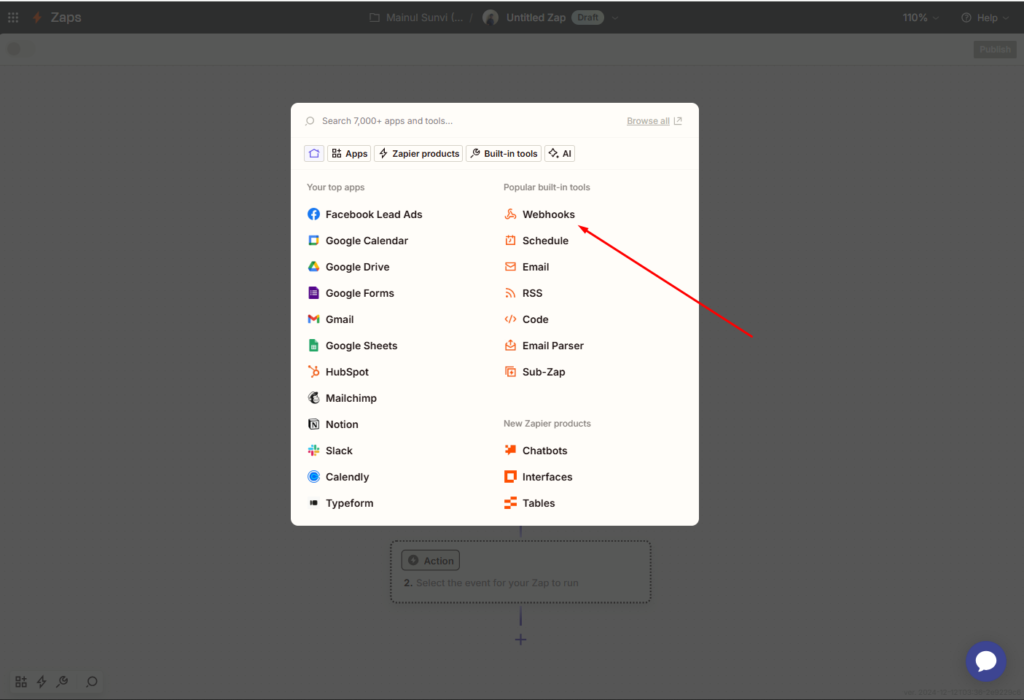
After clicking the Trigger button, a popup will appear displaying several apps and services. Select the Webhooks option from the list.
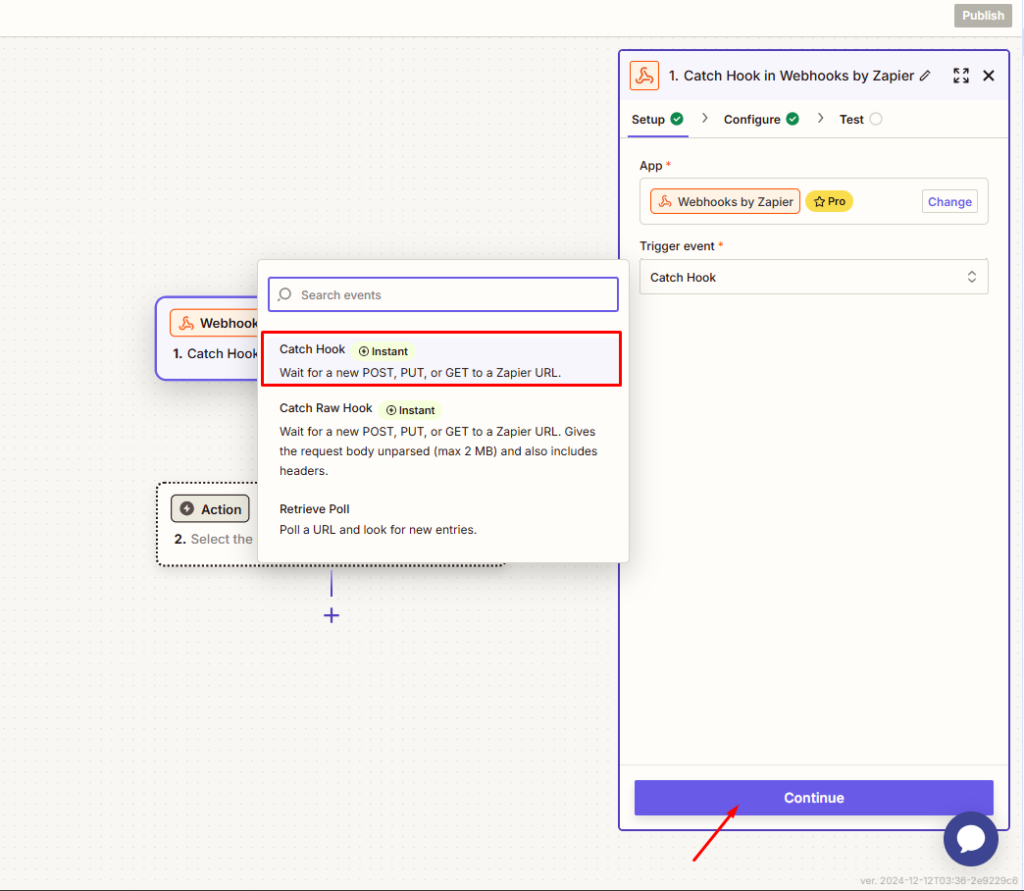
From the Trigger Event dropdown, select Catch Hook and click the Continue button.
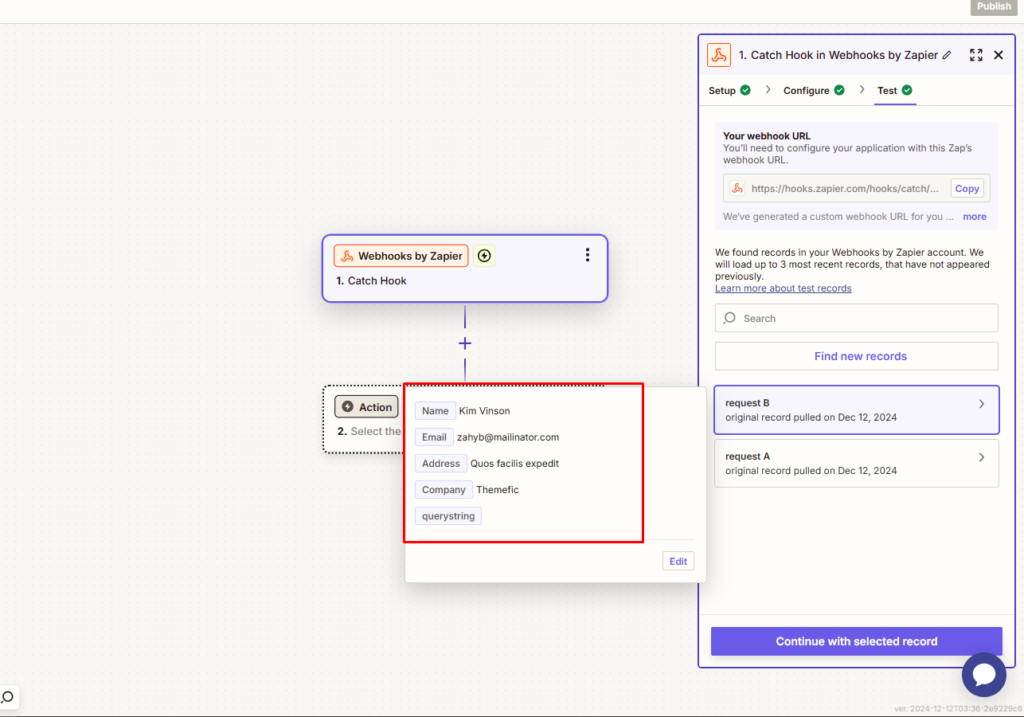
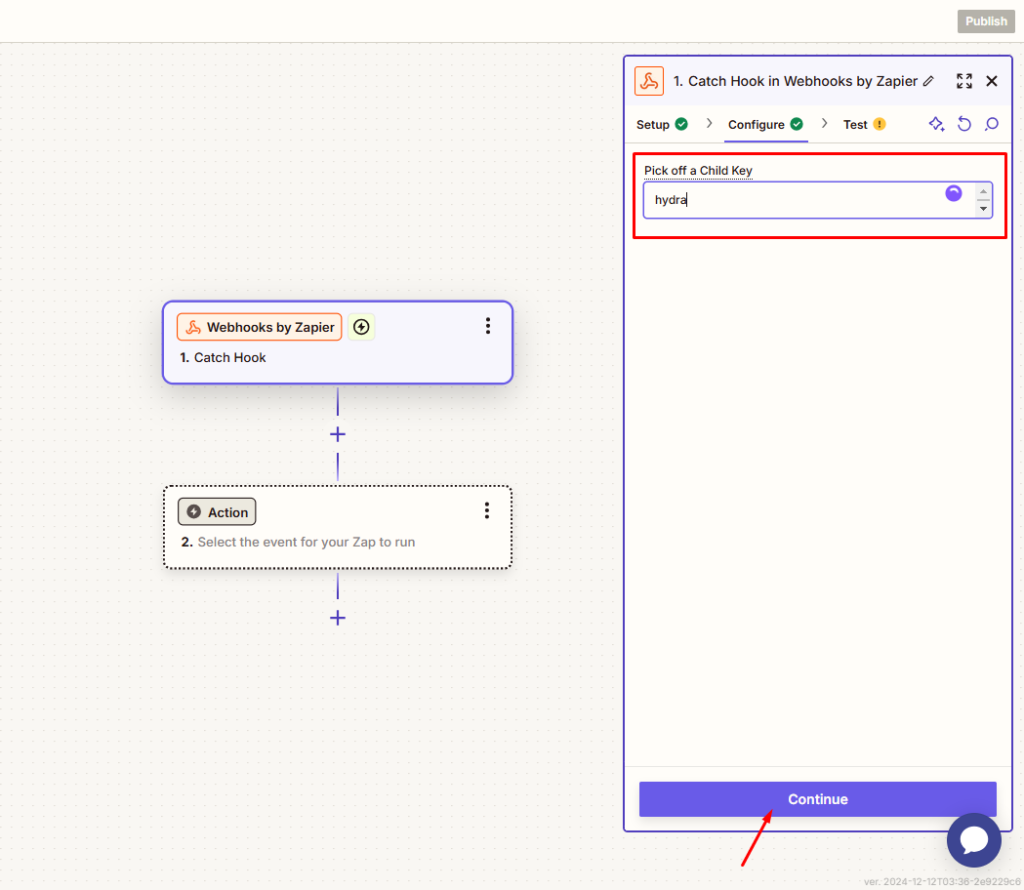
After clicking the Continue button, you’ll see a field called Pick Off a Child Key. Here, you need to enter a key so that Zapier can catch the data and organize it under this specified “child key” as its value. After providing the “Child Key” click on Contine button again.
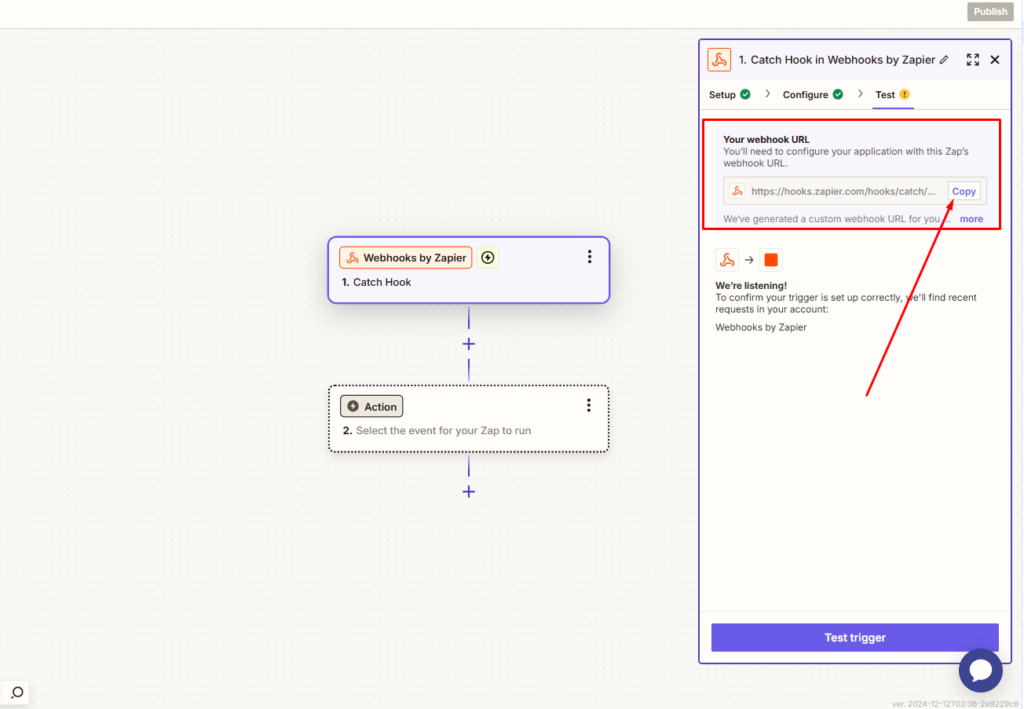
After that, a Webhook URL will be generated. Simply copy this URL, as we’ll need it to configure it with Hydra Booking.
Step 2: Configure the Hydra Booking Settings. #
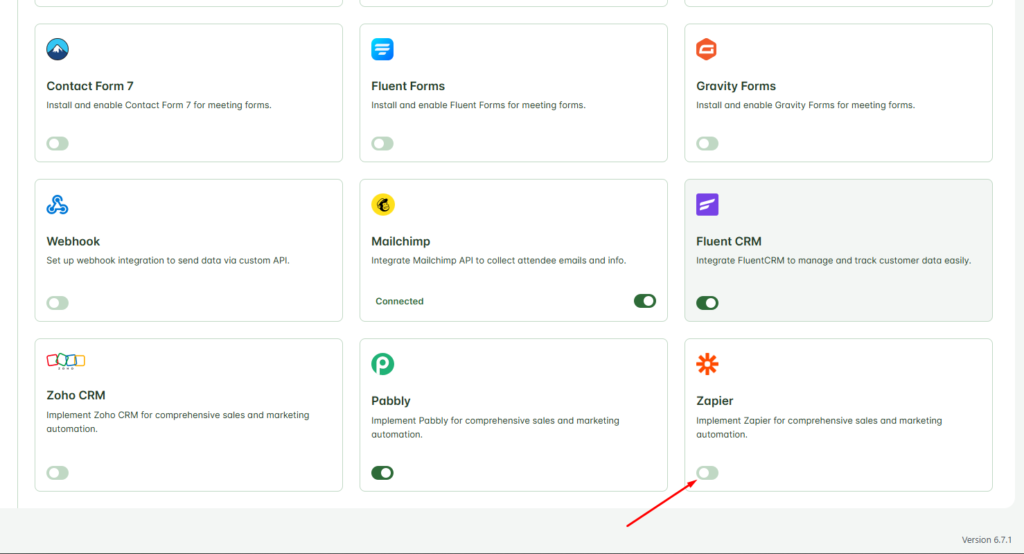
After obtaining the webhook URL, navigate to Hydra Booking > Settings > Integration and locate the Zapier option.
You’ll see a toggle button, turn it on. Enabling this option allows you to use Zapier for your meetings.
Step 3: Configure the Meeting for Zapier Integration. #
After successfully setup everything done, now you need to configure the meeting to apply the integration.
Now, navigate to Hydra Booking > Meetings and edit your desired meeting. Once the editing page loads, go to the Integrations tab from the navigation menu.
Click on Add New Integration, and from the Select Integration dropdown, choose Zapier.
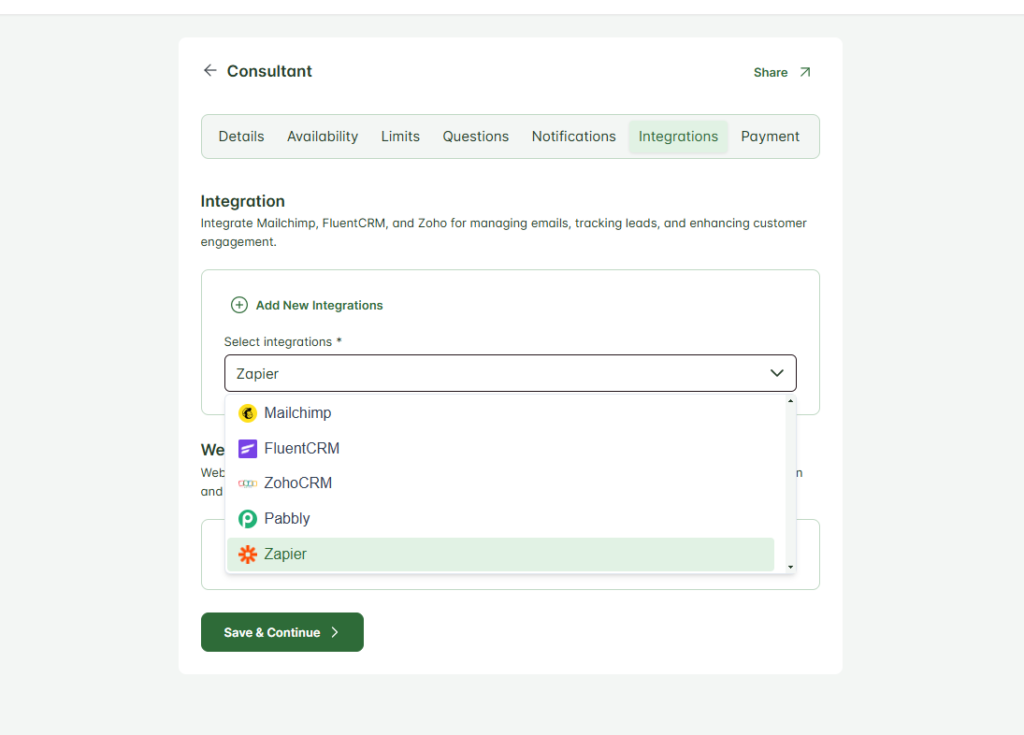
Now you’ll see several options. Let’s go through them one by one:
Integration Title: Enter a title that best describes the purpose of this integration.
URL: Enter the webhook URL you obtained from Zapier Zap.
Event Triggers: Event triggers determine when attendee details will be added to the Zapier. Let’s dive into the available triggers:
- Booking Confirmed: This trigger activates when an attendee books a meeting and receives a confirmation email. The attendee’s details will be added to the Zapier list.
- Booking Canceled: This trigger activates if an attendee’s booking is canceled by the host for any reason. The attendee’s details will be added to the Zapier list.
- Booking Completed: This trigger activates once a booking is completed and the meeting with the attendee is successfully concluded. And then the attendee details will be added to Zapier list.
Other Fields: In this section, you can specify whether you want to receive all the data from a form or only selected fields.
If you choose Selected Data, you can map the keys to specific attendee form fields in Hydra Booking. The fields on the left-hand side represent the keys, while the fields on the right-hand side correspond to Hydra Booking attendee fields. This mapping ensures seamless data synchronization between the two platforms.
Here are my meeting configurations,
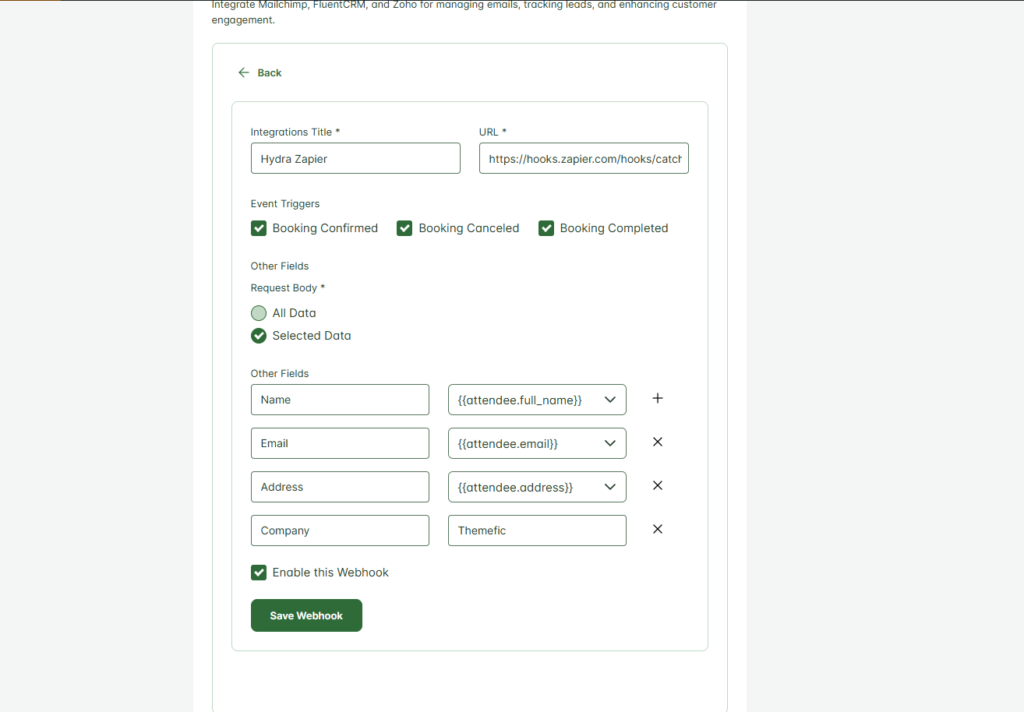
Once all the information is filled in correctly, click the Save Webhook button to finalize the integration.
Testing the Zapier Integration #
Now, whenever an attendee books a meeting from the front end, their data will automatically be added to the Zapier list for further automation tasks.
