You can now integrate Hydra Booking with Mailchimp to streamline your email marketing and attendee management. In this article, we’ll dive deeper into this integration and provide a step-by-step guide on how to connect Hydra Booking with Mailchimp.
Without further ado, let’s talk about it.
How to Integrate Mailchimp with Hydra Booking? #
Step 1: Get the API Key from Mailchimp #
To integrate Mailchimp with Hydra Booking, you’ll need to obtain your Mailchimp API key and add it to the Hydra Booking settings. Here’s how you can get the API key:
First, log in to your Mailchimp account. Once logged in, you’ll land on the dashboard. Now in the top-right corner of the dashboard, click on your profile name or avatar and select Account & Billing.
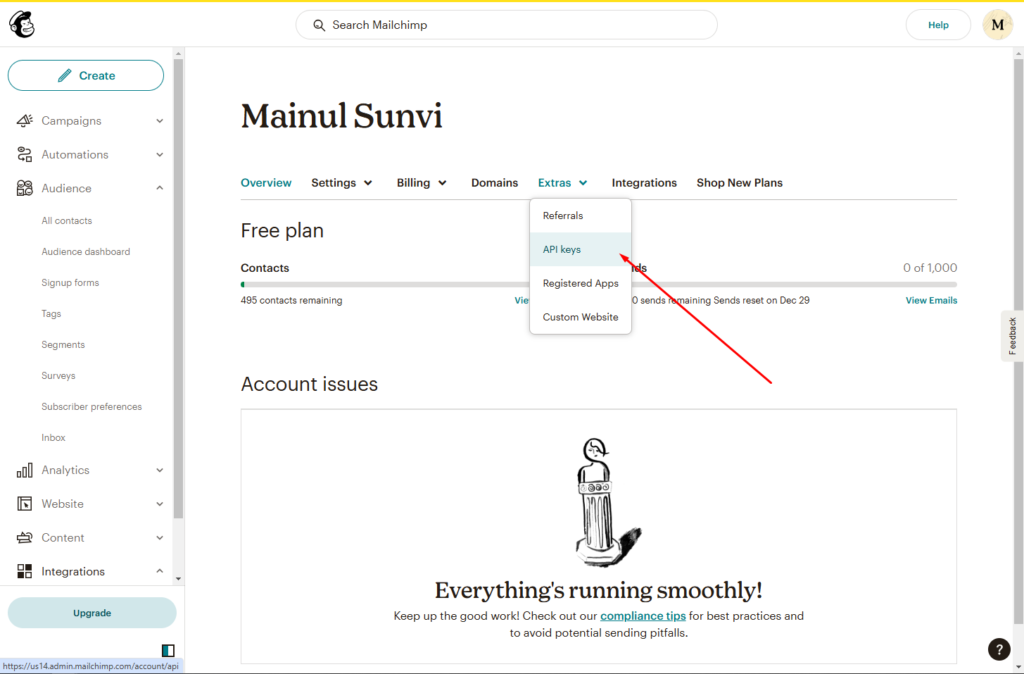
Navigate to Extras > API Keys from the navigation menu.
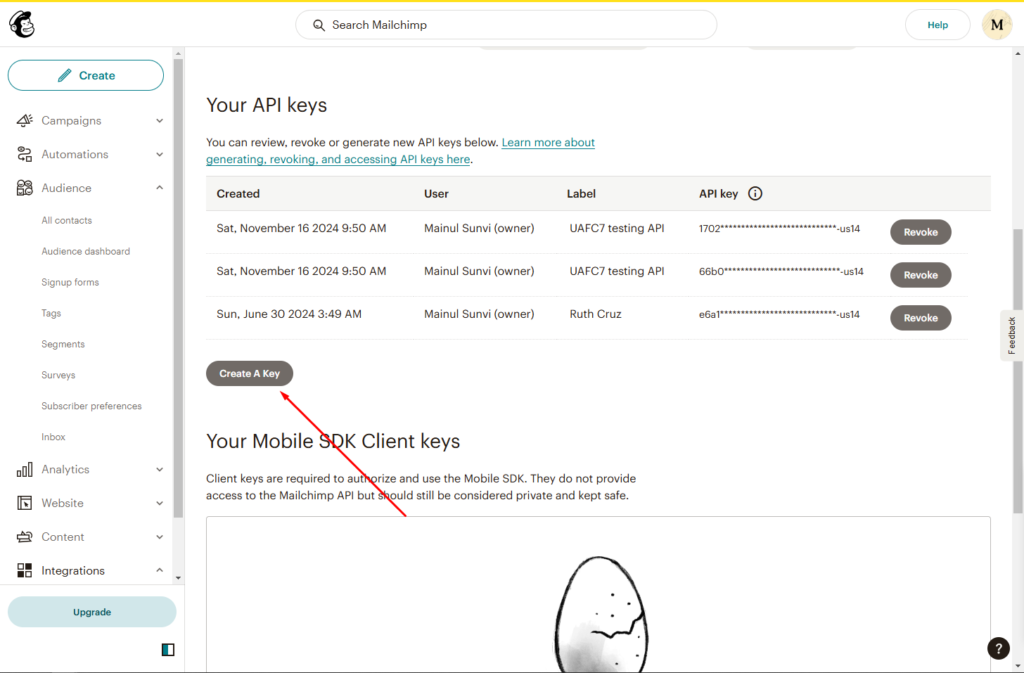
After the page loads, click on the Create a Key button.
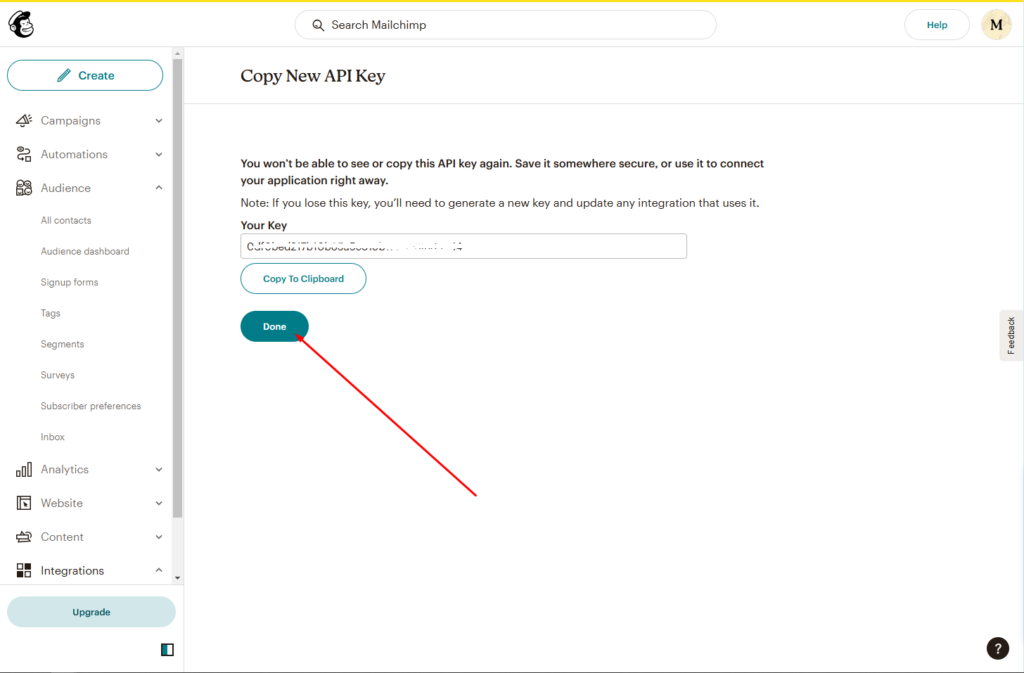
A popup will appear—enter a desired name for the key and click the Generate button. Once the key is created, copy it and click Done to complete the process.
Step 2: Set up the Hydra Booking Settings #
After successfully generating the API key from Mailchimp, it’s time to add it to the Hydra Booking settings.
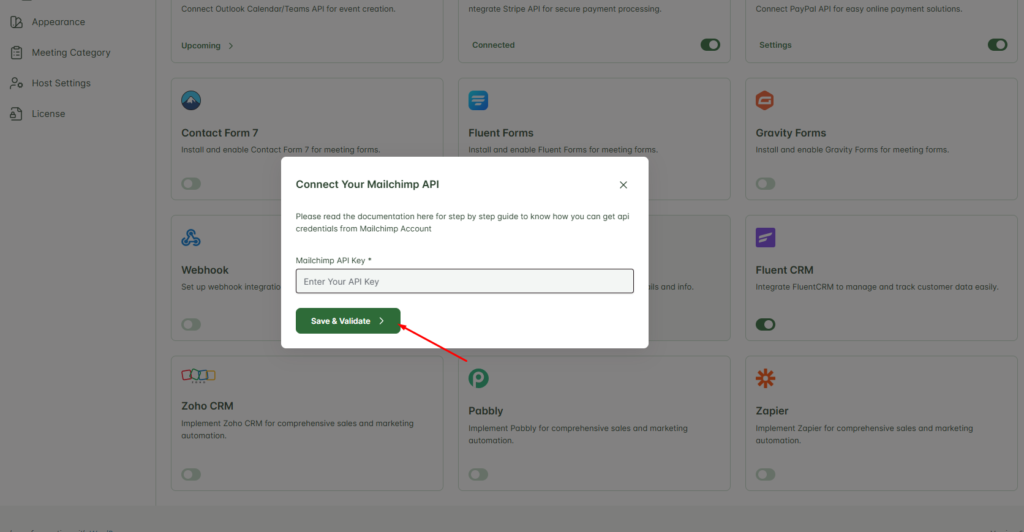
Navigate to Hydra Booking > Settings > Integrations and locate the Mailchimp option. Click the Connect button to open the Mailchimp settings. Paste the API key into the Mailchimp API Key input box, then click Save and Validate to complete the integration.
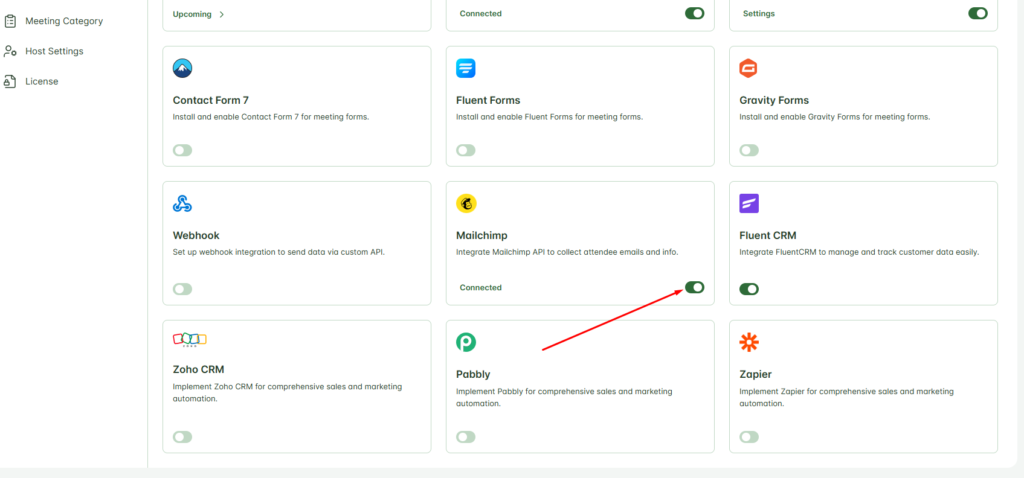
After saving the API key, you’ll see a toggle button next to the Connect button. Turn it on; if it’s turned off, you won’t be able to use Mailchimp for your meetings.
Step 3: Configure the Meeting for Mailchimp Integration. #
After successfully setup everything done, now you need to configure the meeting to apply the integration.
Now, navigate to Hydra Booking > Meetings and edit your desired meeting. Once the editing page loads, go to the Integrations tab from the navigation menu.
Click on Add New Integration, and from the Select Integration dropdown, choose Mailchimp.
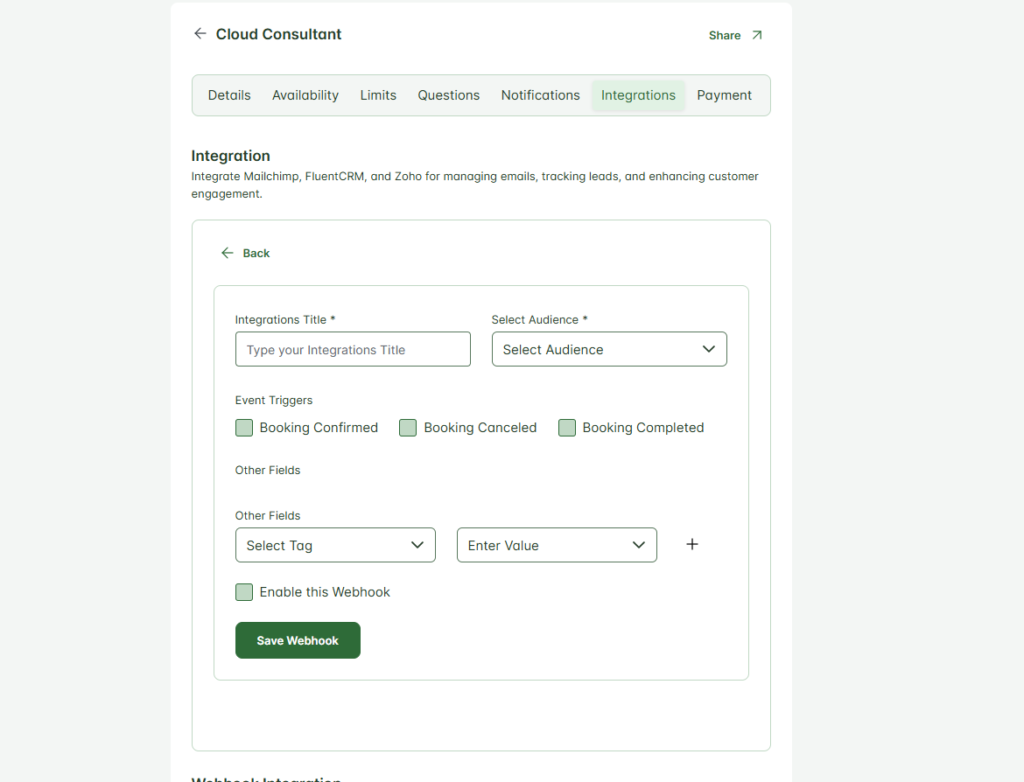
Now you’ll see several options. Let’s go through them one by one:
Integration Title: Enter a title that best describes the purpose of this integration.
Select Audience: Choose your desired audience from the dropdown menu.
Event Triggers: Event triggers determine when attendee details will be added to the Mailchimp. Let’s dive into the available triggers:
- Booking Confirmed: This trigger activates when an attendee books a meeting and receives a confirmation email. The attendee’s details will be added to the Mailchimp list.
- Booking Canceled: This trigger activates if an attendee’s booking is canceled by the host for any reason. The attendee’s details will be added to the Mailchimp list.
- Booking Completed: This trigger activates once a booking is completed and the meeting with the attendee is successfully concluded. And then the attendee details will be added to Mailchimp list.
For this demonstration I am selecting “Booking Confirmed” as event trigger.
Other Fields: In this section, you can map the fields from Mailchimp with the attendee form fields in Hydra Booking. The fields on the left-hand side represent Mailchimp fields, while the fields on the right-hand side correspond to Hydra Booking attendee fields. This mapping ensures seamless data synchronization between the two platforms.
Here is my settings after filling all the information.
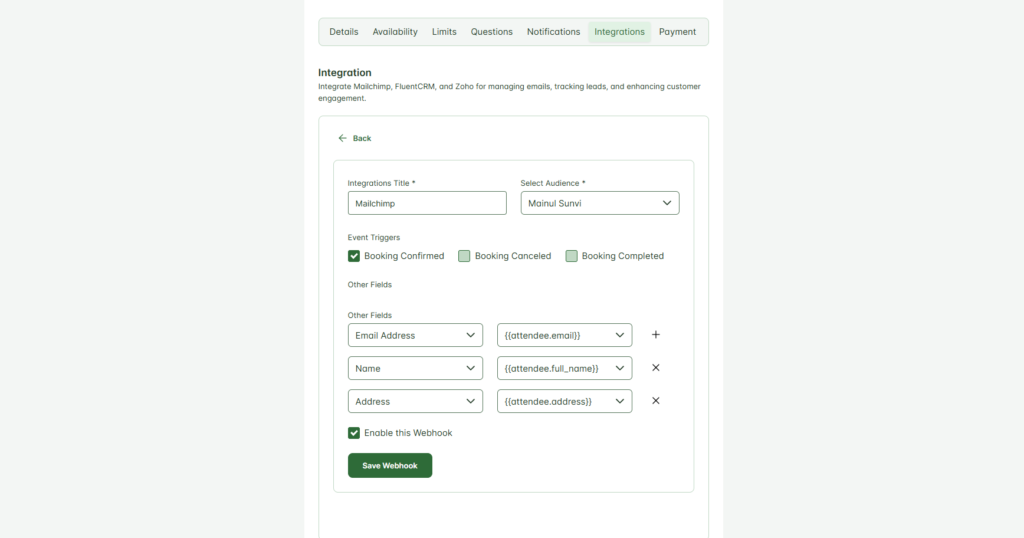
Once all the information is filled in correctly, click the Save Webhook button to finalize the integration.
Testing the Mailchimp Integration #
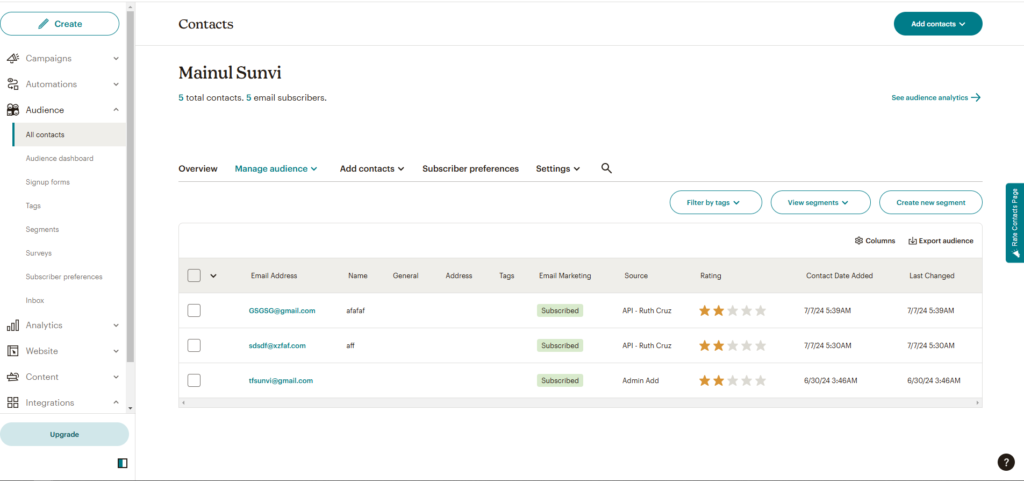
Now, whenever an attendee books a meeting from the front end, their data will automatically be added to the selected Mailchimp audience contact list. You can view this information by navigating to Mailchimp Dashboard > Audience > All Contacts in your Mailchimp account.
