Hydra Booking offers seamless integration with Google Calendar and Google Meet, making scheduling and managing your meetings easier than ever.
In this guide, we’ll walk you through the steps to connect Google Meet and Google Calendar with Hydra Booking, ensuring a smoother and more efficient booking experience for you and your clients.
Follow along as we dive into how to connect Google Meet and Google Calendar with Hydra Booking, making your scheduling and meeting process even smoother.

Create a New Project on the Google Cloud Console #
First, let’s start by creating a new project in Google Cloud Console. Head over to the Google Cloud Console page. Next to the “Google Cloud” logo, click on the drop-down icon, then select New Project.
Or, if you want to go straight to the project creation page, click here.
For this demonstration, I’ll be using a project I previously created called “Hydra API Test.”
Creating an App for Authentication #
Once you’ve selected your project, go to the left menu and navigate to API & Services > OAuth consent screen. When you’re on the OAuth consent page, set the User Type to External and click Create to move on to the next step.
On this page, fill in all the necessary information based on your specific needs. Once you’ve completed the fields, click Save and Continue to proceed to the next page.
On the Scopes page, there’s no need to add anything here—just click Save and Continue to move forward.
The same goes for the Optional Info section; simply click Save and Continue without adding any details.
In the Summary section, take a moment to review everything you’ve filled in to make sure it’s all correct. If it all looks good, click Go to Dashboard to return to the main OAuth consent screen.
Enable the Library #
After creating the app, you’ll need to enable the necessary library to connect it with the Hydra Booking plugin.
From the left menu, click on Library to open the library search page.
Search for Google Calendar in the library search bar, and you’ll see the Google Calendar API. Click on it to proceed.
Click the Enable button to activate the Google Calendar API.
Get the Client ID and Secret Key #
Now, go to Menu > API & Services > Credentials to create a new credential for the connection.
Next, select Create Credentials and then click on OAuth client ID.
For Application Type, select Web Application.
Give the API key a name that suits your needs. For this example, I’ll use Hydra Booking.
Next, for the Authorized JavaScript URI, go to Hydra Booking > Settings > Integrations > Calendars and click the Connect button. A popup will appear—copy the Redirect URI shown there and paste it into the Authorized JavaScript URI text box.
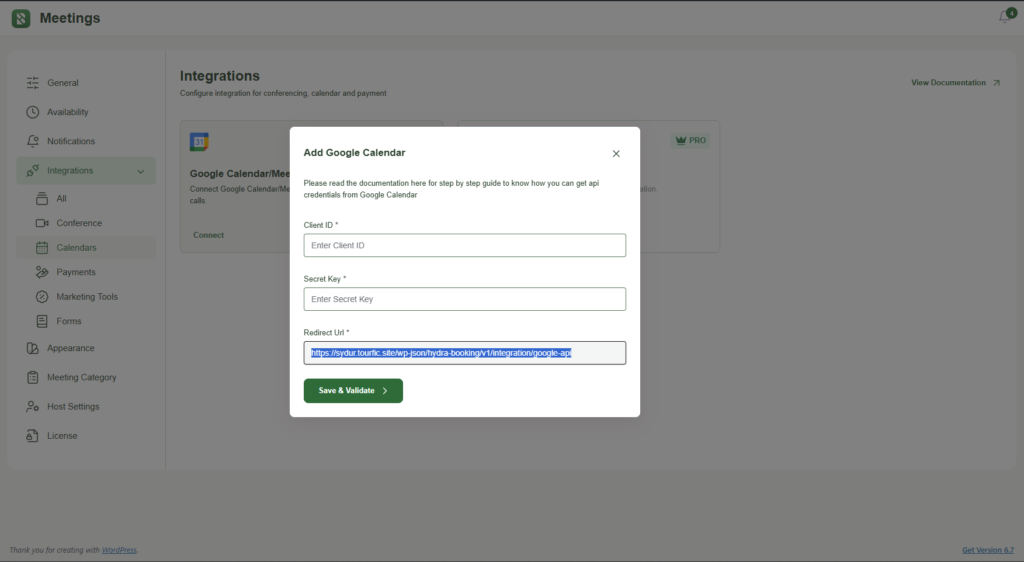
Now, click the Create button to generate the API key.
A popup will appear, displaying the Client ID and Client Secret key.
Copy the Client ID and Client Secret from the popup and paste them into the corresponding fields in the Hydra Booking popup.
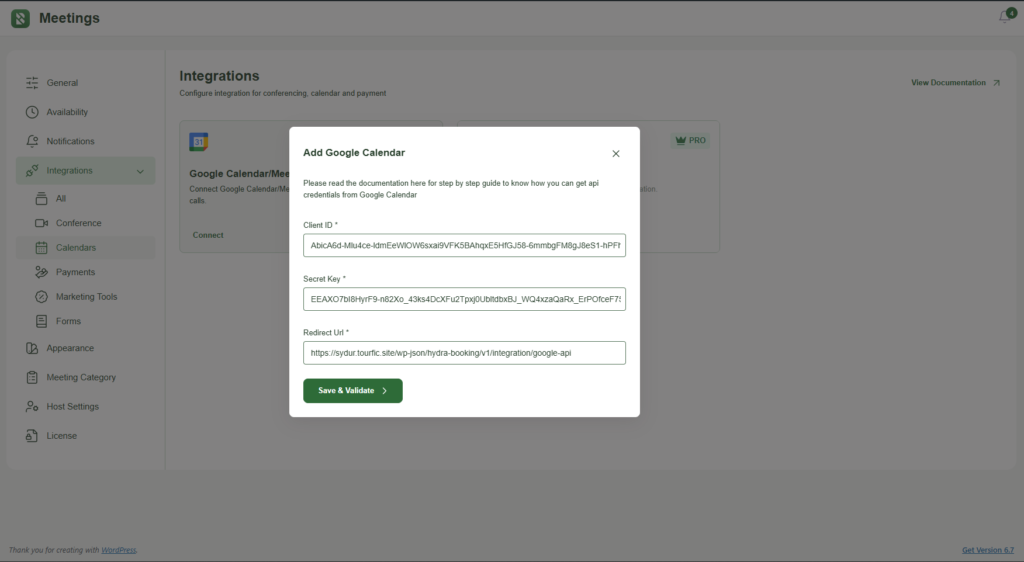
Congratulations! You’ve successfully connected Hydra Booking with the Google Calendar API.
Now, let’s move on to getting the access token for Google Calendar.
Get Access Token for Hydra Booking #
Now, go to Hosts, click on the three dots next to the host, and select Edit.
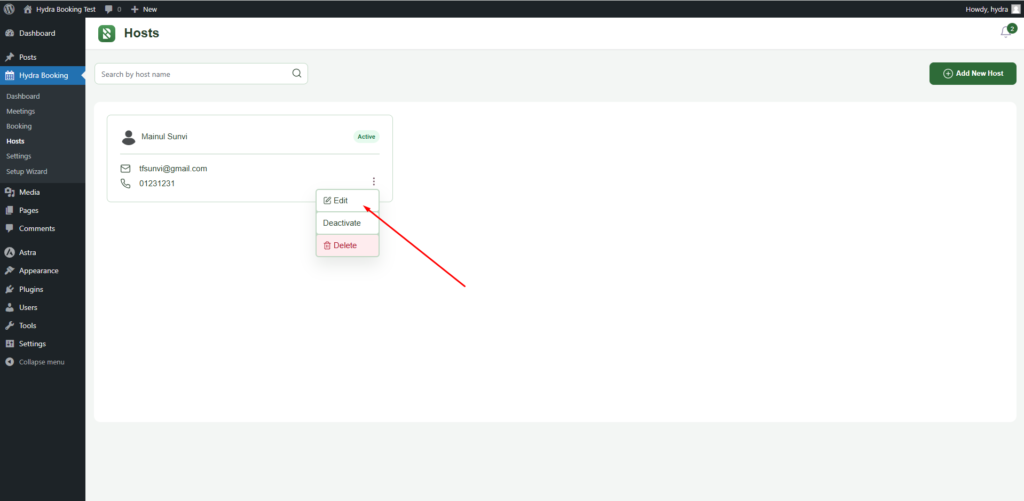
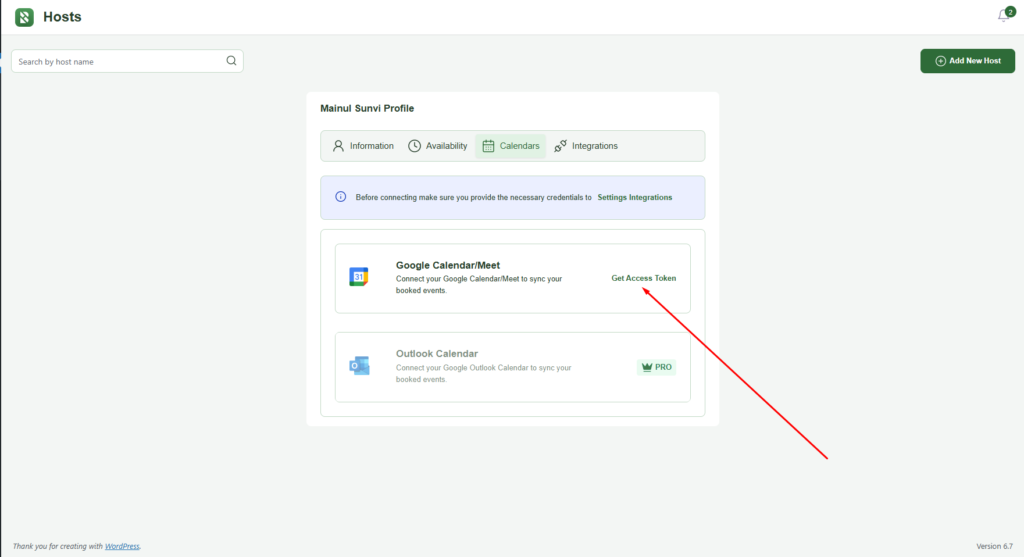
Next, navigate to the Calendars menu, where you’ll find the option Get Access Token. Click on Get Access Token, and you’ll be redirected to Google’s OAuth validation page.
Now, click on your Google account to proceed.
Then click on the advance section and click on “Go to [Your website address]”.
Note: If you see a message about the connection being “unsafe,” don’t worry—this is a standard warning for apps in development. Since you’re connecting your own Google account and API, it’s safe to proceed.
Now, click the Continue button. This will take you back to the Hosts > Calendars settings page.
You’ve successfully generated the Google OAuth access token! Your host can now create meetings using Google Meet and sync them with Google Calendar.
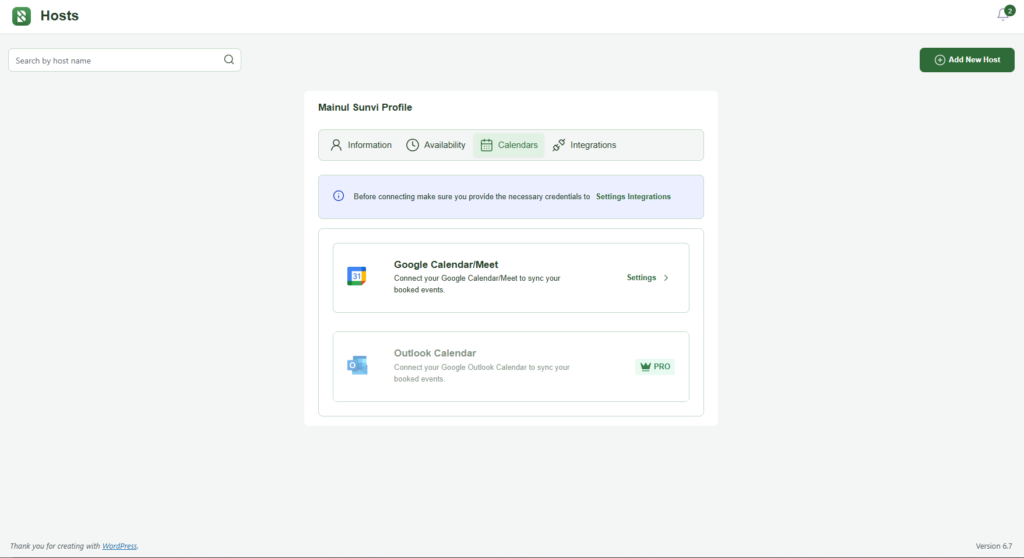
Settings of Google Calendar/Meet #
Once everything is successfully connected, you’ll see a Settings option in place of the Get Access Token button. Click on Settings to specify the calendar you want to sync with Hydra Booking.
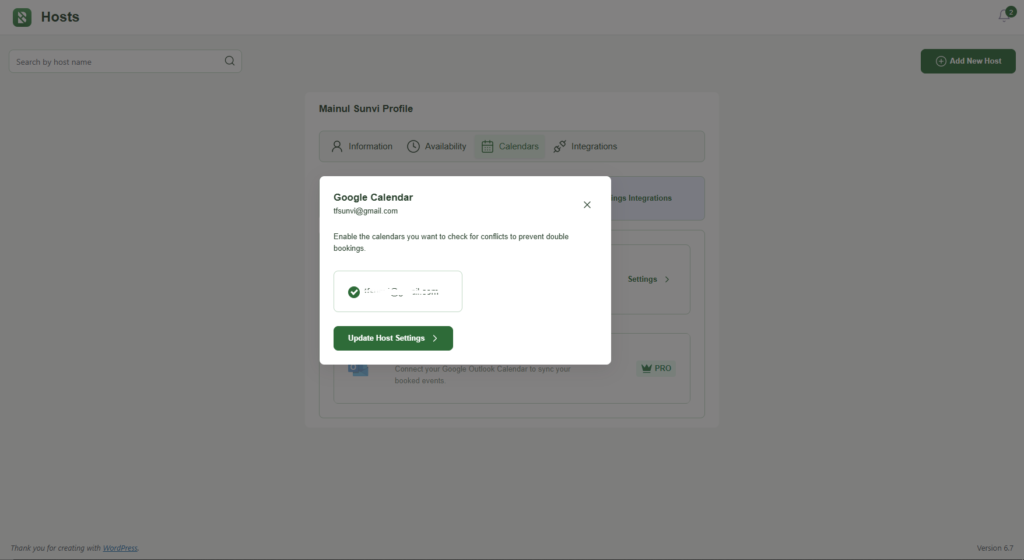
Once you’ve selected your desired calendar, click Update Host Settings to save your selection.
How to use google Meet #
With everything set up, go to Meetings, select your desired meeting, then open the Details page. In the location settings, change the location to Google Meet.
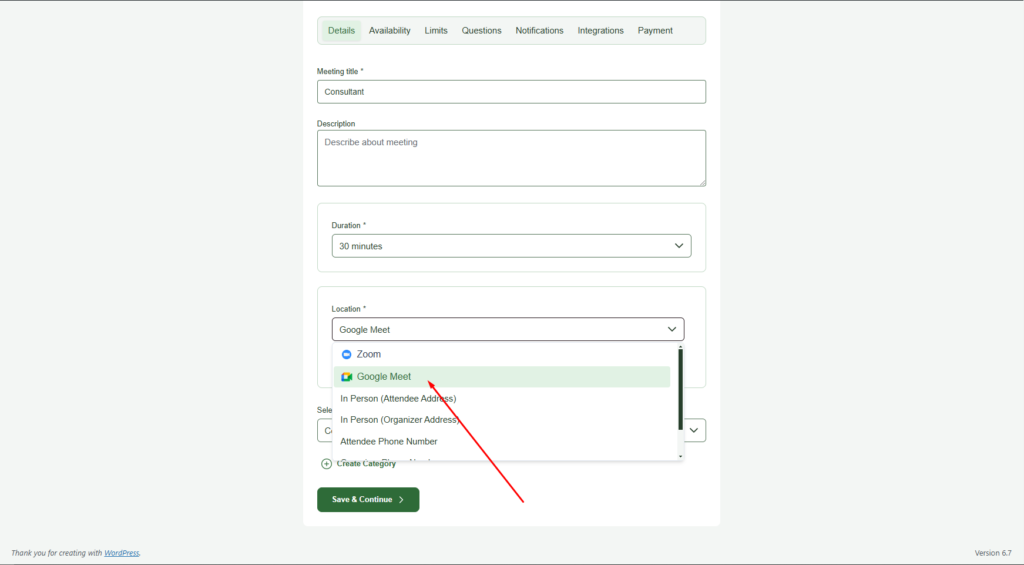
Now, click Save & Continue.
Once all the settings are complete, any time a client books a meeting from the front end, they’ll receive a Google Meet link to join at the scheduled time. You’ll also be able to find the link in your Google Calendar.
And that’s it! You’ve successfully integrated Hydra Booking with Google Calendar and Google Meet, making it easier than ever to manage your bookings and meetings. Enjoy the seamless scheduling experience for both you and your clients!
Happy Booking!

Can each host connect their own Google calendar?