The Bookings section in HydraBooking provides a streamlined interface for managing appointments. You can view, add, and track bookings with ease, using flexible viewing options and search functionality for efficient appointment management.
1. Viewing Bookings
HydraBooking offers multiple ways to view and organize your bookings, allowing you to choose the layout that best suits your workflow.
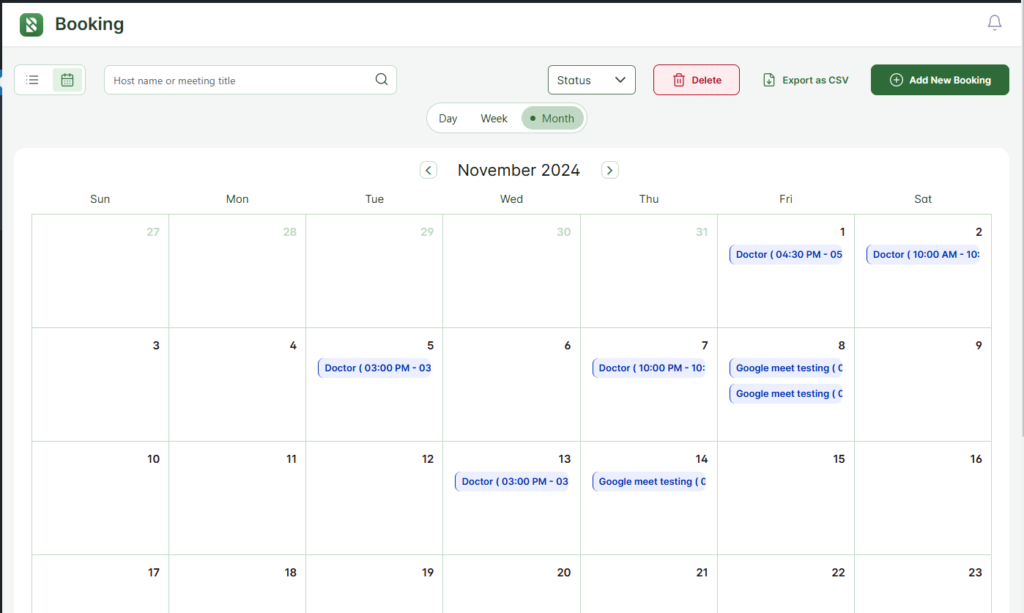
- Calendar View: Displays bookings in a calendar format, where you can switch between different time views:
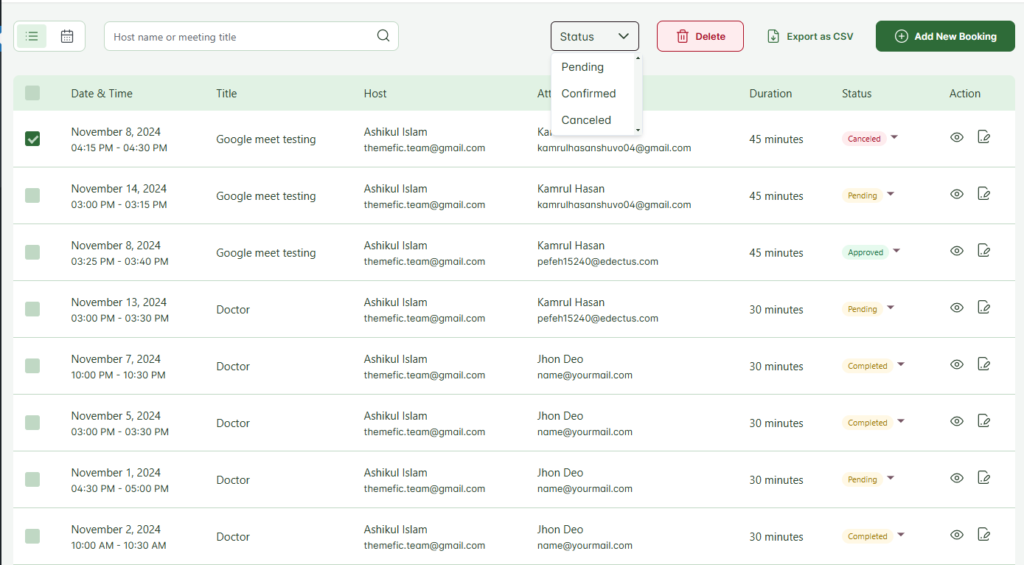
- List View: Shows bookings in a straightforward list format, organized by date and time. This view is ideal for scanning through all upcoming bookings and accessing essential details at a glance.
- Day View: Shows bookings for a single day, providing a detailed look at daily appointments.
- Week View: Displays all bookings within the current week, helping you see upcoming availability and avoid scheduling conflicts.
- Month View: Provides a monthly overview, making it easy to plan and manage bookings over a longer timeframe.
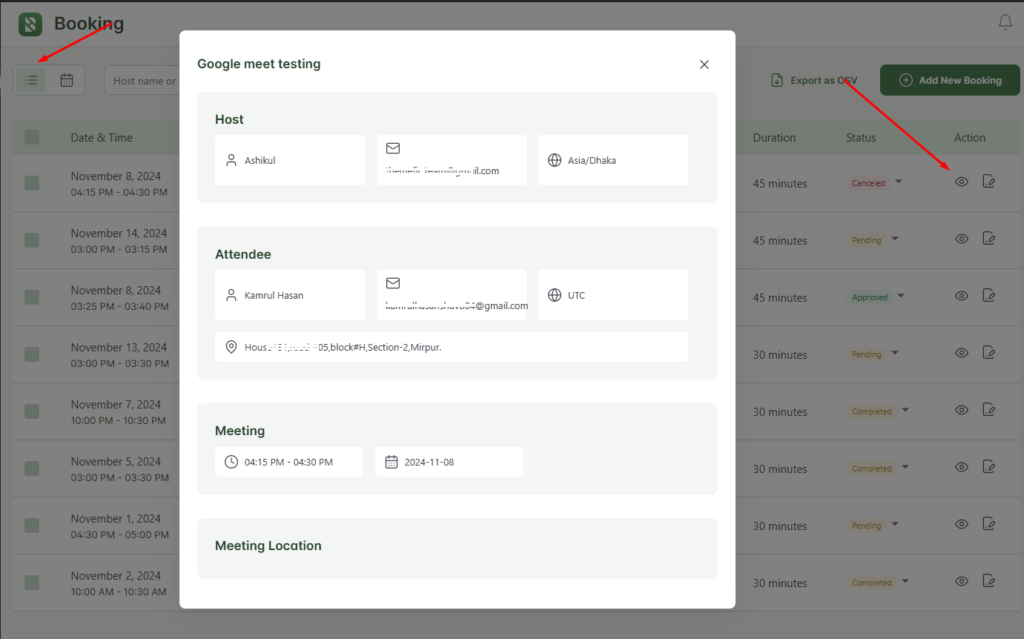
2. Viewing Details
The Booking Details List displays a comprehensive view of all scheduled bookings, organized by essential information in each column. This format ensures easy access to booking details, like Date & Time, Title, Host, Attendee, Duration, and Status Action helping users manage appointments efficiently.
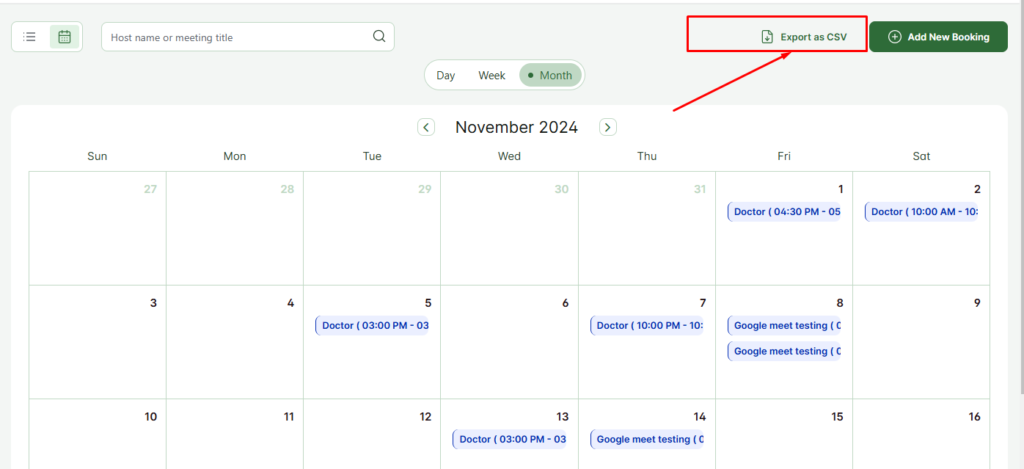
3. Exporting Bookings
For data management and reporting, you can export your booking data:
- Export as CSV: Click this button to export the current booking list or calendar view data in CSV format. The exported file includes essential booking details, which you can use for backup, reporting, or further data analysis.
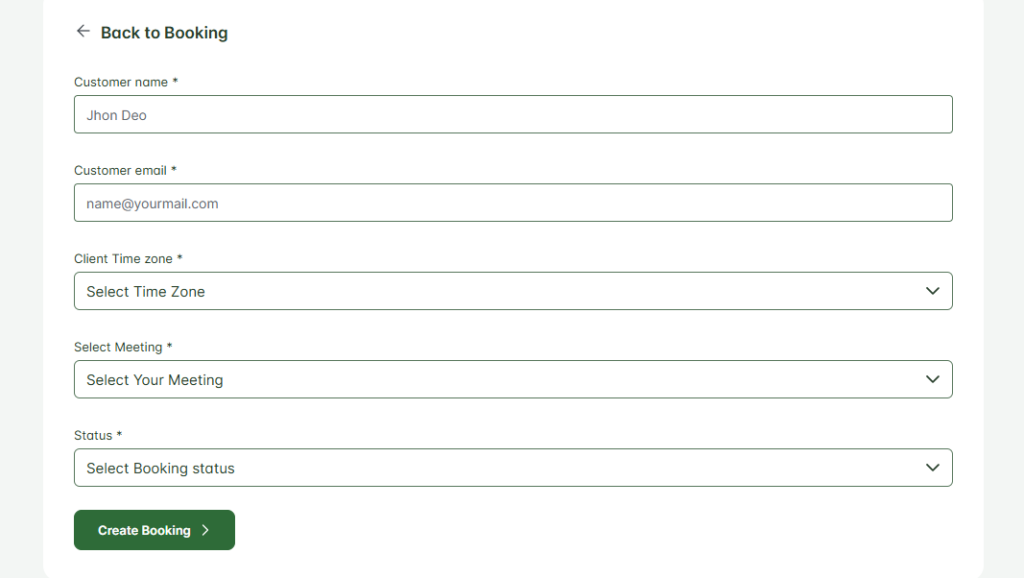
4. Adding New Bookings
Easily create new bookings from the Bookings section:
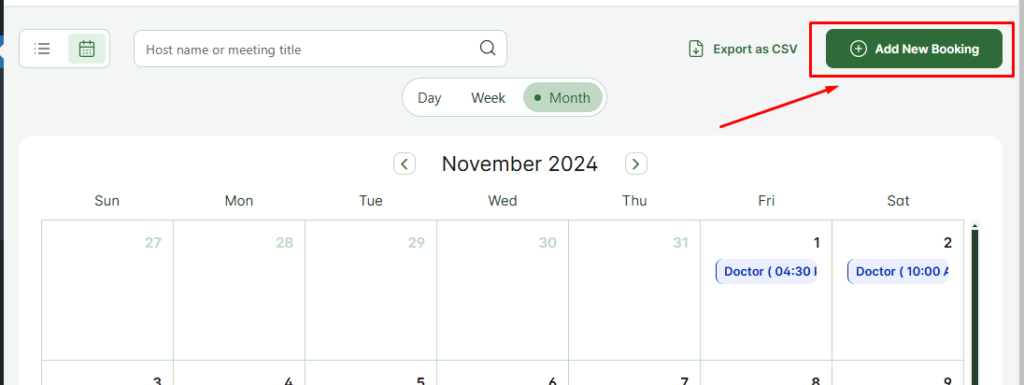
- Add New Booking: Use this option to schedule a new appointment by entering details such as the host, date, time, and meeting title. This functionality helps streamline the booking process by letting you manage appointments directly from this interface.
- Customer Name
- Purpose: Enter the full name of the client who is booking the appointment.
- Example: John Doe
- Tips: Enter the name as it should appear in booking notifications and confirmations.
- Customer Email
- Purpose: Provide the client’s email address for booking confirmations and notifications.
- Example: name@yourmail.com
- Tips: Ensure the email is correct to avoid miscommunication and to ensure that the client receives all relevant booking details.
- Client Time Zone
- Purpose: Select the client’s time zone to align appointment timing with their local time.
- Options: A dropdown list with various time zones.
- Tips: This setting is crucial for ensuring that the client sees the correct time in their notifications, especially for virtual meetings.
- Select Meeting
- Purpose: Choose the type of meeting or appointment from a list of predefined categories.
- Options: Categories like “Doctor Consultation,” “Demo,” “Training Session,” etc.
- Tips: Selecting the appropriate meeting type helps organize and manage bookings, and may trigger specific settings or notifications associated with the category.
- Status
- Purpose: Set the initial status of the booking to indicate its current state.
- Options: Dropdown options include Pending, Confirmed, Rescheduled, Canceled.
- Tips: Set the status based on whether the booking needs further approval, is fully confirmed, or requires rescheduling. You can update this status as needed.