
Good websites have fun features that make people want to stay and look around. One of the best features is a before/after slider. This tool lets people see two images and slide back and forth between them. It’s perfect for showing photo edits, product changes, or how your services help people.
Webflow doesn’t have a before/after slider built in. But don’t worry! The Boosters app (made by Flowbase) has a free Before and After Slider you can add to your Webflow site. This guide will show you how to do it step by step.
Why You Need a Before and After Slider?
Before and after sliders are great tools that tell a story, when you let people slide between two images, they get to interact with your website. Regular pictures can’t do this!
Think about it. If you visit a website that shows photos or home repairs, what would you like more? Seeing two pictures side by side, or sliding back and forth to see the change yourself? The slider is fun and helps people really see what you can do.
Also, before and after sliders help people trust you. They show real proof of your work. When people can see and touch the difference, they’re more likely to buy from you or hire you.
Benefits of Before and After Sliders
People Stay Longer on Your Site
Before and after sliders are fun to use. People don’t just look at your content—they play with it. This makes them stay on your website longer and remember your brand better.
Show Changes Without Words
Some things are hard to explain with words. A slider shows changes right away. Whether it’s weight loss, home repairs, or design changes, the pictures tell the story for you.
Works Great on Phones
Today’s before and after sliders work perfectly on phones and tablets. People can use their fingers to slide back and forth. It works on all devices.
Shows Real Results
If you sell services or products, before/after pictures show real proof. When people see real results, they’re more likely to become customers.
Looks Professional
Adding sliders shows you care about your website. It makes your site look better than basic sites and shows that you pay attention to details.
Step-by-Step Guide: Adding a Before and After Slider with Boosters
The Boosters app is a free tool for Webflow. It has many useful features, including a Before and After Slider. Here’s how to add it to your Webflow site:
Step 1: Install the Boosters App
Go to the Boosters app page on Webflow. Just click on this link.
Click on the button “Log in to install.”
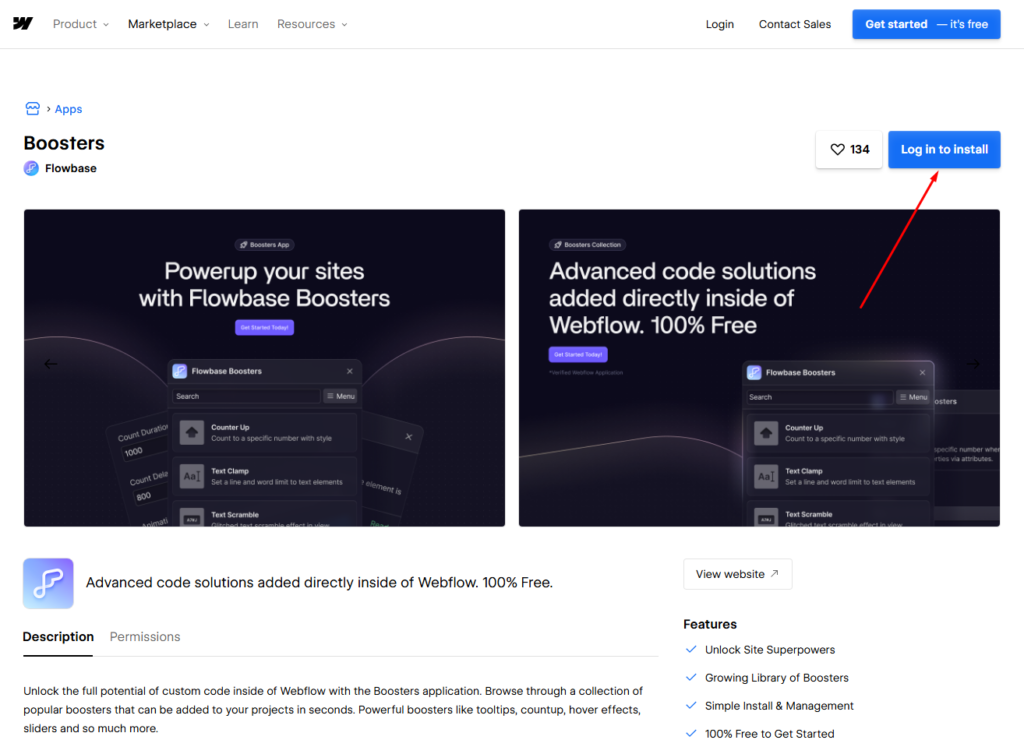
Let the app access your Webflow account.
Choose which website(s) you want to use it on.
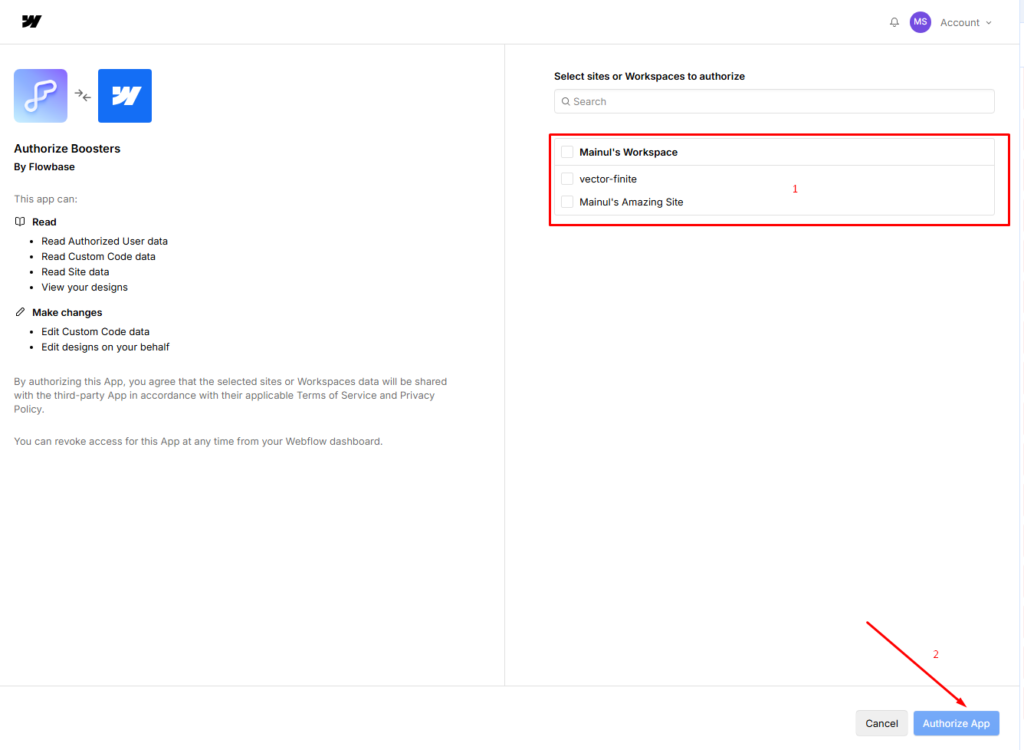
The app is completely free and installs with one click. After installing, you can use all the Boosters, including the Before and After Sliders.
Step 2: Add the Slider to Your Website
- Open your website in the Webflow Designer.
- Go to the page where you want the slider.
- Add an Embed element (find it in the Add Elements panel with the + sign)
- Paste the HTML code that the Boosters app gives you for the Before and After Slider.
The Boosters app will give you the exact code you need, including the parts that make the slider work.
Step 3: Get Your Images Ready
You need two pictures that are the same size:
- Before picture – The original picture
- After picture – The new or changed picture
Pro tip: Use tools like Photoshop, Figma, or Canva to make sure both pictures are the same size. When pictures line up perfectly, the slider looks smooth and professional.
Step 4: Add the Booster Attributes
The Boosters app works with special tags that you add to your elements. These tags tell the code which parts to turn into a slider.
- Click on your wrapper element in Webflow
- Add the custom attributes that the Boosters app tells you to add (usually something like data-booster=”before-after”)
- Add your before and after pictures
The Boosters app will show you exactly which tags you need for the slider to work.
Step 5: Style Your Slider
The best part about using Boosters is that you can still design everything in Webflow:
- Change the slider handle – Make the draggable part look how you want
- Style the container – Add borders, shadows, or round corners to match your design
- Add labels – Write “Before” and “After” on the pictures if you want
- Set the size – Choose how wide and tall the slider should be
You do all of this in the Webflow Designer, so you don’t need to write any code.
Step 6: Test and Publish
- Look at your page in the Designer preview to test the slider.
- Make sure the pictures line up correctly.
- Test on different screen sizes to make sure it looks good.
- Publish your site when you’re happy.
The Boosters code runs on fast servers around the world, so your slider will load quickly and work well for everyone.
Pro Tips for a Great Before and After Slider
Line Up Your Pictures
Even a small misalignment looks bad. Both pictures should:
- Be the exact same size
- Have the same camera angle
- Have the same lighting
- Focus on the same spot
If your pictures come from different places, take time to fix them in photo editing software before putting them in Webflow.
Make Your Pictures Smaller
Big pictures can make your page slow. Before you upload:
- Shrink your pictures with tools like TinyPNG
- Try using the WebP format for smaller files.
- Keep each picture under 500KB
- Use lazy loading if the slider is lower on the page.
Help Everyone Use It
Add text descriptions to both pictures so people who use screen readers know what they are. You can also add “Before” and “After” labels to help everyone understand.
Test on Real Phones
Don’t just test in the Webflow preview. Try your slider on a real phone. Make sure sliding feels smooth and the pictures look good on small screens. You might need to change the size for different devices.
Use Good Pictures
Your slider only looks as good as your pictures. Blurry or bad-quality pictures make you look bad too. Use clear, sharp pictures that show your work well.
Explain What Changed
Don’t assume people know what they’re looking at. Add a short caption that explains what’s different between the two pictures. This helps people understand the change better.
Put It in the Right Place
Put your slider where people will see it, near the top of your page, in your portfolio examples, or close to your “buy now” or “contact us” buttons.
Final Words
Adding a before and after slider to your Webflow site is easy and free. The Boosters app gives you everything you need, and it works great with Webflow. You stay in control of how it looks.
The secret to making it work well is preparation. Take time to line up your pictures perfectly, make the file sizes smaller, and test on different devices. When you do it right, a before and after slider becomes more than a cool feature. It becomes a powerful tool that engages visitors, builds trust, and helps you get more customers.
Whether you’re a photographer showing your edits, a repair company showing your work, or selling products, the Before and After Slider from Boosters has everything you need.
Ready to make your Webflow site better? Install the Boosters app today and start creating before and after sliders that people will love.
Help us grow by sharing this Post!