If you’re building an online store today, you’re likely looking for two things:
- Complete design freedom
- A powerful and reliable eCommerce system
The challenge is that most platforms force you to compromise one for the other. And you’re wondering how to Connect Your Webflow Site with Shopify?
That’s where combining Webflow and Shopify becomes a game-changing solution.
Webflow allows you to design visually stunning, fully custom websites without limitations. Shopify, on the other hand, is built specifically for selling, handling everything from product management to payments, inventory, and order processing.
Now imagine this:
👉 You manage all your product data in Shopify
👉 And that data automatically appears in your Shopify to Webflow site.
No duplication. No manual updates. No inconsistencies.
This blog will guide you through exactly how to connect Webflow with Shopify and sync all your data from Shopify to Webflow, creating a smooth and scalable workflow for your business.
Connect Your Webflow Site with Shopify Using Shopyflow
Step 1: Prepare Your Shopify Store First
Before you begin the Shopify to Webflow integration, make sure your Shopify store is ready. Add your products, set titles, descriptions, images, prices, SKUs, variants, collections, vendors, tags, and any metafields you plan to show on the frontend.
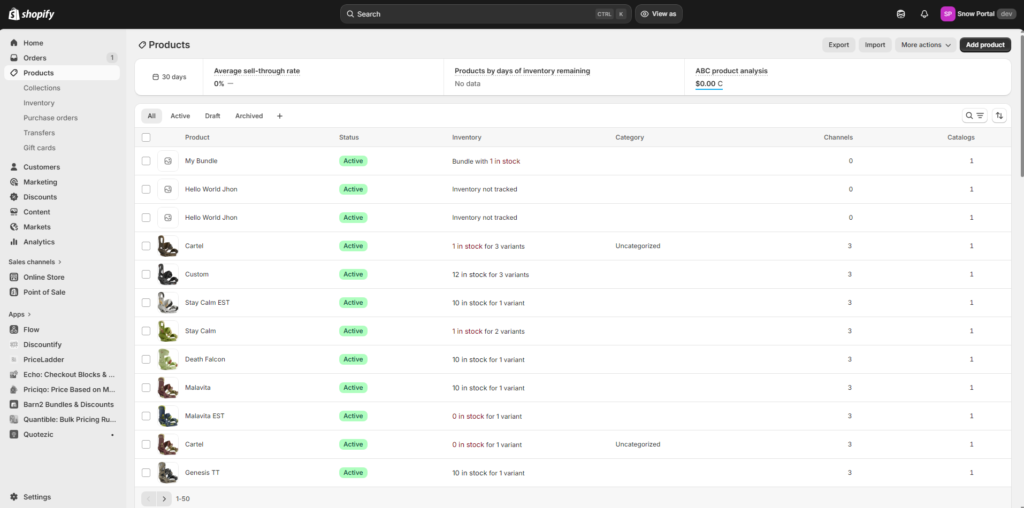
Since Shopify will act as the main source of truth, everything should be properly organized there first. Shopyflow’s sync is designed to pull Shopify product information and related taxonomy data into Webflow CMS, so the cleaner your Shopify setup is, the smoother the sync will be.
Step 2: Open the Shopyflow Setup in Webflow
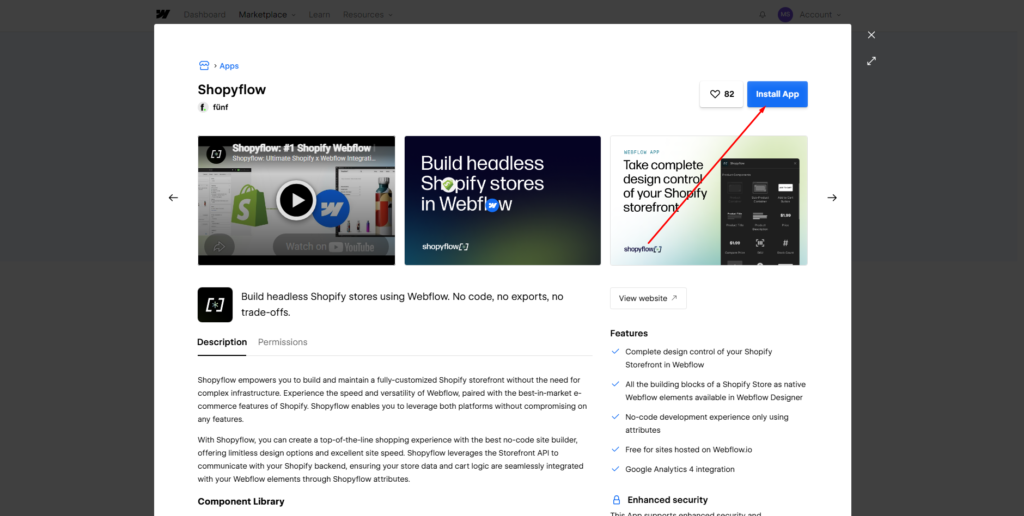
Shopyflow provides a Webflow App experience that works from inside Webflow Designer. Their guide explains that you can import and sync Shopify product data to Webflow CMS without leaving the designer.
This is important because it keeps your design workflow inside Webflow while your product data stays controlled by Shopify.
Step 3: Connect Your Shopify Store to Shopyflow
The next step is to connect your Shopify store inside the Shopyflow setup. This connection allows Shopyflow to access your Shopify catalog and prepare the data for Webflow CMS.
Shopyflow’s platform is specifically built around importing the Shopify dataset and keeping it synced with Webflow, so this connection is the foundation for the whole workflow.
Step 4: Connect Your Webflow Project
After Shopify is connected, connect the Webflow project where you want the synced data to appear. Once both sides are linked, Shopyflow can start creating the CMS structure needed for your store.
Shopyflow says its Webflow App can automatically set up CMS collections and fields for the synced Shopify data, which saves a lot of manual setup work.
Step 5: Let Shopyflow Create the Webflow CMS Collections
One of the biggest benefits of using Shopyflow is that it can automatically generate the CMS structure in Webflow for you. According to Shopyflow’s guide, the sync can create multiple CMS collections, including Products, Product Options, Collections, Product Types, Vendors, Tags, and Metafields.
These collections are then referenced back to the main Products collection, which helps you build dynamic product pages, category pages, and filters more easily.
Step 6: Choose What You Want to Sync
Shopyflow does not force you to import everything blindly. Their guide notes that you can exclude taxonomy collections, specific products, and selected fields from the sync.
That means you can keep your Webflow CMS cleaner by importing only the data you actually need for your storefront. This is helpful if your Shopify store contains backend-only data or product information that does not need to appear on the website.
Step 7: Start the Initial Import
Once your connections and sync settings are ready, run the first import. This brings your Shopify product dataset into Webflow CMS. Shopyflow states that it imports core product information such as titles, descriptions, prices, images, SKUs, variants, and taxonomy data like collections, tags, vendors, and product types.
It also supports syncing Shopify metafields, which is useful if your products have extra custom information like dimensions, materials, specs, or other details.
Step 8: Confirm That Real-Time Sync Is Active
After the first import, check that sync is active. Shopyflow says it reflects changes made in Shopify to Webflow in real time.
In practical terms, this means when you update a product title, image, stock-related data, or taxonomy in Shopify, the matching content in Webflow CMS should update as well. This is what removes the need for duplicate manual editing across both platforms.
Step 9: Build Your Product Pages in Webflow Using CMS Data
Once the Shopify data is inside Webflow CMS, you can start designing your storefront in Webflow. Shopyflow explains that storing Shopify data in CMS lets developers create CMS-based product pages with real-time Shopify store data.
This is one of the key advantages of the setup: you design the frontend visually in Webflow, but the content powering it comes from Shopify. That gives you templated, dynamic product pages with much more design flexibility.
Step 10: Add Shopyflow Components for Product Functions
After the CMS sync is done, you still need the shopping functionality on the frontend. Shopyflow provides components and attributes for things like the Buy Module, Add to Cart button, product image gallery, variant option selectors, cart module, filters, and product listings.
Their components documentation shows that these features are connected to your Webflow elements through Shopyflow attributes, which means you can build the visual layout in Webflow and then bind it to Shopify logic.
Step 11: Set Up Product Listing Pages and Filters
With synced collections like tags, vendors, product types, and collections, you can create category pages and filters in Webflow more easily. Shopyflow’s synced taxonomy structure is designed to support product listing pages, filtering, and SEO-friendly collection pages.
This is especially useful if you want to build custom storefront navigation instead of relying on a standard theme layout.
Step 12: Configure Checkout Properly
Even though your storefront is in Webflow, the transaction side still depends on Shopify. Shopyflow’s launch checklist explains that Shopify remains the checkout domain, and it specifically warns not to add your Webflow custom domain to Shopify domain settings.
Instead, Shopify checkout should use its own primary domain, often a separate subdomain such as checkout.yourwebsite.com, while Webflow serves the main storefront domain.
Step 13: Subscribe and Complete the Launch Setup
Shopyflow’s launch checklist notes that to use Shopyflow on a custom domain in Webflow, you need a Shopyflow subscription.
The same checklist also explains that after subscribing, you will see a Launch Token in the Shopyflow Shopify App, and you need to submit the headless token to enable the headless sales channel and related functions such as order confirmation emails and sales channel attribution.
Then, in the Shopyflow Webflow App, you may be asked to update the installation and publish your site.
Step 14: Publish and Test the Full Storefront
After setup, publish the Webflow site and test the entire flow. Check whether products appear correctly, whether collection pages pull the right data, whether variant selectors work, whether the add-to-cart feature is functioning, and whether checkout sends users properly to Shopify.
Since Shopyflow’s system combines synced CMS data with storefront components, both the design side and the commerce side need to be tested before launch.
Why You Need to Connect and Sync Shopify with Webflow
At first, using Webflow for ecommerce alone might seem enough. You can create product pages, design layouts, and even sell basic products.
But as your store grows, problems start to appear:
- Updating product details becomes repetitive
- Prices and inventory can easily go out of sync.
- Managing large catalogs becomes difficult
- Scaling operations becomes time-consuming
Shopify solves all of these problems. It is built to handle:
- Product management
- Inventory tracking
- Order processing
- Payment gateways
- Discounts and promotions
However, Shopify’s design flexibility is limited compared to Webflow.
So instead of choosing one platform, you combine both:
👉 Shopify = Backend (data, products, orders)
👉 Webflow = Frontend (design, layout, experience)
When you sync Shopify data into Webflow, you create a system where:
- Shopify controls everything behind the scenes.
- Webflow displays everything beautifully.
This is often called a headless or hybrid eCommerce setup, and it’s widely used by modern brands and agencies.
Pros
Single Source of Truth
All your product data lives in Shopify. This means you only need to update things in one place, and everything else updates automatically.
Automatic Data Sync
Once set up, your system works on autopilot:
- New products appear instantly
- Price changes update everywhere
- Inventory stays accurate
Unlimited Design Flexibility
Webflow lets you design without restrictions. You can create unique layouts, animations, and user experiences that are not possible with standard Shopify themes.
Better Performance and UX
Webflow sites are fast and clean. Combined with Shopify’s backend, you get both speed and reliability.
Scalable for Growth
Whether you have 10 products or 10,000, Shopify can handle it, and your Webflow frontend can scale visually without breaking.
Cons
Requires Integration Tools
You cannot fully sync Shopify to Webflow natively. You’ll need third-party tools to connect them.
Additional Cost
You may need to pay for:
- Shopify subscription
- Webflow hosting
- Integration tools
Setup Complexity
The initial setup can feel technical, especially when mapping data fields between platforms.
Sync Limitations
Some tools may have:
- Sync delays
- Limits on product numbers
- Restrictions on certain data types
Benefits
Despite the challenges, the benefits make this setup highly valuable:
- Save time by eliminating manual updates
- Reduce errors in pricing and inventory.
- Keep your store consistent across all pages
- Improve team workflow (designers use Webflow, managers use Shopify)
- Create a future-ready system that can grow with your business.
This setup is especially useful for:
- Agencies managing client stores
- Brands with frequent product updates
- Businesses focused on custom design and branding
Final Words
Connecting Webflow with Shopify and syncing all your data is one of the most powerful ways to build a modern webflow for eCommerce website.
You get:
- Full creative control with Webflow
- Strong backend management with Shopify
- Automatic syncing that saves time and reduces errors
While the setup requires some effort, the long-term benefits are huge.
- Once everything is connected, your workflow becomes simple:
- Manage products in Shopify
- Design in Webflow
- Let the system handle the rest.
If your goal is to build a scalable, flexible, and visually unique online store, this setup is absolutely worth it. 🚀
Also Read: Add before and after slider in Webflow
Help us grow by sharing this Post!