In this article, we will try to explain how to set up Contact Form 7 Range Slider with the help of our Free Addon “Contact Form 7 Range Field”.
What’s needed
- Make sure Contact Form 7 and Ultimate Addons for Contact Form 7 are installed on your WordPress site.
- Go to Contact -> Ultimate Addons menu in your WordPress Dashboard and enable the Range Slider checkbox. Then click the Save Changes button. This will enable the “Range Slider addon” settings.

Range Slider for Contact Form 7 – Live Example
In this tutorial, we will create a range slider for the contact form 7 form like the example below. You can, for sure, create your form following the same steps.
Check our main demo to see all the supported fields for the Contact form 7 range field.
Contact Form 7 Range Slider Creation
From the Admin Screen Dashboard, Open Contact > Add New. This will open a new Contact Form on your Admin Screen. Put a title on your new Contact Form. (i.e. Range Slider).
Contact Form 7 Range Field Settings
Below the Title, you will find an option called UACF7 Range Slider. This will enable you to customize (i.e. changing colors, changing the size of the buttons) your Range Slider Buttons.

Form Tag Generator
Inside the Form Tag Generator Option, you will find a list of Tags. Look for the Range Slider.

Open Range Slider from the tags. You will find a list of settings that allows you to customize your Range Slider before you place it on your Contact Form.
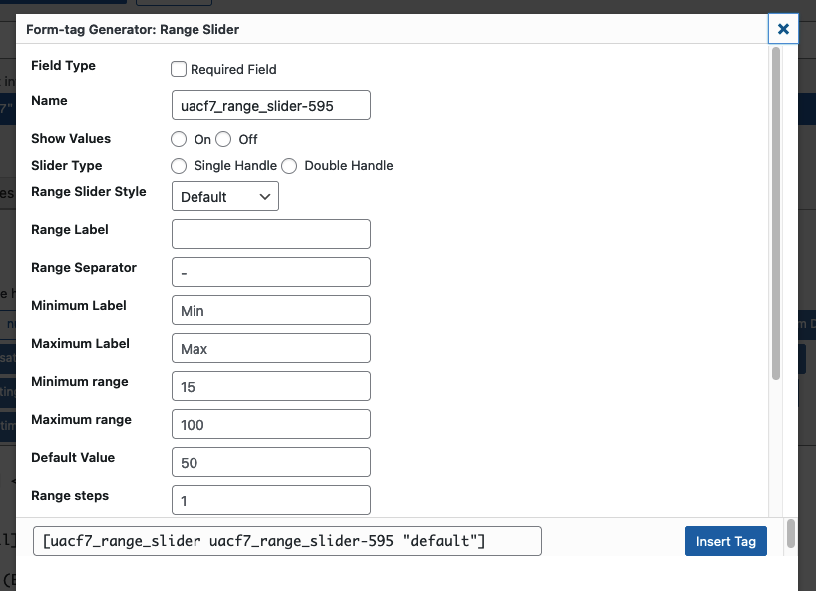
- Field Type: You choose whether the Range Slider Field is required in the Contact Form.
- Name: You can work with the automatically generated name or you could put a different name for the Tag that you are going to place.
- Show Values: Shows the specific values of the Slider, given where it is placed.
- Minimum Range: You set a minimum range for your slider.
- Maximum Range: You set a maximum range for your slider.
- Default Value: This determines the initial value of the Slider Button when a user visits your site.
- Slider Type: Single Handle: In this option, you will get one button on the slider to show a specific value. Double Handle: In this option, you will get two buttons on the slider to show a specific range of values. Here is the difference:

Setting up Range Slider
Now that you know the features, you choose your features according to your needs. Follow the steps mentioned below:
-
- Tick the Required Field, if the slider information is required.
- Choose On/Off according to your preference.
- Choose Single Handle/ Double Handle according to your preference
- Set a Minimum Range
- Set a Maximum Range
- Set a Default Value
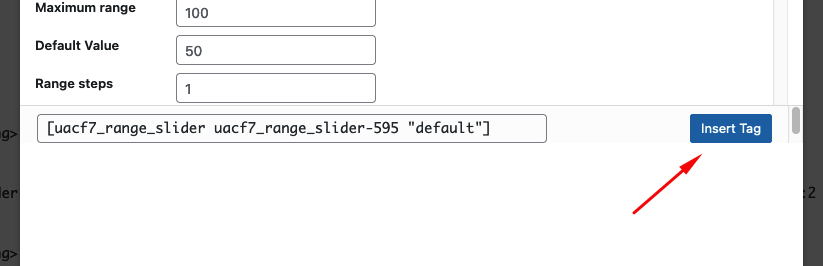
- Insert Tag
Note: If you are a Pro user, you will get a Different Style for your Sliders.
After you have finished customizing your range slider in the Contact Form. Copy the Tag or Click Insert Tag. It will place the Tag inside the Admin Panel of your Contact Form.
Add other fields
Now add the rest of the Contact Form fields you need, either on top of the range slider codes or at the bottom. Wherever you feel necessary.
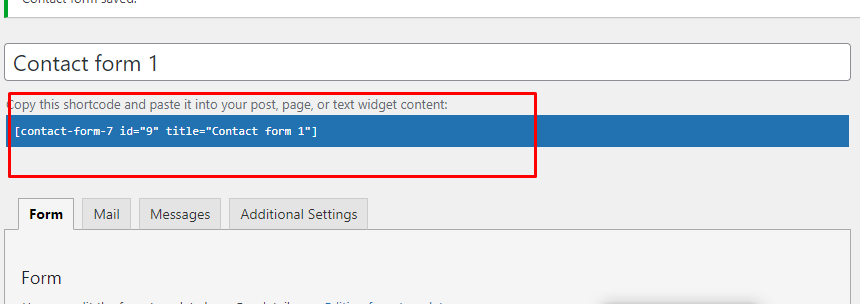
Copy the Shortcode
If your form is ready, click save and copy the Contact form shortcode.
Time to Publish
Paste the shortcode wherever you want to show your form (Pages/Posts/Custom Post Types/Sidebars). The result should be something similar to the above form.
Looking for more Advanced Options?
With the Range Slider Pro version, you can select from 3 Premium Prebuilt Range Slider layouts. Here is a live demo example of the form.
Watch Complete Video
If you are still confused, we suggest you watch this video. In this video, we tried to describe the whole step of How to create a form with Range Slider Field with Contact Form 7:
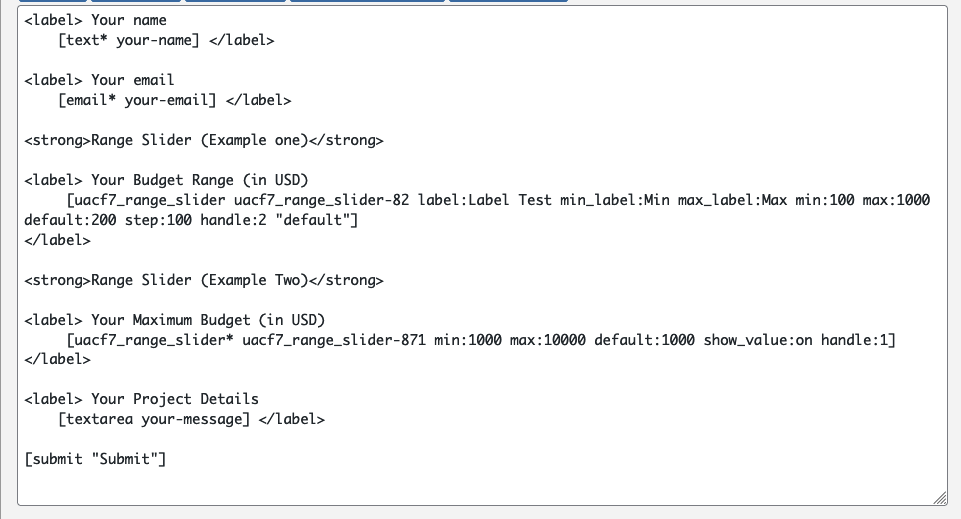
Full-Form Code
Here is a sample code of our above form:
<label> <strong>Your Email</strong>
    [email* your-email autocomplete:email] </label>

<label><strong>Your Budget</strong>
[uacf7_range_slider uacf7_range_slider-234 min:100 max:20000 default:100 step:1 show_value:off handle:1 "default"]</label>

<label><strong>Your Age Range</strong>
[uacf7_range_slider uacf7_range_slider-199 min:18 max:60 default:26 show_value:off handle:2 "default"]</label>

<label> <strong>Your Project Details</strong>
    [textarea your-message] </label>

[submit "Submit"]
Still Not Clear? Please contact us. If you are a free User, you can open a ticket from here. If you are a pro user, you can open a ticket from here.